

Key Takeaways
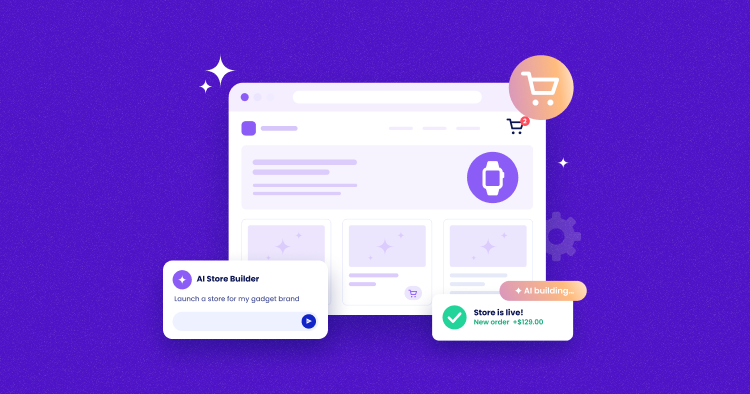
- With a detailed prompt, an AI ecommerce website builder can produce the foundational design, content, pages, and overall structure for a WooCommerce store.
- Review every product listing, pricing, claims, and images to make sure they are in order, and be sure to replace any placeholder material before you put an AI-built site live.
- The WordPress flexibility remains intact with an AI-built WooCommerce store. You can still make additional changes by way of plugins, code, the visual editor, or even AI Chat.
The product concept is in place, as are the logo and images for it, the pricing, and an About page that is partly done. Yet the launch of your online store is put off by the work that has to follow: you have to pick a platform, get WordPress running, sort out the design, set up WooCommerce, and figure out payments and shipping.
With an AI ecommerce website builder, that process is made easier; a detailed description of your business will have it produce a store to start with, complete with the appropriate design and content. That said, the site so created must be reviewed, tested, and configured before any orders are taken.
In this guide, we will show you how to go from the first prompt to having your domain connected with a live WooCommerce store, using the Cloudways AI Website Builder.
- What Do You Need Before Building Your WooCommerce Store?
- How to Launch a WooCommerce Store With an AI Ecommerce Website Builder
- Step 1: Access the Cloudways AI Website Builder and Enter Your Prompt
- Step 2: Review the AI-Generated WooCommerce Store Structure
- Step 3: Customize the Store’s Design and Content
- Step 4: Complete Your Store Setup in WordPress
- Step 5: Connect Your Domain and Enable SSL
- Step 6: Test, Back Up, and Launch Your WooCommerce Store
- Common Mistakes to Avoid When Launching a WooCommerce Store With AI
- Final Thoughts
- Frequently Asked Questions
What Do You Need Before Building Your WooCommerce Store?
The information you put into the AI will determine the quality and relevance of your website. To ensure the system can properly shape your store’s design, content, and ecommerce framework, it is best to gather the following prior to making use of the WooCommerce AI website builder:
- A brief description along with the business name.
- Who your customers are and what issues your products solve for them.
- Inventory information, images, pricing, and categories for the products.
- Your brand’s visual style, including the logo, fonts, and colors.
- Any features or pages the store must have.
- The currency in which you do business and where.
- Payment options to be made available.
- Delivery time frames, rates, and the regions you ship to.
- Policies covering returns, privacy, and refunds.
Taking the time to assemble these details will give the AI what it needs to produce a storefront of greater relevance, and there will be less need to rewrite or restructure down the line.
How to Launch a WooCommerce Store With an AI Ecommerce Website Builder
For the purposes of this demonstration, we will be creating a WooCommerce store for Lunavera Botanics, a skincare company that offers cleansers, face serums, and moisturizers. The brand has adopted an uncluttered, natural aesthetic, and they cater to those who prefer a straightforward routine in their skincare.
We will walk you through the whole process with the Cloudways AI Website Builder. It begins with the first prompt and a look at what the WooCommerce AI website builder has produced, then moves on to product placement, all the way to setting up a domain and getting the site ready to go live.
Step 1: Access the Cloudways AI Website Builder and Enter Your Prompt
For new users, the process starts on the landing page of the Cloudways AI Website Builder. Enter a prompt that outlines the WooCommerce store you have in mind. You will be asked to set up and verify a Cloudways account upon submission; from there, a flexible server is put in place for the account, and the website is built on it.
The moment the editor comes up with the finished site, the 3-day free trial is underway. This covers one AI website creation and 8 AI Credits. Once the trial is over, the site will be left as is, but access to the editor and its AI capabilities will be lost unless you subscribe to an AI Website Builder plan.

If you are already with Cloudways, you can find the AI Website Builder via the banner on the platform. After a prompt is entered, you have the option to use a current paid server or create a new one. Cloudways will handle provisioning the application and any necessary plugins on the server of your choice.
The way one writes the initial prompt is important. Think of it as a brief that is both creative and functional, yet concise. Make sure to distinguish between requirements and mere preferences so the AI ecommerce website builder knows what to prioritize. Tell it what the business does and for whom, what the essential pages and features are, and the desired look of the store.
Take the demo store, Lunavera Botanics, for instance. The prompt would read:
Prompt
Create a WooCommerce website for Lunavera Botanics, a small-batch skincare brand selling gentle cleansers, face serums, and moisturizers. The primary audience is adults aged 25-45 who want a simple daily skincare routine and clear product information.
We need the following pages: a homepage, Shop, category pages (Cleansers, Face Serums, Moisturizers), About, FAQ, Contact, Cart, Checkout, and My Account.
The homepage should have a strong value proposition and a “Shop the Collection” CTA, as well as featured products, a three-step routine, links to categories, a brand story, and an FAQ preview. Product pages need room for everything from images and pricing to ingredients, usage instructions, and shipping details.
Visually, we want something premium and natural with warm ivory and muted sage tones, dark charcoal for the text, and plenty of whitespace. The typography should be elegant and easy to read, the overall tone calm and reassuring. Where we do not have verified data, use placeholders. Do not make up customer reviews, test results, prices, or any dermatological claims or certifications.
Such a prompt leaves no ambiguity as to the structure or style of the store. For a skincare company in particular, it is vital to tell the AI what not to fabricate in order to avoid any legal or reputational trouble down the line.
Have an Online Store Idea? Bring It to Life With Cloudways AI Website Builder
Generate a WordPress-powered WooCommerce website from a prompt and launch it on Cloudways managed hosting, with the flexibility to add plugins and expand as your business grows.
Step 2: Review the AI-Generated WooCommerce Store Structure
After the system has generated your site, you will be in the editor in its Preview mode. From the toolbar at the top, you can select from Preview, Code, Edit, or Open Theme to review and customize your site.
Take some time to survey the whole structure of the store before you start making alterations; you want to be sure all the key ecommerce components and pages are where they should be.
Make sure the navigation is sound; verify that customers can find their way to the Shop, Cart, Checkout, My Account, About, FAQ, or Contact pages without any trouble. The homepage needs to introduce the brand clearly and point visitors in the right direction, with category and Shop pages being simple to navigate.
It is also worth checking the site to see how they are rendered on mobile as well as desktop. You may spot a cramped layout, a badly cropped image, a button that is not clear enough, or a heading that runs too long.
Note down any broken links, empty sections, or placeholder material. Any placeholder content, be it text, prices, policies, or contact details, needs to be replaced with the real business information before you put the site live.
Address those structural issues first, and once those are sorted, you can turn your attention to fine-tuning the design and content in the editor.
Step 3: Customize the Store’s Design and Content
The Cloudways AI Website Builder offers the following options for customizing the AI-crafted site:
- Make prompt-driven adjustments through the AI Chat.
- Use the visual editor to edit the elements directly.
- Opt for the code editor for a more hands-on, code-level approach.
To get started with the visual editor, click Edit; this will put the website preview in an editable state. From here, you can pick any element on the page to alter its text, link, or remove it altogether.
The left panel will show you the settings for the element you have highlighted, allowing you to fine-tune typography, alignment, spacing, and size, among other properties. It’s also where you’ll put your final logo, replace stock images with proper product photography, and ensure the body copy on the buttons and headings is consistent.
With AI Chat, you can make multiple adjustments to the AI-generated store in one go. A single prompt that makes one or more adjustments will cost 1 AI Credit; therefore, it is better to put all your edits together in a comprehensive prompt rather than file them as individual requests.
There is no charge in AI Credits for a session of brainstorming or asking questions, provided the AI does not alter the site.
A good example of an update prompt would be:
Prompt
Change the hero heading on the homepage to ‘Simple Skincare for Your Daily Routine’ and put in two lines of supporting text to let visitors know Lunavera Botanics has small-batch cleansers, serums, and moisturizers. I want the product categories Cleansers, Face Serums, and Moisturizers in three even cards right under the hero section, with the three-step routine below the featured items. Use a warm ivory for the background with some muted sage and dark charcoal for the text, and open up the whitespace between sections. Keep all existing product details unchanged.
There is also an Open Theme for any theme-level customization you may need.
Should the store need styling or functions not covered by the standard controls, click Code to bring up the code editor and make the necessary code-level alterations.
Given that the site is built on WordPress and WooCommerce, it is easily extensible as the store grows. When you have made your adjustments and are prepared to put the site live, click Publish to save them to WordPress. You can come back to make further edits and publish again later on.
Step 4: Complete Your Store Setup in WordPress
While the AI has put in place a storefront with the necessary product pages and categories to get you started, it is up to you to review that all the ecommerce settings are properly configured in WordPress.
Click the WordPress icon at the top right of the AI Website Builder editor. From there, you can open Products or Categories as needed or choose WP admin for full access to the WordPress dashboard.
Once in WordPress, take time to review and make any required updates to:
- All aspects of your inventory, including products and their descriptions, variations, pricing, and images.
- Your store’s address, currency, account settings, and where you are selling.
- The mechanics of the business: payment and tax options, shipping zones and rates, and how deliveries are handled.
- Form submissions, contact info, and transactional emails.
- All store policies on shipping, returns, privacy, and refunds.
Consider anything the AI has generated for your products as a draft. Before you start taking orders, check every claim, ingredient, price, image, and certification. Put in the real details where there are placeholders and confirm your policies and shipping rates are accurate.
When you’re finished, you can click the Edit with Cloudways AI Website Builder option on the WordPress toolbar to return to the editor.
Step 5: Connect Your Domain and Enable SSL
With the store in place, go to the Cloudways Platform and launch the application. Under Domain Management, add your custom domain and make the necessary DNS record changes so they point to the server. Once those changes have propagated, designate it as the primary domain.
After that, go to Application Management, under SSL Certificate, install a free Let’s Encrypt SSL certificate. Add both the www and root of the domain in case your customers use them interchangeably, then turn on automatic renewal and force HTTPS redirection.
To be certain everything is secure, check that all pages are loading over HTTPS, from the homepage and product listings to My Account, the cart, and checkout.
Step 6: Test, Back Up, and Launch Your WooCommerce Store
Start by running a full test of the shopping experience on both mobile and desktop prior to launch. Experiment with browsing for products, choosing variations, and putting them in the cart, try applying a coupon, see how shipping and taxes are computed, and run a test payment.
You should also verify that everything from order notifications and inventory changes to account sign-ups and policy links is functioning as it should.
When the store has been vetted, go to the Cloudways AI Website Builder and click Publish to commit your work to WordPress. Then, in the Cloudways Platform, put in an on-demand backup to have a restore point for the version of the site you are about to launch.
For added security, there are automated off-site backups and point-in-time restoration available from Cloudways to get the application back up and running should an update or some other configuration issue arise; the platform offers both server-level and application-level options for this.
To go live, put the payment gateway into live mode and take down any coming-soon pages. If you can, process a small live order. In the days after launch, monitor the site for errors, how it is performing, and any failed payments or orders.
Any time you need to make updates down the road, make use of the one-click staging environment Cloudways makes available to try out changes on the application before they go live to the store.
Go From an AI Prompt to a Live Online Store
Create your dream WooCommerce website with Cloudways AI Website Builder, customize it using AI Chat or the visual and code editors, and publish it on Cloudways managed hosting.
Common Mistakes to Avoid When Launching a WooCommerce Store With AI
While AI is a means to hasten the building of an online store, the resulting site will still need proper configuration and review. To prevent any issues at launch or during checkout, as well as to avoid having to make unnecessary edits later, avoid these common pitfalls.
- An imprecise prompt: Asking the AI to “build a skincare shop” does not tell it much in the way of visual direction, what features or pages are called for, or who the audience is. Put in the work to provide a thorough brief, and the first iteration of the website will be of better use.
- Assuming generated content as fact: The AI can come up with some very convincing claims, statistics, reviews, ingredient lists, or pricing for placeholder purposes. Do not publish without going over every fact to make sure it is accurate.
- Focusing on the finish before looking at the underlying structure: There is no point in fine-tuning the copy and color palette if you have to rework the navigation or are missing key pages. Make sure the customer journey is sound before you start customizing.
- Thinking the generated design completes WooCommerce setup: The storefront and its commercial foundation are separate layers. You will have to deal with payments, shipping, inventory, taxes, and email settings on your own.
- Overlooking the mobile experience: A shopper is quite likely to find a product, enter an address, and pay for it all from their phone. It is worth running through the whole purchase flow on an actual mobile device to see how it works.
- Going live without a backup or test orders: On the surface, a store may seem good to go while payments or email notifications are failing in the background. Run through the transaction process with a test order and have a backup in place before you open for business.
Final Thoughts
An AI ecommerce website builder will eliminate a lot of the preliminary work to set up a WooCommerce store. A sufficiently detailed prompt is all it takes to have the design, page layout, content, and storefront come to life without having to do it all yourself.
That said, you should not overlook the need for a human to go over what has been AI-produced. You have to verify that product details are right, make sure the WooCommerce configuration is in line with the way the business runs, and run some tests on the purchase process before going live.
For a more integrated approach to building and launching an online store, Cloudways AI Website Builder is a solid option. It brings together AI capabilities with WordPress and WooCommerce, as well as managed hosting and developer access, for a seamless workflow from creation to customization.
Q1: Can AI build an ecommerce website?
In short, yes. With a prompt, you can have an AI ecommerce website builder produce your store’s design and navigation as well as its content, pages, and overall structure. That said, one must still go into the WP admin to set up WooCommerce before going live. This means you have to configure everything from store policies and customer accounts to shipping, taxes, inventory, and payments, as well as verify the product details the AI has put in place.
Q2: Is there a free AI website builder available?
You will find some AI website builders with limited trials or no cost at all. Take the Cloudways AI Website Builder for instance; its 3-day free trial comes with 8 AI Credits and lets you create an AI website, giving you the chance to build and customize a WordPress or WooCommerce site before you commit to a subscription.
Q3: How much does a WordPress AI website builder cost?
Pricing is determined by the provider and what is included in terms of hosting, plan, and AI usage. The Pro version of the Cloudways AI Website Builder is $7.99 a month per website and provides 20 AI Credits monthly. Additional AI Credits can be purchased through top-ups that do not expire.
Q4: Which AI builder is best for building a WordPress website?
It is a matter of what you need in terms of ownership, customization, hosting, and design. The Cloudways AI Website Builder is a good fit for those looking to have AI generate a WordPress or WooCommerce site and then customize it via plugins, code, the visual editor, or AI Chat.
Start Growing with Cloudways Today.
Our Clients Love us because we never compromise on these
[email protected]
Nisha is a technical content writer with a passion for translating complex technology into content that’s clear, practical, and enjoyable to read. With strong technical insight and a user-first mindset, she crafts guides that help readers understand and use modern tools and platforms.