Key Takeaways
- Agency client onboarding has a technical layer under the paperwork: the client’s site needs a server, an app, a domain, an SSL certificate, and secure access.
- This layer takes the most setup time. It is also where manual mistakes happen.
- The Cloudways Model Context Protocol (MCP) server lets an AI agent run these hosting actions for you, in plain English.
- You keep one tuned template. Onboarding then becomes a clone, not a rebuild.
- Five core steps turn a signed contract into a branded, working environment in seconds.
The process of turning a signed client into an active project is known as “onboarding” an agency client. Most of the teams have gone through the same route. A message of welcome is given. You schedule a kickoff call. You build up brand assets and logins through a survey. You are on the same page about the scope and timings.
And it’s all underpinned by one step. Your team cannot build or launch any project before the client’s site is based somewhere. This includes the provision of the server, application, right stack settings, domain, SSL certificate and secure access to the people who will be doing the work.

This step is technical and is usually where most of the setup hours are spent. It is also the step where a small manual mistake, like a skipped password change or a wrong domain, can follow you for weeks.
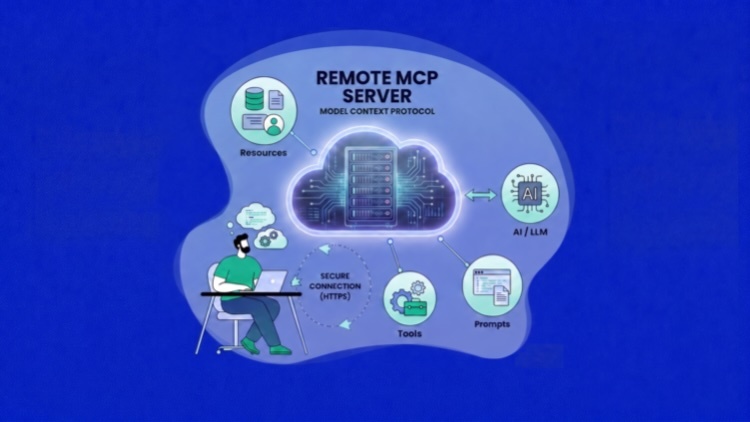
This article demonstrates the process of compressing that step. In seconds you can transform a signed contract into a fully configured and branded development environment. The method uses the Cloudways Model Context Protocol (MCP) server. The MCP server allows an AI agent like Cursor or Claude to do real hosting functions from a chat window. If you are new to MCP, you should start by defining what MCP is and why it is important.
What agency client onboarding includes
The complete onboarding process has four stages. You start with a warm welcome to the client and manage expectations. Second, you collect information including brand assets and access and objectives. Third, you establish the technical environment where the work will be performed. Fourth, you start and you finish. Many guides have lots of information on the first two stages. This one is in the third stage, as this is the one that can be automated today.
In the technical phase a simple question is answered. What is the time frame for the client to have a secure, authentic and branded place to track progress once the contract is signed? The honest answer for most agencies is that the hours are spread across several people. That is boiled down to a single conversation in the workflow below.
Start with a template, not a blank server
Manual mistakes come from repetitive manual work. Every time a team member manually builds a server, there is a chance that a setting will be missed. The fix is a template.
Have one server and one app as your agency standard. Tweak the stack once. Set PHP version, cache, object cache, plugins and all base configuration that every client project needs. Give it a try. Then let it go. This template forms the basis for each new client environment.
Onboarding now changes shape. You do not build a new environment. You copy a known-good one and adjust the details. The AI agent does the copying and the adjusting for you. This is the same idea behind the agency management blueprint, applied to the first day of a client relationship.
The instant onboarding workflow: five steps
Each step below is an instruction for your agent. You write it in plain English. The agent calls back the matching Cloudways tool and reports back to you. You can execute the steps individually or as a single sequence. It shows the tool name so you can see what is running for each request.
Step 1 — Clone your template server (server_clone)
Copy your template server to a new server for the client. The clone comes with the apps, the settings, the tuned stack. You choose the provider, the size and the region.
Clone my template server 12345 to a new DigitalOcean 2GB server in New York. Copy the apps and settings.
The agent creates the server. You get a fresh, tuned environment that matches your standard, with no hand configuration.
Step 2 — Clone the template application (app_clone)
If you have one application as a template, copy the application to the new server. The clone takes the stack settings and the base site along. The client gets their own copy and it’s not in your master template.
Clone my template app 67890 onto the new server for this client.
The client now has a working application. Nobody built it by hand, so nobody missed a setting.
Step 3 — Group the work in a project (project_create)
Create a project for the client and link the new app to the project. A project keeps all of a client’s apps in one clear group. This is useful for access control, billing and simple day-to-day navigation when you are running many clients at once.
Create a new project called “Client Starry” and attach the new app to it.
Your account stays organized from day one. When you add the next client, you repeat the same clean pattern.
Step 4 — Label the app for the client (app_update_label)
Rename the cloned app to the client’s name. A clear label helps avoid the most common mix-up in a busy account: work done at the wrong site. Good names are worth the two seconds it takes.
Rename the new app to “Starry Production”.
Step 5 — Create scoped access credentials (app_credentials_create)
Create a separate SSH and SFTP credential for this app. Give it to the team member who’ll do the work. Never tell anyone the server master password. The scoped credential limits access to a single app, and you can revoke it later without impacting anything else.
Add an SSH credential named “starry-deploy” to the new app.
These five steps give you a running, organized, access-controlled environment. The next section makes it branded and secure.
Make it branded and secure
A working environment is not the same as a client-ready environment. The client needs to see their own domain and a secure padlock, not a default hosting URL. And your master template has default passwords, which you must not carry over into a live client site. The following actions bridge that gap. Each is a single request on your agent.
Point the app to the client’s domain:
Set the primary domain for the new app to www.starry.com.
Issue an SSL certificate and force HTTPS, so every visit is encrypted:
Install a Let’s Encrypt certificate for www.starry.com on the new app, then force HTTPS.
Connect the client’s code repository and deploy the first version. The agent generates a deploy key, you add the key to your Git host once, and the agent pulls the code:
Generate a Git deploy key for the new app. Then clone [email protected]:starry/website.git branch main into it.
Rotate the passwords that came from the template. This one action prevents a real risk: two client sites that share the same default admin or database password. Never let template defaults reach production.
Reset the admin password and rotate the database password on the new app.
Give the assigned staff member scoped account access, so they can work without holding the keys to every client:
Invite [email protected] as a team member with access to the new app only.
Scoped access is a security habit, not a formality. For the reasoning behind letting an agent hold these permissions, and how to keep it safe, see is it safe to let AI run your servers?.
The whole thing as one conversation
You do not have to send the steps one by one. You can describe the outcome, and the agent runs the actions in order. A single message can cover the full onboarding.
New client onboard: Starry.
- Clone template server 12345 to a new 2GB DigitalOcean server in NY.
- Clone template app 67890 into it.
- Create a project called “Client Starry” and attach the new app.
- Rename the app to “Starry Production”
- Add SSH credential “starry-deploy” to the app.
- Set domain to www.starry.com, put in a Lets Encrypt cert, and force HTTPS.
- Change the database password and reset the admin password
- Only invite [email protected] to the app
- Report each step as it completes.
The agent runs the sequence and reports progress. What used to take an afternoon across two people now takes one message and a short wait. For more ready-made requests like this, see the Cloudways MCP prompt library.
Why this reduces mistakes
Speed is the name of the game. The real benefit is consistency. All clients start with the same proven template so every environment has the same tuned stack. The agent does the same things in the same order every time. Nobody forgets the password rotation or the SSL certificate. Scoped credentials and per-client projects keep your access clean as you grow. The result is an onboarding process that scales from ten clients to fifty.
Turn onboarding into a single message
Your clients judge you in the first week. The right tone is a fast, clean, branded environment. With the Cloudways MCP server, you can deliver that environment in seconds, from the same chat window where you already plan the work.
Learn more about Cloudways MCP and connect it to your agent to run your next onboarding as one conversation.
Q1: What is the agency client onboarding process?
It’s the process that puts a signed client into active work. It includes a welcome, information gathering, technical environment setup and a kickoff. This piece addresses the technical setup phase, as that stage is prone to automation.
Q2: What are the four stages of onboarding?
The four stages are welcome and expectations, information collection, environment and access set up, and kickoff and handover. The above MCP workflow runs the third stage in seconds.
Q3: What are the five C’s of onboarding?
The five C’s are: compliance, clarification, culture, connection and check-back. They talk about the human side of onboarding. The technical workflow backing your team removes setup delays so your team can spend time on the client not the server.
Q4: What should be included in client onboarding?
Welcome. Clear scope. Information questionnaire. Ready technical environment. Secure access for your team. Kickoff. With the Cloudways MCP server, you can automate the environment and access parts.
Q5: How do I automate agency client onboarding?
Maintain a single tuned template server or app. Connect your AI agent to the Cloudways MCP Server. Then send the onboarding steps as plain English requests, or as a single sequence, and let the agent do the hosting actions for you.
Start Growing with Cloudways Today.
Our Clients Love us because we never compromise on these
Zain Imran
Zain is an electronics engineer and an MBA who loves to delve deep into technologies to communicate the value they create for businesses. Interested in system architectures, optimizations, and technical documentation, he strives to offer unique insights to readers. Zain is a sports fan and loves indulging in app development as a hobby.