Key Takeaways
- Serverless works fine for static sites, but heavy database-driven Next.js apps hit slow cold starts and Postgres connection crashes as traffic grows.
- A persistent Node.js server keeps the runtime warm and reuses a single database connection pool, eliminating both cold starts and connection overload.
- Cloudways Velocity is a managed Node.js environment that handles the reverse proxy, SSL, and PM2 process management, so you get a persistent server without manual VPS setup.
- Migrating means pushing your codebase to GitHub, deploying it on Velocity, and connecting a PostgreSQL database with a single environment variable — no other code changes required.
You build a Next.js app, push it to a serverless platform, and the developer experience feels like magic. There are no servers to configure, and deployments happen instantly.
But then real users show up.
Suddenly, your API routes are hanging for three or four seconds on the initial load. Worse, your database starts throwing ECONNRESET errors and dropping queries. You check your logs and realize the edge platform is spinning up hundreds of ephemeral containers, each opening a brand new database connection until your Postgres instance just panics and shuts down.
This is exactly why so many developers eventually decide to self host Nextjs applications on a persistent server. Serverless is great for static sites, but for heavy, database-driven apps, you need a continuous Node.js runtime.
In this blog, I’ll break down exactly why serverless apps hit this bottleneck, and then I’ll walk through migrating a Next.js codebase to a persistent server on Cloudways Velocity.
The Real Reason Your Serverless App Is Slowing Down
When production falls apart like this, it is almost never the code. It is the serverless model itself, pulling against everything a normal database is built to do.
What Actually Happens During a Cold Start
Every request on a serverless platform gets handed to a small, temporary container. No traffic for a few minutes, and the platform kills that container to stop paying for it. Fair enough, that is the business model. But then a user shows up and clicks something.
Now the whole thing has to happen from scratch. Spin up a container. Load the Node.js runtime. Boot Next.js. Only then does the request get answered.
That gap is the cold start, and it is exactly as slow as it sounds. Edge functions cut it down by trimming the runtime, which helps for lightweight stuff. But a real full-stack Next.js app carrying backend logic and an ORM is going to feel it every single time.
Why Serverless Keeps Crashing Your Database
The database side is usually what actually takes you down, though. Postgres and MySQL are built around long-lived connections. They want to open a pipe once and keep using it.
Serverless does the opposite, on purpose. Every new container opens its own fresh connection. So imagine 500 people land on your app in the same few seconds. The platform answers with 500 containers, and all 500 grab a connection at once. Your limit is gone almost instantly. The database runs out of headroom, starts dropping connections, and everyone gets timeouts.
Why a Continuous Node.js Runtime Fixes Both Issues
Trade the disposable containers for one persistent Node.js server and both problems mostly just go away. The server never shuts off, so the runtime is always warm. There is no cold start to pay for. And since the process stays alive, it holds a small pool of database connections and reuses them for everything. Traffic can triple and your memory usage barely notices.
Serverless Edge vs. Always-On Hosting
Honestly the whole decision comes down to one thing. How much backend state does your app carry?
How Persistent Connections Stop Timeouts
On a persistent server you have got PM2 and Nginx sitting in front of the Node process. When the server boots, it opens a set number of database connections and then reuses those same ones for every request that comes in after. Requests get queued and handled asynchronously. And you are not paying for a separate connection pooler, because the server is already doing the pooling itself.
Why Cloudways Velocity Makes Management Easy
For years people put up with serverless purely because rolling your own server was miserable. Provision a Linux VPS, install Node, configure Nginx, get SSL working. That is an afternoon gone, minimum, and that is if nothing breaks.
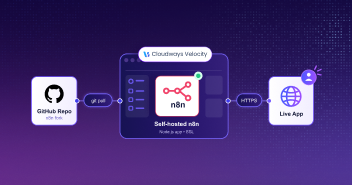
Velocity skips the whole ordeal. It is a managed Node.js environment. You point it at your GitHub repo, add your environment variables, and deploy. The reverse proxy, the SSL, the PM2 process management, all of it runs underneath where you never have to touch it. You get a real persistent server, but the day-to-day still feels like the git-push flow you are used to.
How to Migrate Your Next.js App from Serverless to Cloudways Velocity
My storefront is already live on a serverless platform. The code sits in a Git repo, which is what the serverless host was deploying from in the first place. So I am not starting a new project here. I am taking the app I already have and moving it onto a persistent server.
The migration itself is only a few moves. I push the existing codebase to a GitHub repo I own, switch the build over to a standalone Node server, point Cloudways Velocity at the repo, and connect a Postgres database on the same platform. That is the whole job.
The only thing I’ll need to add later is an environment variable for the database PostgreSQL connection. Everything else is already configured in the project.
Step 1: Push Codebase to GitHub
Velocity deploys straight off Git, so the code has to live in a repo I own. My app is a small product store (node-cw), and I already have it locally from the serverless setup. I initialize Git in the project root and push it up to a fresh GitHub repository.

Once it is on GitHub, every push after this triggers Velocity’s auto-deploy on its own.
Step 2: Deploying to Cloudways Velocity
The code is ready, so the next thing I need is a place to run it. For this deployment, I’m using Cloudways Managed Node.js Hosting (Velocity).
I’ll open the Cloudways console, select Velocity, and click Get Started. I’ll go with the Starter plan for this demo.
On the next screen, I’ll connect my GitHub account, select the node-cw repository, and click Deploy Now.
Cloudways pulls the code from GitHub, runs the build, sets up the reverse proxy, and starts the Node.js application. Once the deployment finishes, I’ll get an application URL that I can use to open the site.
I’ll open the URL in my browser, and the store should be up.
At this point, though, the products are still coming from the fallback data in the code. I haven’t connected a database yet, so that’s what I’ll set up next.
Step 3: Connecting the PostgreSQL Database
The store needs a database for its product catalog, so the next step is connecting PostgreSQL. I’m setting it up in the same Cloudways environment as the application, which means the app and database can communicate locally rather than relying on a separate database service.
I’ll open the Database section and connect PostgreSQL. Once it’s provisioned, Cloudways gives me the database name, username, and password.
I noticed there wasn’t a host value listed. In this setup, that’s because PostgreSQL is running on the same server as the application, so I’ll use 127.0.0.1 as the database host.
I’ll add the database connection string to my application’s environment variables:
DATABASE_URL=postgres://USERNAME:[email protected]:5432/DBNAME
I’ll replace USERNAME, PASSWORD, and DBNAME with the values from the Database section.
I’m keeping the connection string in the environment variables rather than putting it in the project files or committing it to GitHub. The application can then use the same database configuration without exposing those credentials in the code.
Once that’s saved, I’ll redeploy the application so it picks up the new variable.
Step 4: Verifying the Database Connection
After the application restarts, the first request will connect to PostgreSQL, create the products table, and seed the initial data. From this point on, the store should be reading the catalog from the database instead of the fallback data.
I’ll still check everything rather than assuming the deployment worked just because it finished successfully.
First, I’ll open the application URL and refresh the page a few times to make sure the products load normally.
Then I’ll open the Database Manager and check the products table. The seeded products should be there, which confirms that the application was able to connect to PostgreSQL and write the data.
I’ll also make a small change directly in the database. For example, I can rename one of the products and then reload the store. If the new name appears on the page, I know the application is pulling the current data from PostgreSQL rather than using the values that were originally in the code.
At this point, the setup is doing what I wanted: the Node.js application stays running, PostgreSQL is available on the same server, and the application can maintain its database connection instead of setting everything up again for each request.
Wrapping Up
Serverless works fine until you put a heavy, database-driven Next.js app on it. After that the cold starts and the connection errors start stacking up, and you end up fighting the platform instead of building on it.
Moving to a persistent server on Velocity sorted that out for my store. The Node process stays running, so there are no cold starts to sit through. Postgres is on the same server, and the app holds one connection pool open instead of opening a new connection on every request. Setting it up was mostly pushing the repo, connecting the database, and adding a single environment variable.
The project is on my GitHub if you want to use it. Velocity has a free trial too, so you can deploy the same repo and see how it runs for yourself.
Q1: Why should I self-host Next.js on a persistent server?
A persistent server keeps the Node.js application running instead of putting it to sleep when there’s no traffic. This can help avoid cold starts and makes it easier to maintain database connections for applications that rely on them heavily.
Q2: What causes serverless cold starts in Next.js applications?
When a serverless application has been idle, the platform may shut down its running instance. The next request then needs to start a new instance and load the application before the request can be handled. That startup delay is known as a cold start.
Q3: Do I need a custom server file for a standalone Next.js build?
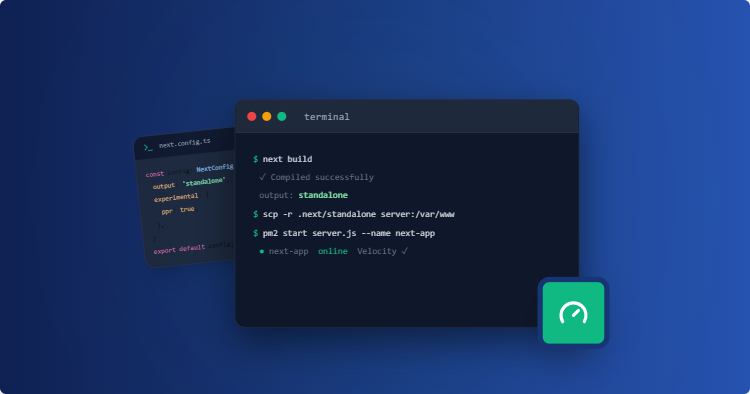
No. With output: ‘standalone’ enabled in next.config.js, Next.js creates a minimal server.js as part of the build. That server can be run directly without adding Express or another Node.js wrapper.
Start Growing with Cloudways Today.
Our Clients Love us because we never compromise on these
[email protected]
Abdul is a tech-savvy, coffee-fuelled, and creatively driven marketer who loves keeping up with the latest software updates and tech gadgets. He's also a skilled technical writer who can explain complex concepts simply for a broad audience. Abdul enjoys sharing his knowledge of the Cloud industry through user manuals, documentation, and blog posts.