Key Takeaways
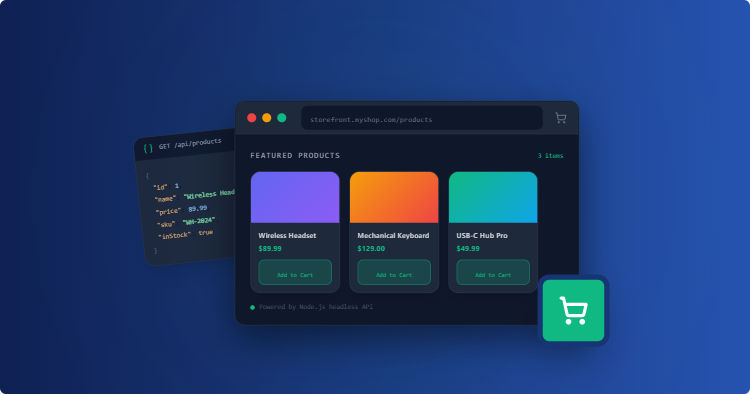
- A headless architecture separates the Node.js backend from the Next.js storefront so each part can scale independently.
- Medusa.js gives you an open-source Node.js backend for products, orders, and inventory without building commerce logic from scratch.
- Connecting a Next.js storefront to PostgreSQL only requires a connection pool and a query inside the page component.
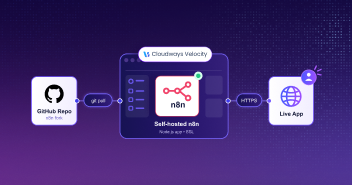
- Cloudways Velocity deploys the Node.js app straight from GitHub, handling NGINX, SSL, and process management automatically.
As an e-commerce application grows, running everything as one large application can become harder to manage and scale. The database, backend logic, and storefront may all be competing for the same resources, so a spike in checkout or product requests can affect the rest of the application.
One way to deal with this is to separate the different parts of the stack into a decoupled, headless commerce architecture. The backend can run as its own Node.js application and handle things like product data, orders, inventory, and database operations, while the storefront focuses on serving the customer-facing experience.
In this guide, I’ll look at how this setup works in practice. I’ll build a Next.js storefront, connect it to a separate PostgreSQL product catalog, and deploy the Node.js environment on Cloudways Velocity without having to configure the underlying Linux server manually.
What Does a Headless Ecommerce Architecture Mean?
A decoupled e-commerce setup separates the backend from the storefront rather than keeping everything inside one application.
The backend is responsible for the parts of the application that handle the actual commerce logic. Depending on the setup, this can include database operations, inventory management, orders, checkout workflows, and background jobs.
The storefront is the customer-facing part of the application. A framework such as Next.js can fetch product data from the backend and handle how that information is displayed to visitors.
Because the two parts are separate, they can also be developed and scaled independently when needed.
Why Use Medusa.js for a Node.js E-Commerce Backend?
Building an e-commerce backend from scratch means handling a lot more than just displaying products. There are orders, inventory, payments, customers, and other parts of the system to consider.
Medusa.js provides an open-source backend for handling many of those e-commerce functions. It can be used to manage products, orders, inventory, and other commerce-related operations without having to build every part from the ground up.
It also works well with a separate frontend. The backend can be used with frameworks such as Next.js or React, allowing the storefront and commerce logic to remain independent of each other. That gives developers more flexibility over how the frontend is built and where different parts of the application are deployed.
Mini Project: Building the Storefront and Database Locally
Before I deploy anything to Cloudways Velocity, I want to get the storefront and database working locally first. I’m using standalone Windows binaries for both Node.js and PostgreSQL, so I’ll need to point Command Prompt to their locations before I start.
I’ll open Command Prompt and add both binary folders to the PATH for this session:
set PATH=%PATH%;C:\Users\abdulrehman\Downloads\node-v24.18.0-win-x64\node-v24.18.0-win-x64;C:\Users\abdulrehman\Downloads\postgresql-18.4-2-windows-x64-binaries\pgsql\bin

With that done, I can use the PostgreSQL commands from this terminal. I’ll create a new database cluster in a pgdata folder and start the PostgreSQL server:
initdb -D C:\Users\abdulrehman\Downloads\pgdata -U postgres
pg_ctl -D C:\Users\abdulrehman\Downloads\pgdata -l logfile start
Once PostgreSQL is running, I’ll open the PostgreSQL shell with psql -U postgres. From there, I’ll create the products table and add a couple of products that I can display in the storefront:
CREATE TABLE products (
  id SERIAL PRIMARY KEY,
  name VARCHAR(255) NOT NULL,
  description TEXT,
  price DECIMAL(10, 2) NOT NULL,
  image_url TEXT NOT NULL,
  created_at TIMESTAMP DEFAULT CURRENT_TIMESTAMP
);

INSERT INTO products (name, description, price, image_url) VALUES
('Minimalist Desk Lamp', 'Matte black architectural lighting.', 89.00, 'https://images.unsplash.com/photo-1507473885765-e6ed057f782c'),
('Ergonomic Wooden Chair', 'Crafted from sustainable oak.', 249.00, 'https://images.unsplash.com/photo-1580481072645-022f9a6d83d0');
That’s enough data for the local test. I’ll close the PostgreSQL shell and open a fresh Command Prompt.
Since Node.js is also running from a standalone folder rather than being installed system-wide, I’ll need to add its path again in this new terminal session. Then I’ll create the Next.js project:
set PATH=%PATH%;C:\Users\abdulrehman\Downloads\node-v24.18.0-win-x64\node-v24.18.0-win-x64

cd C:\Users\abdulrehman\Downloads

npx create-next-app@latest nextjs-storefront
During the setup, I’ll select Yes for Tailwind CSS and Yes for the App Router.
Next, I’ll move into the project directory and install pg, which I’ll use to connect the Next.js application to PostgreSQL:
cd nextjs-storefront
npm install pg
Connect Next.js to PostgreSQL
Now I’ll open the nextjs-storefront folder in Visual Studio Code.
In the project root, I’ll create a lib folder and add a db.js file inside it. This is where I’ll set up the PostgreSQL connection pool:
import { Pool } from 'pg';

export const pool = new Pool({
  connectionString: process.env.DATABASE_URL || 'postgresql://postgres:@localhost:5432/postgres',
});
With the database connection in place, I can move on to the storefront itself.
I’ll use Next.js and Tailwind CSS for the product cards. In app/page.tsx, I’ll replace the existing code with the following. The page queries PostgreSQL and uses the returned rows to build the product cards:
import { Pool } from 'pg';

export const pool = new Pool({
  connectionString: process.env.DATABASE_URL || 'postgresql://postgres:@localhost:5432/postgres',
});
With the database connection in place, I can move on to the storefront itself.
I'll use Next.js and Tailwind CSS for the product cards. In app/page.tsx, I'll replace the existing code with the following. The page queries PostgreSQL and uses the returned rows to build the product cards:
import { pool } from '@/lib/db';

export const dynamic = 'force-dynamic'; // <-- Add this line

type Product = {
  id: number;
  name: string;
  description: string;
  price: string;
  image_url: string;
};

async function getProducts(): Promise<Product[]> {
  const res = await pool.query('SELECT * FROM products ORDER BY created_at DESC');
  return res.rows;
}

export default async function Storefront() {
  const products = await getProducts();

  return (
    <main className="max-w-6xl mx-auto px-6 py-16">
      <h1 className="text-4xl font-extrabold tracking-tight mb-10 text-gray-900">Featured Collection</h1>
      <div className="grid grid-cols-1 sm:grid-cols-2 lg:grid-cols-3 gap-10">
        {products.map((product) => (
          <div key={product.id} className="group flex flex-col bg-white rounded-2xl border border-gray-200 overflow-hidden shadow-sm hover:shadow-xl transition-all duration-300">

            {/* Fixed Aspect Ratio Image Container */}
            <div className="relative aspect-[4/3] w-full overflow-hidden bg-gray-100">
              <img
                src={product.image_url}
                alt={product.name}
                className="absolute inset-0 h-full w-full object-cover group-hover:scale-105 transition-transform duration-500 ease-out"
              />
            </div>

            {/* Flex-grow ensures buttons align at the bottom */}
            <div className="flex flex-col flex-grow p-6">
              <h2 className="text-xl font-bold text-gray-900">{product.name}</h2>
              <p className="text-sm text-gray-500 mt-2 line-clamp-2 flex-grow">{product.description}</p>

              <div className="mt-6 flex items-center justify-between">
                <span className="text-xl font-bold text-gray-900">${product.price}</span>
                <button className="bg-black text-white px-5 py-2.5 rounded-lg text-sm font-semibold hover:bg-gray-800 transition shadow-md">
                  Add to Cart
                </button>
              </div>
            </div>

          </div>
        ))}
      </div>
    </main>
  );
}
The page is now set up to query the products table and render whatever rows are returned.
Before testing it, I’ll install the project dependencies and make sure the production build completes without errors:
npm install
npm run build
If the build finishes successfully, I’ll start the development server:
npm run dev
I’ll open http://localhost:3000 in my browser and check the storefront. The products shown on the page should be coming from the PostgreSQL table I created earlier.
I can also make a quick change to one of the products in PostgreSQL and reload the page to make sure the storefront is actually reading the database rather than using hardcoded product data.
Once I’m happy with the local setup, I’ll push the project to GitHub so Cloudways Velocity can pull the repository during deployment.
Before doing that, I’ll make sure .env and node_modules are included in .gitignore. Then I’ll initialize the Git repository and push the project:
git init
git add .
git commit -m "feat: complete Next.js storefront UI with PostgreSQL"
git branch -M main
git remote add origin https://github.com/abdulrehman293/nextjs-storefront
git push -u origin main
The project is now in GitHub and ready for the deployment steps.
Deploying the Storefront to Cloudways Velocity
Now that the code is on GitHub, I’ll open the Cloudways dashboard and create a new server. I’ll give the server a name and select the region I want to use.
Next, I’ll connect the server to the GitHub repository I pushed earlier.
Velocity detects the project and fills in the framework preset, branch, and Node.js version. I’ll review those settings and click Deploy Now.
Once the deployment starts, Velocity pulls the repository, installs the npm packages, and starts the application behind NGINX with SSL enabled.
With the application running, I’ll set up the database next.
I’ll go to the Access Details tab in my Cloudways application and connect PostgreSQL to the app.
After that, I’ll open Database Manager and run the SQL below to create the products table and add two products:
CREATE TABLE products (
  id SERIAL PRIMARY KEY,
  name VARCHAR(255) NOT NULL,
  description TEXT,
  price DECIMAL(10, 2) NOT NULL,
  image_url TEXT NOT NULL,
  created_at TIMESTAMP DEFAULT CURRENT_TIMESTAMP
);

INSERT INTO products (name, description, price, image_url) VALUES
('Minimalist Desk Lamp', 'Matte black architectural lighting.', 89.00, 'https://images.unsplash.com/photo-1507473885765-e6ed057f782c'),
('Ergonomic Wooden Chair', 'Crafted from sustainable oak.', 249.00, 'https://images.unsplash.com/photo-1592078615290-033ee584e267');
I’ll then copy the PostgreSQL credentials, including the username, password, and database name.
Back in the Velocity deployment settings, I’ll open Environment Variables and add a new variable called DATABASE_URL. I’ll use the credentials from the database setup to build the connection string:
postgresql://[username]:[password]@localhost:5432/[database_name]
I’ll save the changes and redeploy the application so it picks up the new database connection.
Once the redeployment is finished, I’ll copy the application URL and open it in my browser. The storefront should look the same as it did during the local test.
I’ll make one more check to confirm that the products are actually coming from PostgreSQL.
I’ll open the PostgreSQL database through Cloudways and change the first product from “Minimalist Desk Lamp” to “Matte Black Desk Lamp”.
After refreshing the live storefront, the new product name should appear. That confirms the application is reading the product data from the database rather than using the values from the original code.
Wrapping Up
That’s the storefront deployed and connected to PostgreSQL. With the Node.js application running on Cloudways Velocity and PM2 handling the process, I don’t have to set up the underlying Nginx or Docker configuration myself.
I’ve also pushed the complete Next.js storefront code to my GitHub repository, so it can be used as a starting point for a similar setup.
If you run into a connection refused error or another deployment issue while following the steps, leave a comment and I’ll take a look.
Q. Can I run the Node.js backend and storefront on the same Cloudways instance?
Yes. Both applications can run on the same server as long as they use different internal ports and are configured with the appropriate domains.
Q. Do I need Redis for a self-hosted Medusa.js backend?
Medusa uses Redis for things such as background jobs, caching, and event processing. Whether it is required depends on the features and version of Medusa being used.
Q. Where should product images be stored?
For a production setup, it’s better to keep product images in external object storage rather than on the application server. S3-compatible storage is a common option and keeps media separate from the application itself.
Start Growing with Cloudways Today.
Our Clients Love us because we never compromise on these
[email protected]
Abdul is a tech-savvy, coffee-fuelled, and creatively driven marketer who loves keeping up with the latest software updates and tech gadgets. He's also a skilled technical writer who can explain complex concepts simply for a broad audience. Abdul enjoys sharing his knowledge of the Cloud industry through user manuals, documentation, and blog posts.