Key Takeaways
- Lovable’s exported code is hardcoded for Cloudflare, so a nitro block must be added to vite.config.ts to force a Node server build.
- Two cleanup steps — deleting bun.lock and bunfig.toml, and adding the nitro block — are needed before pushing the exported code to GitHub.
- A new production Supabase project and database schema, created through the SQL Editor, replaces Lovable’s temporary database.
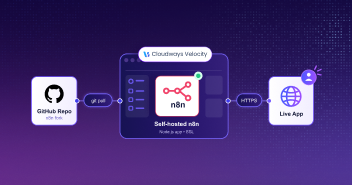
- Cloudways Velocity deploys the Node.js app straight from GitHub, handling Nginx, PM2, and SSL automatically with just a custom build command and environment variables.
- The result is a persistent, always-on Node.js server with no cold starts, well suited for apps that rely on PostgreSQL via Supabase.
Lovable’s sandbox is easy. It always is. You type a prompt, watch the UI build, and everything feels incredibly fast.
Then you actually try to put that application on the internet. Suddenly, you have to make a choice about infrastructure, and standard options usually leave you frustrated.
You either rely on their locked-down preview environment where you have zero control over your database, or you dump the codebase into a serverless edge platform that puts your backend to sleep the second people stop using it.
If you are hooking up a relational database like PostgreSQL via Supabase, ephemeral serverless hosting is going to give you a massive headache. You need a persistent backend.
I am going to walk through building a fast Task Manager with Lovable, exporting the code, and deploying it straight to a persistent Cloudways Managed Node.js (Velocity) server. No Nginx configurations to debug. No serverless cold starts. Just reliable Node.js hosting.
Exporting a Lovable App, Testing It Locally & Deploying It Live on Cloudways
I’m going to build a minimal Task Manager Kanban board. I’ll use Lovable to generate the React frontend and the Supabase database schema.
The first thing I’ll do is set up my project in the Lovable workspace.
I’ll write a prompt asking for a dark-mode layout with three columns: To Do, In Progress, and Done. Lovable generates the UI components and wires up the drag-and-drop state. Once it renders in the preview window, I can see the app working perfectly.

Now I need to get this code onto my own machine.
Exporting the Code to GitHub
Lovable includes a native Git sync feature. But I’m using a shared team workspace for this demo, which means the integration is locked to a coworker’s account. I can’t link my own.
I’ll instead download the standalone .zip version of the codebase.
I open the Settings > Git, and click Download codebase.
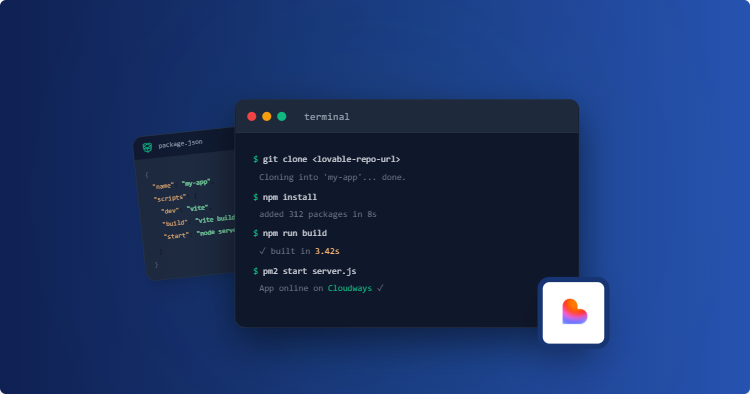
After unzipping the folder, there are two crucial cleanup steps I need to make before pushing the code to my personal GitHub account.
The Lovable project I downloaded has two files, bun.lock and bunfig.toml, which I’ll need to delete.
Second, since the Lovable code, in my case, is hardcoded for Cloudflare, I’ll open vite.config.ts in my editor and add a nitro block right at the root level to bypass Cloudflare and force a Node server build.
My updated file looks exactly like this:
import { defineConfig } from "@lovable.dev/vite-tanstack-config";
export default defineConfig({
  nitro: {
    preset: "node-server"
  },
  tanstackStart: {
    server: { entry: "server" },
  },
});
Next, I’ll open Command Prompt and delete the Bun files:
cd C:\Users\abdulrehman\Downloads\lovable-kanban-board
del bun.lock
del bunfig.toml
With the tweaks made, I’ll push the code to Git.
git init
git add .
git commit -m "Initial export from Lovable"
git branch -M main
git remote add origin https://github.com/abdulrehman293/cw-velocity-lovable
git push -u origin main
Great, now I can manage the code myself and hook it up to Cloudways later.
Setting Up the Local Project
Next up, I will install the dependencies. I need to make sure the exported code actually compiles on my machine.
So just like last time, I’ll point my terminal to the location where the node folder is on my machine, since I downloaded the standalone binary version.
set PATH=%PATH%;C:\Users\abdulrehman\Downloads\node-v24.18.0-win-x64\node-v24.18.0-win-x64
Then I open my terminal inside the project folder and run:
npm install
The terminal downloads Vite, React, and the Supabase client (@supabase/supabase-js).
By default, the exported .zip file of my project saves tasks to local browser memory. To make the app actually send data to Supabase, I first create src/supabase.ts to initialize the database client:
import { createClient } from "@supabase/supabase-js";

const supabaseUrl = (import.meta.env['VITE_SUPABASE_URL'] as string) || "";
const supabaseKey = (import.meta.env['VITE_SUPABASE_ANON_KEY'] as string) || "";

export const supabase = createClient(supabaseUrl, supabaseKey);
Next, I open src/hooks/use-tasks.ts and replace the local storage logic with real Supabase React Query mutations:
import { useQuery, useMutation, useQueryClient } from "@tanstack/react-query";
import { supabase } from "@/supabase";
import type { Task, TaskInput, TaskStatus } from "@/lib/tasks/types";

export function useTasks() {
  const queryClient = useQueryClient();

  const { data: tasks = [], isLoading } = useQuery({
    queryKey: ["tasks"],
    queryFn: async () => {
      const { data, error } = await supabase
        .from("tasks")
        .select("*")
        .order("position", { ascending: true });
      if (error) throw error;
      return data as Task[];
    },
  });

  const create = useMutation({
    mutationFn: async (input: TaskInput) => {
      const { data, error } = await supabase
        .from("tasks")
        .insert([input])
        .select()
        .single();
      if (error) throw error;
      return data;
    },
    onSuccess: () => queryClient.invalidateQueries({ queryKey: ["tasks"] }),
  });

  const update = useMutation({
    mutationFn: async ({ id, patch }: { id: string; patch: Partial<TaskInput> }) => {
      const { data, error } = await supabase
        .from("tasks")
        .update(patch)
        .eq("id", id)
        .select()
        .single();
      if (error) throw error;
      return data;
    },
    onSuccess: () => queryClient.invalidateQueries({ queryKey: ["tasks"] }),
  });

  const move = useMutation({
    mutationFn: async ({ id, status, position }: { id: string; status: TaskStatus; position: number }) => {
      const { data, error } = await supabase
        .from("tasks")
        .update({ status, position })
        .eq("id", id)
        .select()
        .single();
      if (error) throw error;
      return data;
    },
    onSuccess: () => queryClient.invalidateQueries({ queryKey: ["tasks"] }),
  });

  const remove = useMutation({
    mutationFn: async (id: string) => {
      const { error } = await supabase.from("tasks").delete().eq("id", id);
      if (error) throw error;
    },
    onSuccess: () => queryClient.invalidateQueries({ queryKey: ["tasks"] }),
  });

  return { tasks, isLoading, create, update, move, remove };
}
To see the app working locally, I navigate to the local Vite port after running npm run dev. The board loads clean and ready to talk to the backend.
Migrating the Supabase Database
The app is still looking for Lovable’s temporary database. I need to point it to a real production database.
I’ll go to supabase.com and create a new project called lovable-kanban-production.
After the database provisions, I need to grab two specific credentials to connect my app.
First, I’ll go to the General settings and copy my Project ID.
Second, I need the public API key. I’ll go to the API Keys tab and copy the Publishable key.
I’ll save both of them somewhere safe as I’ll need them for Cloudways later.
Moving on, if I go to my new database, I can see that it is totally empty. It doesn’t have the tables Lovable created.
To fix this, I need to build the database schema so it matches the exact fields our frontend sends (title, description, status, priority, and position).
I open my Supabase Dashboard, click on the SQL Editor tab on the left sidebar, and paste in this script:
DROP TABLE IF EXISTS tasks;
CREATE TABLE tasks (
id UUID DEFAULT gen_random_uuid() PRIMARY KEY,
title TEXT NOT NULL,
description TEXT DEFAULT '',
status TEXT NOT NULL DEFAULT 'todo',
priority TEXT DEFAULT 'medium',
position INTEGER DEFAULT 0,
created_at TIMESTAMP WITH TIME ZONE DEFAULT timezone('utc'::text, now()) NOT NULL,
updated_at TIMESTAMP WITH TIME ZONE DEFAULT timezone('utc'::text, now()) NOT NULL
);

ALTER TABLE tasks ENABLE ROW LEVEL SECURITY;
CREATE POLICY "Allow all operations" ON tasks FOR ALL USING (true) WITH CHECK (true);
I click Run. And with that, my tasks table is live, configured with proper permissions, and ready to store data from Cloudways.
Deploying the Mini Project on Cloudways Velocity
Deploying a custom Node.js application on bare-metal VPS servers usually means configuring Nginx as a reverse proxy, keeping PM2 running, and taking care of SSL certificates.
Cloudways Velocity handles such server-side tasks on its own. It provides a managed Node.js environment where the underlying server setup is handled for me.
Back to the deployment. I’ll open the Cloudways console and select Velocity, then click Get Started.
For this deployment, I’m going to choose the Starter plan, which is more than enough for this demo.
Next, I connect my GitHub account, select my cw-velocity-lovable repository and click Continue.
Cloudways will now automatically choose everything for me. For example, it checks the root of the project for the package.json file. From there, it reads the dependencies and selects the appropriate framework preset automatically.
There’s no need for me to create custom start commands or set up PM2 manually. The platform handles those pieces as part of the deployment. The only tiny change I make is in the Settings tab, where I swap the Build Command to this: NITRO_PRESET=node-server npm run build. This stops Lovable from trying to build for Cloudflare.
Next, I open the Environment Variables tab to securely inject my database credentials and lock in the production Node process.
I’ll take the Project URL and API key I saved earlier and add them as VITE_SUPABASE_URL and VITE_SUPABASE_ANON_KEY. I’ll also add a third variable named NITRO_PRESET to reinforce the Node server target.
- Value for Project URL in this format: https://your-project-id.supabase.co
- Value for API key can be copied and pasted as is, for example: sb_publishable_your_key_here
- Value for NITRO_PRESET: node-server
After saving, I’ll click Deploy Now and let the deployment complete.
Once the application finishes deploying, I open the application management screen and click on the Database tab. I select Supabase, click connect, and authorize my account to link my production database directly to the live Cloudways app.
Verifying the Production App
Now that everything is done, I’ll head back to the application’s Overview tab and copy the Application URL. I’ll open it in the browser to check the app.
The Kanban board loads instantly.
To test saving real data, I create a new task named “Test Cloudways” and move it to the “In Progress” column.
When I refresh the page now, I can see the task is still there.
I can also go ahead and check the table in Supabase and the task I created should be there.
This means my live Node server successfully received the request, and stored the task inside my production Supabase database.
And with that, I am experiencing a true, always-on Node instance. No connection timeouts. No cold starts.
Wrapping Up
That brings this migration guide to an end. I covered why a persistent Node.js environment can be a better fit for exported apps that need consistent performance, particularly when the application relies on keeping Postgres database connections active.
I also built a Kanban board in Lovable, tested the project locally, pushed the database schema to a new Supabase project, and then deployed the finished application using Cloudways Managed Node.js Hosting (Velocity).
The full source code for the Lovable app I built is up on my GitHub if you want to clone it. If you run into any issues with the setup or deployment steps, feel free to leave a question in the comments.
Q. How does Supabase work with Lovable?
Lovable natively integrates with Supabase to handle backend storage. When developers prompt the AI to build a data-driven interface, Lovable generates the React code and writes the exact PostgreSQL queries needed to manage the data.
Q. Is Lovable Supabase free?
Both platforms offer starter tiers. Lovable gives users free prompt credits, and Supabase provides a free development database cluster. When the application starts receiving consistent traffic, developers need to upgrade to paid hosting.
Q. Is Lovable Cloud or Supabase better?
They act as two different layers of the stack. Lovable is a frontend code generator. Supabase is a Backend-as-a-Service that manages database tables and user authentication. They are used together to build a complete application.
Q. Can I export my Lovable code?
Yes. Developers are not locked into the platform. You can export the source files at any point by syncing directly to a GitHub repository or by downloading the codebase as a .zip file.
Q. How can I download code from Lovable?
Open the Code panel on the left sidebar of the Lovable editor. Scroll to the bottom of the file explorer and click the “Download codebase” button to save the archive to your machine.
Q. How do I export code from Lovable to GitHub?
Use the native GitHub sync setting inside the project workspace. Alternatively, developers can download the .zip file, extract it locally, initialize Git, and push the repository manually.
Q. Does Lovable give you source code?
Yes. Lovable produces standard React, Vite, and Node.js files. Developers get full access to view, edit, and export the raw code for their own infrastructure.
Start Growing with Cloudways Today.
Our Clients Love us because we never compromise on these
[email protected]
Abdul is a tech-savvy, coffee-fuelled, and creatively driven marketer who loves keeping up with the latest software updates and tech gadgets. He's also a skilled technical writer who can explain complex concepts simply for a broad audience. Abdul enjoys sharing his knowledge of the Cloud industry through user manuals, documentation, and blog posts.