Key Takeaways
- Astro’s hybrid rendering keeps most of a page static while Server Islands stream only the dynamic pieces from the server on demand.
- Server Islands require a real SSR adapter, like @astrojs/node, and a persistent server, since serverless cold starts break the on-demand island requests.
- Cloudways Velocity auto-detects the Node.js framework preset from your project files, so you can deploy straight from GitHub without configuring Nginx, PM2, or SSL yourself.
- The full demo project, a live Stock Market Dashboard built with Astro Server Islands, is available on GitHub to clone and reuse.
Localhost is easy. It always is. You build your components, run the Astro dev script, and everything loads instantly.
Then you actually try to put that dynamic app on the internet. Suddenly, you have to make a choice about infrastructure, and standard options usually leave you frustrated.
You either rent a blank Linux server and spend your weekend acting as an unpaid sysadmin, or you dump the codebase into a serverless edge platform that puts your app to sleep the second people stop using it.
If you are hooking up live dynamic data using Astro Server Islands, ephemeral serverless hosting is going to give you a massive headache. You need a persistent backend.
I am going to walk through building a fast Stock Market Dashboard with Astro hybrid rendering and deploying it straight to a persistent Cloudways Managed Node.js (Velocity) server. No Nginx configurations to debug. No serverless cold starts. Just reliable Astro hosting.
Deploy Astro Without the Cold Starts
Run your Astro SSR app and Server Islands on a persistent Cloudways Velocity server, with no serverless sleep and no latency spikes.
Understanding Astro Rendering Modes
Let’s look at the two extreme ends of web rendering and why neither is perfect for a standard dynamic application.
On one side, you have pure Static Site Generation (SSG). You get flat HTML files and unbeatable speed, but the content is frozen at build time. It cannot show a logged-in user their own dashboard.
Because of this, people eventually pivot to full-page Server-Side Rendering (SSR). The server generates the entire page fresh on every single request.
But here is the catch. Full-page SSR ruins your Time to First Byte. Users sit there looking at a white screen while the server waits on a slow database query or a third-party API before it can send back a single byte of HTML.
Astro hybrid rendering fixes this bottleneck. It keeps the core of your site static while letting you selectively defer specific components to render on the server after the initial page has already loaded.
How Astro Server Islands Work (server:defer)
This selective server execution is exactly why Server Islands are so useful.
Instead of making an entire page slow just to load one live widget, Server Islands break the delivery into two pieces. The browser gets the static layout instantly. Then, an internal background request fetches the dynamic component and swaps it in.
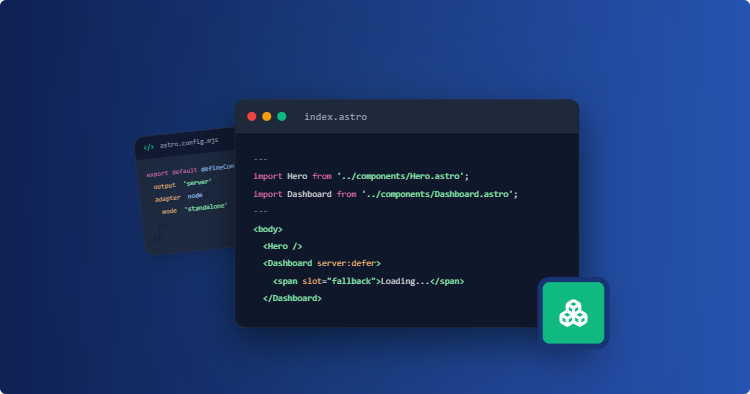
I’ll use the server:defer directive to make this happen. Here is what the code looks like:
---
import Layout from '../layouts/Layout.astro';
import StockTicker from '../components/StockTicker.astro';
import TickerSkeleton from '../components/TickerSkeleton.astro';
---

<Layout>
  <h1>Market Overview</h1>

  <!-- Server Island with Fallback -->
  <StockTicker server:defer>
    <TickerSkeleton slot="fallback" />
  </StockTicker>
</Layout>
The logic here is incredibly important. Astro skips the <StockTicker/> component during the initial load. It drops in a <TickerSkeleton slot=”fallback”/> placeholder so the screen doesn’t jump around, and then streams the real data when it’s ready.
Running dynamic components on demand strictly requires an active server adapter like @astrojs/node.
Serverless vs. Persistent Node.js for Astro Hosting
If you were to host this on a standard serverless platform, you would run into issues almost immediately.
Serverless providers kill your application when web traffic drops. When a new user requests a Server Island, the platform has to boot up a brand new function instance from scratch, load the Node runtime, and then execute your component. That delay is called a cold start.
If your site gets 150 hits at once, the platform tries to spin up 600 separate instances to keep up with the parallel Server Island requests. Each one pays that cold start tax individually.
This invocation bottleneck is exactly why you need a persistent Node environment for Server Islands.
A dedicated server never puts your Astro process to sleep. It stays warm. Because the runtime is already loaded in memory, a Server Island request resolves in milliseconds instead of seconds.
Using a managed environment like Cloudways Velocity gives you that persistent power without forcing you to manually configure the underlying Linux server yourself.
Keep Your Server Islands Always Warm
Cloudways Managed Node.js hosting keeps your Astro adapter running around the clock, so background Server Island requests never hit a cold start.
Mini Project: Build a Stock Market Dashboard
I’m going to build a minimal Stock Market Dashboard. I’ll write an Astro app that handles hybrid rendering and uses Server Islands with the Node adapter.
Setting Up the Local Project
The first thing I’ll do is set up my local workspace.
I’m using my work laptop for this demo which has IT restrictions so I can’t run the standard installer for Node. I’ll instead download the standalone binary .zip version of Node.js on my machine.
After unzipping the Node folder, I’ll tell Command Prompt where it is located on my machine. To do this, I’ll run this command with the exact path:
set PATH=%PATH%;C:\Users\abdulrehman\Downloads\node-v24.18.0-win-x64\node-v24.18.0-win-x64
Great, now I can execute Node and npm commands.
Next I’ll create a project folder on my desktop.
cd C:\Users\abdulrehman\Desktop
mkdir cw-astro-stock-dashboard

cd cw-astro-stock-dashboard
npm create astro@latest . -- --template minimal --no-install --no-git --typescript strictest

Next up, I will install the dependencies. I need the official Node adapter to run this as a standalone server.
npm install
npm install @astrojs/node
I also need to configure Astro to use that adapter. I will open up my editor and tweak astro.config.mjs:
// astro.config.mjs
import { defineConfig } from 'astro/config';
import node from '@astrojs/node';

export default defineConfig({
  output: 'server',
  adapter: node({
    mode: 'standalone',
  }),
});
That’s it. My local environment is fully operational at this stage.
Building the Dynamic Server Island
To test real-world persistence, keeping a dynamic component responsive is the perfect stress test. I will open up my editor and create a src/components/StockTicker.astro file. Drop in my custom script:
---
// src/components/StockTicker.astro

// Simulate a database or API delay
await new Promise((resolve) => setTimeout(resolve, 800));

const stocks = [
  { symbol: 'AAPL', name: 'Apple Inc.', price: '224.23', change: '+1.45%' },
  { symbol: 'NVDA', name: 'NVIDIA Corp.', price: '128.50', change: '+3.12%' },
  { symbol: 'MSFT', name: 'Microsoft', price: '448.90', change: '-0.22%' },
  { symbol: 'AMZN', name: 'Amazon.com', price: '186.40', change: '+0.88%' },
];

const timestamp = new Date().toLocaleTimeString();
---

<div style="background: #111827; border: 1px solid #374151; border-radius: 8px; padding: 1.5rem; color: #f9fafb; font-family: sans-serif;">
  <div style="display: flex; justify-content: space-between; align-items: center; margin-bottom: 1rem;">
    <h3 style="margin: 0;">Live Market Indices</h3>
    <span style="font-size: 0.8rem; background: #065f46; color: #34d399; padding: 0.2rem 0.6rem; border-radius: 4px;">Updated: {timestamp}</span>
  </div>

  <div style="display: grid; grid-template-columns: repeat(auto-fit, minmax(140px, 1fr)); gap: 1rem;">
    {stocks.map((stock) => (
      <div style="background: #1f2937; padding: 1rem; border-radius: 6px; display: flex; flex-direction: column; gap: 0.25rem;">
        <span style="font-weight: bold;">{stock.symbol}</span>
        <span style="font-size: 1.2rem;">${stock.price}</span>
        <span style={`font-weight: 500; color: ${stock.change.startsWith('+') ? '#34d399' : '#f87171'};`}>
          {stock.change}
        </span>
      </div>
    ))}
  </div>
</div>
Next, I need to build the fallback skeleton so the page doesn’t look broken while it loads. I’ll make a TickerSkeleton.astro file:
---
// src/components/TickerSkeleton.astro
---

<div style="background: #111827; border: 1px solid #374151; border-radius: 8px; padding: 1.5rem; font-family: sans-serif;">
  <div style="height: 24px; width: 180px; background: #1f2937; border-radius: 4px; margin-bottom: 1rem;"></div>
  <div style="display: grid; grid-template-columns: repeat(auto-fit, minmax(140px, 1fr)); gap: 1rem;">
    <div style="height: 80px; background: #1f2937; border-radius: 6px;"></div>
    <div style="height: 80px; background: #1f2937; border-radius: 6px;"></div>
    <div style="height: 80px; background: #1f2937; border-radius: 6px;"></div>
    <div style="height: 80px; background: #1f2937; border-radius: 6px;"></div>
  </div>
</div>
Now, I assemble everything inside src/pages/index.astro:
---
// src/pages/index.astro
import StockTicker from '../components/StockTicker.astro';
import TickerSkeleton from '../components/TickerSkeleton.astro';
---

<html lang="en">
  <head>
    <meta charset="utf-8" />
    <title>Astro Stock Dashboard</title>
  </head>
  <body style="background: #030712; color: #f3f4f6; font-family: system-ui, sans-serif; max-width: 800px; margin: 2rem auto; padding: 0 1rem;">
    <header style="border-bottom: 1px solid #1f2937; padding-bottom: 1rem; margin-bottom: 2rem;">
      <h1 style="margin: 0;">Market Dashboard</h1>
      <p style="color: #9ca3af;">Static layout shell delivered instantly via cached HTML.</p>
    </header>

    <main>
      <StockTicker server:defer>
        <TickerSkeleton slot="fallback" />
      </StockTicker>
    </main>
  </body>
</html>
To test what I built locally, I’ll compile the standalone build and run the entry file.
npm run build
node ./dist/server/entry.mjs
After running the node command, the terminal shows a confirmation that the server is listening.
To see the app working, I open my web browser and navigate to http://localhost:4321.
The page loads a static header instantly, along with the skeleton placeholder.
This is exactly what I expected to see. It means Astro served the static shell and is waiting for the background request.
When the 800ms delay finishes, the skeleton disappears. Instead I can now see the live stock market data.
The mini project is fully operational on my local machine. Now I can push this codebase to Git and deploy it to Cloudways Velocity.
Pushing the Project to GitHub
Before I do the push, I will open my package.json file and manually add a start script. It should look exactly like this:
"scripts": {
  "start": "node ./dist/server/entry.mjs"
}
My updated code will look like this:
{
  "name": "cw-astro-stock-dashboard",
  "type": "module",
  "version": "1.0.0",
  "scripts": {
    "dev": "astro dev",
    "build": "astro build",
    "preview": "astro preview",
    "start": "node ./dist/server/entry.mjs"
  },
  "dependencies": {
    "@astrojs/node": "^9.0.0",
    "astro": "^5.0.0"
  }
}
The start command is critical. Cloudways looks for this exact keyword when configuring the production server.
I’ll go to GitHub and then create a new repository. I’ll call it cw-velocity-astro-ssr.
Then I’ll go back to my command prompt, and push the project to my GitHub repo:
git init
git add .
git commit -m "Initial commit: Astro SSR Dashboard with Server Islands"
git branch -M main
git remote add origin https://github.com/abdulrehman293/cw-velocity-astro-ssr
git push -u origin main
With my code uploaded to GitHub, it is time to create my Node.js server on Cloudways.
Deploying the Mini Project on Cloudways Velocity
Deploying a custom Astro SSR application on bare-metal VPS servers usually means configuring Nginx as a reverse proxy, keeping PM2 running, and taking care of SSL certificates.
Cloudways Velocity handles such server-side tasks on its own. It provides a managed Node.js environment where the underlying server setup is handled for me.
Skip the DevOps, Ship Faster
Cloudways Velocity auto-detects your Astro Node adapter and handles Nginx, PM2, and SSL for you.
Back to the deployment. I’ll open the Cloudways console and select Velocity, then click Get Started.
For this deployment, I’m going to choose the Starter plan, which is more than enough for this demo.
Next, I connect my GitHub account, select my cw-velocity-astro-ssr repository and click Continue.
Cloudways will now automatically choose everything for me. For example, it checks the root of the project for the package.json file. From there, it reads the dependencies, detects the Node adapter, and selects the appropriate framework preset automatically.
There’s no need for me to create custom start commands or set up PM2 manually. The platform handles those pieces as part of the deployment.
So I’ll click Deploy Now for now and let the deployment complete.
Now that the app is deployed, I’ll head back to the application’s Overview tab and copy the Application URL. I’ll open it in the browser to check the site.
The static page header loads instantly, just like it did on local.
In the Network tab, I can see the background request to /_server-islands/StockTicker streaming in.
When the request resolves, the live stock data snaps right into place.
And with that, I am experiencing a true, always-on Astro SSR instance. No connection timeouts. No cold starts.
Wrapping Up
That brings this Astro deployment guide to an end. I covered why a persistent Node.js environment can be a better fit for hybrid rendering, particularly when the application relies on streaming Server Islands without cold-start delays.
I also built an Astro hybrid dashboard locally, tested the project, pushed it to GitHub, and then deployed the finished application using Cloudways Managed Node.js Hosting (Velocity).
The complete project is available on my GitHub if you’d like to use it as a starting point for your own Astro application. If you run into any issues with the setup or deployment steps, feel free to leave a question in the comments.
Q. What exactly is Astro SSR used for?
Developers use Astro SSR to build dynamic backend features. It lets you check authentication cookies, query databases, or fetch live data at request time instead of rebuilding the entire site.
Q. What is the difference between Client Islands and Server Islands?
Client Islands run interactive UI code in the browser using JavaScript. Server Islands run component logic entirely on the server and just send back flat HTML chunks to the browser.
Q. Why does Astro require an SSR adapter for Server Islands?
Static file hosting cannot execute backend code. Because Server Islands trigger code on the server every time a user requests the page, you need an adapter like @astrojs/node to provide an actual server environment.
Q. Is persistent Node.js better than serverless for this?
Yes. Pages with multiple Server Islands trigger multiple parallel HTTP requests. On serverless, this causes severe cold starts. A persistent server stays active in RAM and handles the incoming island requests immediately.
Start Growing with Cloudways Today.
Our Clients Love us because we never compromise on these
Abdul Rehman
Abdul is a tech-savvy, coffee-fuelled, and creatively driven marketer who loves keeping up with the latest software updates and tech gadgets. He's also a skilled technical writer who can explain complex concepts simply for a broad audience. Abdul enjoys sharing his knowledge of the Cloud industry through user manuals, documentation, and blog posts.