Hosting multiple websites on separate servers can be expensive, making it crucial to maximize the benefits of every dollar spent on hosting. While hosting a single website on a cloud server may not make financial sense, hosting multiple websites on a single server can be a viable solution.
However, most of the available information on the subject can be complex and difficult to understand, especially for non-technical users.
Fortunately, Cloudways provides a premium managed cloud hosting solution that simplifies server management and enables effortless hosting of multiple websites on a single server.
- Benefits of Hosting Multiple Websites on One Server
- How to Host Multiple Websites on One Server – Using Cloudways Platform
- How to Access All the Applications on Cloudways
- How to Host Multiple Websites on One Server Manually – DigitalOcean Droplet
- How to Scale Your Server for High Traffic on Cloudways
- Summary
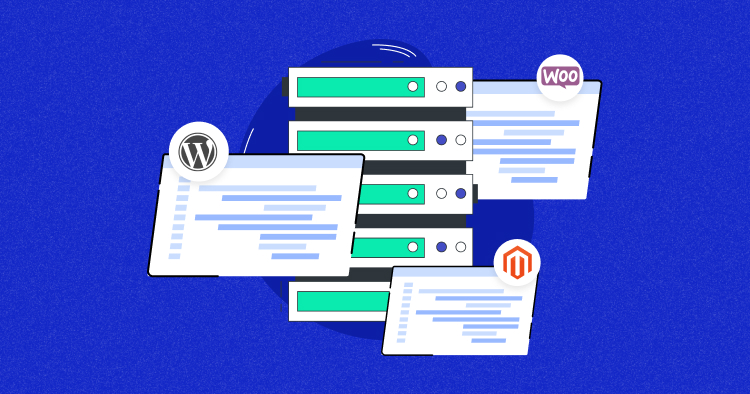
With Cloudways, users can use the cloud’s power to host multiple PHP applications, including Magento and WordPress, with WooCommerce.
In this tutorial, I will demonstrate the multiple website hosting capability of Cloudways by installing WordPress with WooCommerce and Magento on a single server. Keep in mind that server specifications are the only limitation to the number of hosted websites, but scaling is easy with just one click to accommodate changing needs.
So without any further ado, let me show you how to host multiple websites on one server.
Host Unlimited Sites for Less Than Dedicated Hosting
✓ Start at $11/month
✓ Isolated resources for each site
✓ 24/7 monitoring & easy scaling
Benefits of Hosting Multiple Websites on One Server
Hosting multiple websites on one server has several major benefits:
- Cost Efficiency: Hosting many websites on one server reduces the cost of hosting for each individual website, as the cost of maintaining the server is shared between all the websites.
- Resource Optimization: By sharing resources such as disk space, CPU, and RAM, the server can operate more efficiently and handle more requests without incurring additional hardware costs.
- Scalability: Multiple websites on one server can be easily scaled up or down as required, with additional resources allocated to individual websites as needed.
- Easy Management: Managing one server is simpler than managing multiple servers, reducing the administrative burden on IT staff and lowering the risk of errors.
- High Uptime: Hosting many websites on one server reduces the risk of downtime, as websites can be switched between servers in case of a failure.
- Flexibility: Hosting many websites on one server allows website owners to easily add or remove websites as needed, making it a flexible option for businesses of all sizes.
How to Host Multiple Websites on One Server – Using Cloudways Platform
Cloudways is an excellent choice for hosting multiple websites on a single server as it provides support for various PHP applications, making it a versatile and flexible option for website owners.
You can host popular CMS platforms like WordPress, Magento, Drupal, and Joomla, as well as e-commerce platforms like PrestaShop and OpenCart, all on a single server.
This allows you to streamline your website management processes, improve resource allocation, and reduce costs associated with maintaining multiple servers.
With Cloudways, you can easily manage all your websites from a single dashboard, making it an ideal solution for website owners looking for a simple yet powerful hosting platform.
Here are the general steps to host multiple websites on one server using Cloudways platform:
- Step # 1: Sign Up or Login for Cloudways Account
- Step # 2: Launch Server with WordPress Application
- Step # 3: Add Multiple Website on Same Server
- Step # 4: Access All the Applications on Cloudways
Step # 1: Sign Up or Login for Cloudways Account
First, sign up for a Cloudways Platform account for a 3-days-free trial (no credit card required) by completing a simple form and clicking the Start Free button. You can also sign up using your LinkedIn, GitHub, or Google account. If you have already signed up, log into your account.

Verify your email address to complete the signup process. Next, click the Launch button to launch your cloud managed server.
Step # 2: Launch Server with WordPress Application
In Cloudways, you can launch a server with a particular app. The Application can be WordPress, WooCommerce, Magento, PHP, and Laravel. To launch the server along with the application, you need to follow the steps below.
1. Enter Server & Application Details
- Choose the latest version of your application that you want to launch.
- Name your Application and Server.
- Select your Project.
2. Select the Cloud Infrastructure
- The second step is to chose the Cloud Provider.
- Cloudways is a PaaS (Platform as a Service) provider and offers the flexibility of choosing cloud infrastructure providers of your preference, including DigitalOcean, AWS, and Google Cloud.
- I chose a DigitalOcean server for this tutorial.
3. Select the Server Size
- With the DigitalOcean server, you have the option to host your application on 1GB to 192GB servers.
- I chose a 2GB Premium server, which has 2GB RAM, 50GB NVMe Disk, 2TB Bandwidth, and 1 Core Processor.
If you want to see all the servers specifications with a detailed comparison with Kinsta vs. WP Engine vs. Flywheel and want to see how much you can save on Cloudways, you can check out our Web Hosting Savings Calculator.
4. Select Server Location
- Choosing the server location is of utmost importance because it has a direct impact on the speed of your WooCommerce store and, thus, your revenue. Therefore, to decrease latency, you should choose the location that is nearest to your target audience.
- After entering the Server & Application Details, click the LAUNCH NOW button.
- Now, wait for a few minutes until the server is ready!
Note: In Cloudways, launching the server repeatedly with the application is unnecessary. Instead, you can launch the server along with an application, such as WordPress. Once the server is up and running, you can then launch multiple applications on the same server. This approach saves time and resources, and enables you to manage multiple applications efficiently on a single server.
Step # 3: Add Multiple Website on Same Server
Once you launch the server successfully, you just need to add applications.
- Click on the Applications option from the top menu bar in Cloudways Platform.
- Now, click on the Add Application button.
- Select the server from the dropdown menu in which you want to add websites.
- Click on the Add Application button.
- Now, you’ll be redirect to the next screen where you need to select the Application (WooCommerce, Magento, PHP, Laravel), add Application Name and select the Project.
- Now, click on the Add Application button.
- Now, the application adding process will start and it will take a few minutes to complete.
- To see the newly added application, click on the www option, and here you can see and access the application.
- Under the Application Management tab, you can see the Application Access tab. You can access your application from here.
To add the Magento, PHP, and Laravel applications on the same server, you just need to follow the same process.
How to Access All the Applications on Cloudways
As I mentioned before, you can access your application by clicking on the www option on a particular server. If you want to access all the applications hosted on Cloudways Platform, go to Application and here you can see all the applications.
Now, click on the application that you want to access and you’ll get access to the Application Management page from where you can access your application by using your credentials.
Are You Overpaying for Multiple Sites?
✓ Save up to 60% vs. Kinsta, WP Engine, and Flywheel
✓ Premium performance at budget-friendly pricing
How to Scale Your Server for High Traffic on Cloudways
Scaling your server for high traffic on Cloudways using Autonomous Scaling is a straightforward process. Cloudways offers an intuitive platform that allows you to manage your server resources efficiently:
Step # 1: Login to your Cloudways platform and go to Servers. Click on the server that you want to scale.
Step # 2: Under the Server Management section, click on the vertical scaling tab.
Step # 3: I have a 4GB server on DigitalOcean, now I’m scaling it to 8GB. To do that, I just need to select the server size on which I want to scale, and click on the Scale Now button.
Step # 4: Read out the scaling warning carefully and click on the Proceed button.
Step # 5: Scaling the server will take a few minutes.
Finally, your server is scaled now. You can also scale down your server when you feel that there is no need for the higher server specs to save cost.
There are some points that you can also consider to improve your server’s performance further.
Evaluate your server’s current performance: Use Cloudways’ monitoring tools to determine how your server is performing under normal traffic conditions. This will help you identify any bottlenecks or areas that need improvement.
Choose the appropriate scaling method: Cloudways offers two scaling methods: vertical scaling and horizontal scaling. Vertical scaling involves increasing the size of your server by adding more RAM, CPU, or storage. Horizontal scaling involves adding more servers to your cluster to handle the increased traffic. Choose the method that best suits your needs.
Optimize your application: Optimize your website or application to reduce server load and improve performance. This can include using caching, optimizing images, and minimizing code.
Use a Content Delivery Network (CDN): A content delivery network or CDN can help reduce server load by caching and delivering static content from servers located closer to your users. Cloudways offers integration with popular CDNs like Cloudflare.
How to Host Multiple Websites on One Server Manually – DigitalOcean Droplet
Heads Up!
Creating and launching a digitalOcean droplet is a lengthy process. If you’re not tech savvy, this process might be more complicated than launching an app on DigitalOcean with Cloudways that we shared with you earlier.
Hosting multiple websites on a single server can also be done manually, but it requires technical knowledge. However, Cloudways offers a more straightforward approach with its one-click installation process.
In contrast, launching a DigitalOcean Droplet requires some command-line tinkering, which can be complex for some users. If you’re still figuring out what is DigitalOcean or find the manual process of hosting web apps on it overwhelming, Cloudways can simplify everything for you. It provides a managed platform that lets you enjoy DigitalOcean’s powerful infrastructure without the technical complexity..
Anyway, here are the manual steps to launching a DigitalOcean Droplet:
Create and Launch DigitalOcean Droplet
First you need to launch the DO Droplet then we can add multiple applications. Just follow the steps below with screenshots to create and launch your first DigitalOcean droplet.
Step # 1: To create a droplet on DigitalOcean, click on Create > Droplet.
Step # 2: Choose the region for your droplet. It is recommended to select the region that is near to your target audience.
Step # 3: Next, select an image. For this tutorial, I will go with Debian 10, which is the Linux OS flavor you will install on your server.
Step # 4: Next you need to choose the Droplet Type. I’ll go with the Basic one.
Step # 5: Now select the CPU option for your DO Droplet. I’m selecting the Regular option.
Step # 6: Under the Authentication section, click on the SSH key. I’m creating an unused SSH key. For that, you will simply be required to launch the PuTTY generator. If you don’t have a PuTTY generator, make sure to download it and install it.
- Open the PuTTYgen, click on the Generate button.
- A key will generate by the PuTTYgen
- Now, save the key as a private key in your system. Copy the key from the PuTTYgen as shown in the image below.
Step # 7: Return to your DO server setup screen and press New SSH Key.
Step # 8: Now, paste the text to the SSH key content segment, provide it a title (I selected for Multiple Websites), and press Include SSH Key.
Step # 9: Next, choose a hostname for your droplet. I’m naming it multiple-websites.
- Now, leave all the sections because the server setup is completed and all you need to do is Create Droplet.
- It will take a few minutes to create your new droplet. Once the droplet is created successfully, you can see it on the DigitalOcean screen.
Deploy the LEMP STACK
At this stage, your droplet has been created successfully. Now you need to deploy the LEMP STACK on your droplet. For this, you need to follow the below steps:
Step # 1: To deploy the LEMP stack. First, you need to open PuTTY and paste your droplet server IP.
Step # 2: Next, navigate to Connection > SSH > Auth, browse, and select the PPK file (private key file) that you recently saved in your system from PuTTYgen.
Step # 3: Now click on the Open button to access your DO server droplet and type root.
Step # 4: Change directory and access the root file. Run the following command.
cd ..
Step # 5: Update the package lists, run the following command.
apt update
Step # 6: Next, you need to install the NGINX web server. To do this, run the following command.
apt install nginx
Step # 7: You will be asked for the disk space usage. Type Y to continue the process.
Step # 8: To install the MariaDB database, type the following command.
apt install mariadb-server
Step # 9: You will be again asked for the disk space usage. Type Y to continue the process.
Step # 10: To secure your MariaDB installation, you need to run the following command.
mysql_secure_installation
Note: You’ll be asked for the root password, you just need to hit enter, because By default, there’s no root password.
Step # 11: Enter Y to complete the security process for MariaDB.
Step # 12: To install PHP FPM and MySQL, type the following command.
apt install php-fpm php-mysql
Step # 13: To edit the default file, run the following command.
nano /etc/nginx/sites-available/default
Step # 14: Add index.php in the below that says # Add index.php to the list if you are using PHP.
Step # 15: Uncomment the four lines by removing “#” as shown in the following image, and save the file by pressing “ctrl + x.”
Step # 16: To edit the php.ini file, type the following command.
nano /etc/php/7.3/fpm/php.ini
Step # 17: Then, press “ctrl+w” and paste “cgi.fix_pathinfo=” with a right click. It will search the line containing cgi.fix.
Step # 18: Now, uncomment that line (by removing “;”) and set value “0” like this: cgi.fix_pathinfo= 0;. Press ctrl+x to save the changes and exit.
Step # 19: I’m creating a PHP file named multiple-websites.php to check whether the configuration is running or not.
Step # 20: Paste the following code into the PHP file and save the changes.
<?php
$title="Multiple Websites on Same Server";
for ($i=1; $i<=5; $i++)
{
echo "Article title: ".$title."
";
}
?>
Step # 21: Before running the newly created PHP file in the browser, you need to restart NGINX by using the following commands.
systemctl restart nginx
![]()
Step # 22: Now go to the browser and run your PHP file. To do that, first, copy the DO droplet IP from DO platform and then put a forward slash (/) after it and your PHP file name like so: 157.245.95.5/multiple-websites.php
That’s it! You’ve successfully installed the LEMP stack if the newly created PHP file starts executing.
Install Multiple Websites on One Server – DO Droplet
Once you have successfully created a DO droplet and installed the LEMP stack, now it’s time to install multiple websites on the same server. How can you do that? Let’s start the process.
Install WordPress Application
To install the WordPress application on your DigitalOcean droplet, you need to follow the steps below.
Step # 1: To install the important PHP modules and packages, run the following command.
apt install php7.3-common php7.3-mbstring php7.3-xmlrpc php7.3-soap php7.3-gd php7.3-xml php7.3-intl php7.3-ldap php7.3-zip php7.3-curl
Step # 2: To access the DB root, run the following command and use the password we previously set up during the MariaDB installation.
mysql -u root -p
Step # 3: Now, Create a new database by running the following command.
CREATE DATABASE CWdb;
Step # 4: Next step is to grant full control and permission to a user. You can do it simply by using the following command.
GRANT ALL PRIVILEGES on CWdb.* TO 'danishuser'@'localhost' IDENTIFIED BY 'password123';
Step # 5: Now you need to run the following command of flush privileges to effect the changes without restarting the DB service.
FLUSH PRIVILEGES;
Step # 6: Type the exit command to exit.
exit
Step # 7: Now the next step is to go to the HTML folder. To change the directory, run the following command.
cd /var/www/html/
Step # 8: Now, you are in the HTML folder. It’s time to download the latest WordPress version. For this, run the following command.
wget https://wordpress.org/latest.tar.gz
Step # 9: Now, extract the archive file of WordPress. Also, run the command and extract it.
tar xzvf latest.tar.gz
Step # 10: To assign the ownership, run the following command.
chown -R www-data:www-data /var/www/html/wordpress/
Step # 11: Now set the file permission.
chmod 755 -R /var/www/html/wordpress/
Step # 12: Now, restart the NGINX by running the following command.
systemctl restart nginx
Step # 13: Now it’s time to go browse and continue the WordPress installation. Browse your IP address with the WordPress folder where you installed the WordPress like this: yourdodropletIP/wordpress.
Step # 14: Choose the language and continue the installation process. You need to provide some information i.e., Database Name, Username, Password, and Database Host. Once you’re done, click on the Let’s go! button.
Step # 15: Change the value of the Database Name, Username, and Password (that we have previously created) and click Submit to connect the database with the WP application.
Step # 16: Now click on Run the installation button.
Step # 17: After running the installation, you will see the basic WordPress setup screen where you must enter the information about the website you are creating. Once done, click on Install WordPress button.
Hurray! WordPress application has been successfully installed on your DigitalOcean droplet manually. You can now login to your WordPress website by using your credentials.
Turbocharge Load Times by 70%
✓ Free Cloudflare Enterprise CDN pre-configured
✓ Ace Core Web Vitals effortlessly
Install the Cockpit CMS Application
To install the Cockpit CMS application on your DigitalOcean droplet, you need to follow the steps below .
Step # 1: To install a Cockpit CMS application, you need to run the following commands.
apt install php7.3-common php7.3-mbstring php7.3-xmlrpc php7.3-soap php7.3-gd php7.3-xml php7.3-intl php7.3-ldap php7.3-zip php7.3-curl
Step # 2: To access the DB root, run the following command and use the password we previously set up during the MariaDB installation.
mysql -u root -p
Step # 3: Now create your database for the Cockpit CMS application by running the following command. You can name your database whatever you prefer. I have named it CWCCMS.
CREATE DATABASE CWCCMS;
Step # 4: Grants full control and permission to a user.
GRANT ALL PRIVILEGES on CWCCMS.* TO 'danishusercockpitcms'@'localhost' IDENTIFIED BY 'password123';
Step # 5: Now you need to run the following command of flush privileges to effect the changes without restarting the DB service.
FLUSH PRIVILEGES;
Step # 6: Type the exit command to exit.
exit
Step # 7: Now the next step is to go to the HTML folder. To change the directory, run the following command.
cd /var/www/html/
Step # 8: Download the latest Cockpit CMS version.
wget https://github.com/agentejo/cockpit/archive/refs/heads/next.zip
Step # 9: Now, unzip the download file with this command.
unzip next.zip
If you face any any issue while uzip the file, make sure your linux has unzip package. In some Linux distributions, the unzip package is not installed by default. Run the following command to install the unzip package.
sudo apt install unzip
Step # 10: At this stage, the Cockpit CMS files are successfully extracted. Now, assign the ownership.
chown -R www-data:www-data /var/www/html/cockpit-next/
Now set the file permissions.
chmod 755 -R /var/www/html/cockpit-next/
Before running the Cockpit CMS installation process in the browser, navigate to the root directory using cd / and restart NGINX again by using the following commands.
systemctl restart nginx
Step # 11: To install Cockpit CMS, head to the cockpit-next/install/ file through the address bar. The installation process will take a while. After it is done, you’ll see the following screen:
Here you can see we have installed two different applications on the same server. It is very much possible to host multiple websites on a single server manually.
Unmatched Speed & Security for WordPress
✓ NVMe storage + auto-scaling
✓ Daily backups & malware protection
✓ 99.9% uptime SLA
Summary
Hosting multiple websites on one server is a great way to save costs and manage multiple sites efficiently. However, manually hosting multiple websites on one server can be complicated and involve running codes, as we’ve seen in this guide.
On the other hand, by using Cloudways managed web hosting for developers, you can make this process much easier without breaking your bank. With Cloudways, you can host multiple websites on one server in hassle-free manner – even if you’re not tech savvy.
Frequently Asked Questions
Q: Can we host multiple websites on one server?
Yes, you can host multiple websites on one server. It can be done on Cloudways Platform with one-click, or you can manually host multiple sites using Virtual Servers.
Q: How many websites can you host on one server?
On Cloudways hosting, you can launch as many websites as you like. There is no cap on this. But other hosting providers limit their users, and the number of websites is based on their hosting plan. Get to know more about Siteground competitors.
Q: Can you host multiple websites from the same IP?
If you want to host multiple websites on one server, it is possible, as the server’s IP is dedicated to it. This means that you can configure the server to serve different domains or subdomains with different content, a practice known as virtual hosting.
Q: Which hosting is best for multiple websites?
Cloudways is an excellent hosting provider for multiple websites, as it offers hassle-free cloud-based hosting solutions that are easy to manage and scale. With Cloudways, you can host multiple websites on a single server, ensuring cost-effectiveness and efficiency. Plus, our intuitive user interface and 24/7 support make managing your websites a breeze.
Q: Is it very expensive to host multiple websites simultaneously on a server?
Hosting multiple websites on a server is generally not very expensive. In fact, it can be a cost-effective solution for individuals or businesses who want to host multiple websites without the expense of separate servers for each site.
Q: How many websites can I host on a dedicated server?
A: On Cloudways, you can launch as many websites as your server can handle. This means you don’t pay per website; you just pay for a server, and you can host as many clients on it as you want, and even resell hosting if you have to.
Q: How do I host multiple domains from one server?
To host multiple domains from one server on Cloudways, follow these steps:
- Step # 1: Sign Up or Login for Cloudways Account
- Step # 2: Launch Server with WordPress Application
- Step # 3: Add Multiple Website on Same Server
- Step # 4: Access All the Applications on Cloudways
Danish Naseer
Danish Naseer is a WordPress Community Manager at Cloudways. He is passionate about designing, developing, and engaging with people to help them. He also actively participates in the community to share his knowledge. Besides that, he loves to watch documentaries, traveling and spending time with family. You can contact him at [email protected]