Key Takeaways
- IP whitelisting secures your server by only allowing known and trusted users access to sensitive backend areas.
- You can easily set up whitelist access rules manually in your .htaccess file, through a WordPress plugin, or via your host’s dashboard.
- If your internet provider gives you a dynamic IP address, you will need to update your whitelist rules whenever your connection resets.
Getting locked out of a server or WordPress admin dashboard is a situation a lot of website owners face, especially when their host has strict brute-force protections in place.
When a firewall detects multiple failed login attempts or unusual activity, it blocks the IP address entirely to secure the application.
But there are situations where a website owner has to provide an internal team member, or a third-party developer, uninterrupted access to a server without triggering the security protocols in place.
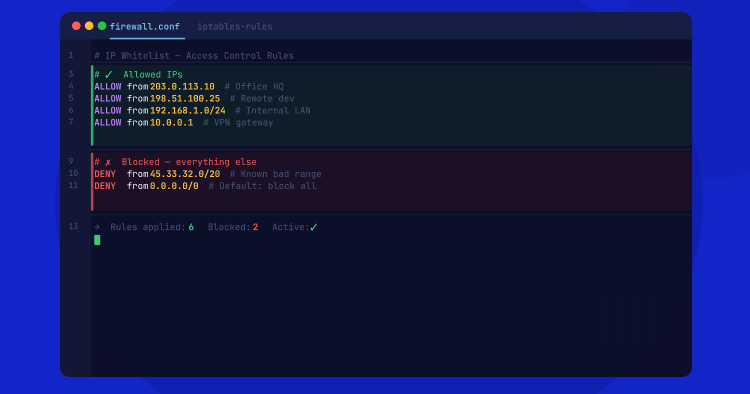
If you are wondering exactly what is whitelisting an IP address, it is the process of granting a specific IP address trusted permission to access a server or application. While firewalls and blacklists are designed to keep malicious traffic out, a whitelist ensures trusted traffic is always let in.
In this guide, I will show you exactly how to whitelist IP addresses manually, through WordPress security plugins, and directly within the Cloudways dashboard.
Why Whitelist an IP Address?
IP whitelisting allows you precise control who can access your server or application. Instead of blocking every malicious bot on the internet, whitelisting allows you to lock down access and only permit known, trusted users.
To understand this better, here are some scenarios where whitelisting an IP address is necessary:
- Securing Admin Dashboards: Restricting access to backend login pages like wp-admin or custom admin portals to only your team’s IP addresses, effectively blocks unauthorized login attempts before they even reach the application layer.
- Preventing Accidental Lockouts: Aggressive brute-force protection can sometimes invoke false positives. Whitelisting ensures that your developers or team members don’t get temporarily blocked from accessing the server while working.
- Protecting Staging Environments: When developing a new website, it’s important to keep it hidden from visitors and search engines until it’s ready. Restricting access to specific IP addresses is a simple way to limit access to authorized users while the site is still in development.
- Remote Database Access: Leaving a database port that’s open to the public is a critical security risk. Whitelisting makes sure that only authorized administrators or external applications can establish a direct database connection.
- Securing SSH and SFTP: Direct server access should always be restricted. Whitelisting specific IPs that require SSH or SFTP access can prevent unauthorized network scans and connection attempts at the firewall level.
Lock Down Your Website with Advanced Managed Security.
Protect your applications with Cloudways’ built-in firewalls and automated threat defense.
Method 1: Whitelisting an IP Address via .htaccess (Apache)
If your application runs on an Apache server, or a stack using Apache, such as a standard WordPress environment, you can manually manage IP whitelisting using the .htaccess file.
This method is useful when you want to restrict access to specific areas of your website. For example, the admin panel or a login page.
To allow only certain IP addresses and blocking everyone else, you’ll use the Require ip directive, which lets you define access controls within your web server configuration.
Here’s how to do this:
Step 1: Connect to your server using SFTP or through the file manager provided by your host. Locate the .htaccess file in your application’s root directory.

Step 2: Open the file in a text editor.
Step 3: To restrict access to the WordPress login area, for example, add the following code snippet at the top of the file, above the # BEGIN WordPress line:
<Files wp-login.php>
    Require all denied
    Require ip 192.168.1.100
    Require ip 10.0.0.5
</Files>
Note: Change the example IP addresses with the actual IPs you want to whitelist.
What this configuration will do is deny all traffic to the login file except for the IP addresses listed.
If you need to whitelist an entire network or a dynamic IP range, you can use CIDR notation (e.g., Require ip 192.168.1.0/24).
One thing I forgot to mention earlier is that you should always create a backup of your .htaccess file before applying changes. A syntax error in this file can result in a 500 Internal Server Error and take your site offline.
Method 2: Whitelisting an IP Address via the Cloudways Platform
Manually editing server files is always risky, especially if you’re not experienced with editing code. If you’re hosting your website on Cloudways, you can skip the command line and avoid editing .htaccess files altogether.
The Cloudways platform offers a built-in security interface that allows you to whitelist IP addresses for SSH/SFTP and remote database access in just a few clicks.
And because this applies changes at the server firewall level, it is incredibly secure and eliminates the risk of crashing your site with a syntax error.
Securing SSH, SFTP, and Remote Database (MySQL) Access
In Cloudways, remote access controls are managed from a single location in the platform. To configure them, follow these steps:
- Log in to your Cloudways account and access your server.
- Click on Security from the left-hand menu and select Shell Access.
- From this section, you can manage access for both SSH/SFTP and MySQL remote connections.
- Choose the option to allow access from specific IP addresses, except the ones blacklisted by the Cloudways security system.
- Then enter the IP addresses you want to whitelist and save changes.
Cloudways will update your server’s firewall rules, and make sure only trusted IPs can connect to your backend.
How to Find and Unblock an IP in Cloudways
It’s not uncommon to only think about IP whitelisting after you’re already locked out. If this happens, there’s no need to panic. Your IP address may have been blocked by our server firewall.
This security feature can automatically block those IPs that it detects of making multiple failed logins or linked to suspicious brute-force activity.
If you or a team member is locked out, here is how to find the block list in Cloudways and whitelist blocked IPs:
- Log in to your Cloudways account and access your server.
- Go to the Security tab and click on the Firewall.
- Here, you’ll see a list of blocked IP addresses. You can also search for a specific IP address that you want to whitelist.
- Once you locate the IP, click on the three dots under the Actions column and select Move to White List option.
When you explicitly whitelist an IP in the firewall section, our brute-force protection system won’t accidentally lock out you or your team in the future.
Method 3: Whitelisting an IP Address via WordPress Plugins
If you’re managing a WordPress site, you can also handle IP whitelisting directly from your WordPress admin dashboard using a security plugin.
Plugins like Wordfence, iThemes Security, and All-In-One Security include firewall and access-control features that make IP whitelisting very easy.
As an example, let me show you how you can whitelist an IP address using Wordfence, since it’s a widely used security plugin:
- Install and activate the Wordfence Security plugin.
- In your WordPress dashboard, go to Wordfence > Firewall.
- Click on the All Firewall Options tab.
- Scroll down to the Advanced Firewall Options section.
- Look for the field that says Allowlisted IP addresses that bypass all rules.
- Then enter your IP address, or multiple IPs separated by commas, and save your changes.
Once you add your IP addresses, the plugin’s security rules, rate limiting, and brute-force protections won’t accidentally block you or your team from accessing the WordPress backend.
A Quick Note on Dynamic vs. Static IP Addresses
Before whitelisting your IP address, figure out whether your ISP assigned you a static or dynamic IP address. This will affect how reliable the allowlist entry will be over time.
- Static IP: Your IP address never changes. Once you whitelist it, you are good to go.
- Dynamic IP: Your IP address changes periodically, whenever you restart your router, or every few weeks depending on your ISP.
If you are on a dynamic IP, you might find yourself suddenly locked out again weeks after whitelisting yourself.
If this happens, simply check your current public IP address. You can do this by Googling “what is my IP” and update your whitelist rules in Cloudways, your plugin, or your .htaccess file with the new address.
Final Thoughts
Now that you know how to whitelist IP addresses across different setups, you can safely give yourself, your team or third-parties, secure access to your server or application without compromising on security.
Whether you want to manage access manually using the .htaccess file, rely on a WordPress security plugin, or handle it all directly from the Cloudways dashboard, setting up an IP whitelist is a quick and easy task.
The only thing to watch out for is dynamic IP addresses. If your IP changes, remember to update your allowlist so you don’t have to deal with unexpected firewall blocks.
Q. How to get an IP whitelisted?
A. To get an IP whitelisted, first find your public IP address. You can do this by simply Googling “what is my IP.” Then, provide the exact IP address to your server administrator so they can add it to their firewall’s trusted list.
Q. What does whitelisting your IP do?
A. What whitelisting does is that it tells a server’s firewall that your specific connection is completely safe. It bypasses standard security blocks to make sure you can access administrative areas or databases without triggering an automated lockout.
Q. How do I whitelist an address?
A. You can whitelist an IP address manually by adding access rules to your site’s .htaccess file. You can use a WordPress security plugin like Wordfence, or manage it directly from your web host’s server dashboard.
Q. Is IP whitelisting safe?
A. Yes, it is one of the most effective ways to secure your server. By only allowing whitelisted IPs to access your backend, you block all unauthorized traffic. Just remember to never whitelist a public Wi-Fi network.
Abdul Rehman
Abdul is a tech-savvy, coffee-fueled, and creatively driven marketer who loves keeping up with the latest software updates and tech gadgets. He's also a skilled technical writer who can explain complex concepts simply for a broad audience. Abdul enjoys sharing his knowledge of the Cloud industry through user manuals, documentation, and blog posts.