Key Takeaways
- Next.js data fetching inside Server Components delivers great performance, but you must manually opt-in to caching starting with version 15.
- For continuous background updates or dynamic client-side interactions, using tools like SWR simplifies your code and prevents messy state management.
- Next.js automatically deduplicates network requests and manages UI loading states through built-in routing files to keep your codebase clean.
Data fetching in standard React applications is pretty straightforward. By that I mean: you make an API call inside a component and render the result.
But Next.js handles things differently.
What this means is that instead of waiting for the page to load in the browser to fetch your data, you now make API calls directly on the server before the webpage is sent to the user.
In this guide, I’ll cover how data fetching works in Next.js. I’ll talk about the difference between server and client side fetching, different methods you’d use like the native fetch API, SWR, and Axios, and cover the best practices.
Oh and I’ll also cover a mini project so you can see how data fetching works in action.
What is Data Fetching in Next.js?
Data fetching is pretty self-explanatory. It is the process of getting data from an external source, for example, a database or a REST API, and displaying it on your own website.
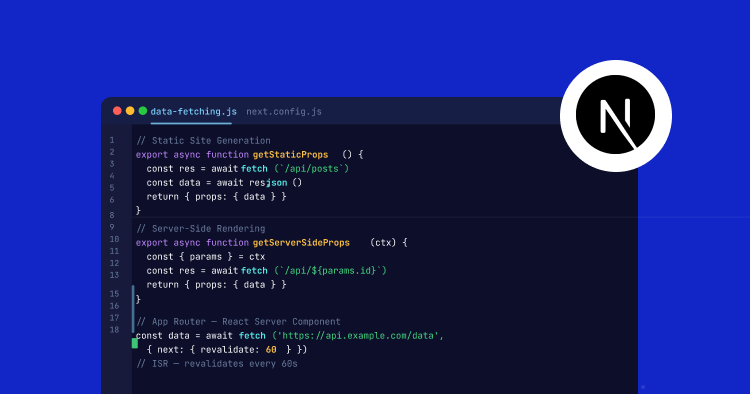
If you used Next.js a few years ago, you might remember using functions like getServerSideProps or getStaticProps to pull your data. Next.js doesn’t use them anymore.
Now it uses App Router and everything is built around React Server Components. So…instead of learning a bunch of Next-specific functions to get your data, you can just use standard async JavaScript.
By that I mean you can call the regular web fetch API inside your server components and let Next.js do the heavy lifting.
Server-Side vs. Client-Side Fetching: Which Should You Use?
When choosing between server-side and client-side fetching, my advice would be to always start with the server.
I say this because, by default, every component in Next.js is a Server Component anyway. And frankly, this is the approach you should stick to most of the time.
Why?
For one, it is better for SEO. Search engines are able read the fully rendered HTML. Also, let’s not forget about security. Your database passwords and API keys stay hidden on the server and never show up in the user’s browser.
And lastly, pages load faster since you are sending way less JavaScript to the client.
But what about Client Components?
Well, you just need them sometimes. For example, when building a highly interactive page or when you need to use browser-specific tools like local storage, then you have to use the client. And using it is as simple as just dropping ‘use client’ at the top of your component file.
To make it even simpler to understand, you would typically use client-side fetching for things like a live chat, a dashboard where the data has to update every second.
Fast and Scalable PHP Hosting for Custom REST APIs
Ensure your Next.js app fetches data without delay. Cloudways provides dedicated resources and advanced caching for highly responsive backend APIs.
3 Ways to Fetch Data in Next.js
Let’s now look at a few ways you’d actually pull data into your app. Depending on what you’re building, you’ll probably use one of the three approaches I’ll cover below.
Method 1: The Native fetch API (Server Side)
If you are using App Router, the most sensible approach is to use the native fetch API inside an async Server Component.
The nice thing about this is that Next.js basically took the standard web fetch API and added caching controls to it.
One thing to note here is: as of Next.js 15, fetch requests do not cache by default anymore, unlike previous versions. Now it pulls fresh data on every single request.
You can still cache though. For example, if you have static data and want to cache a request to avoid running it on every page load, you just pass a force-cache option like this:
const res = await fetch('https://api.example.com/data', {
  cache: 'force-cache'
});
And if you want that data to update frequently on its own like every few minutes, you can easily swap out force-cache for a revalidation timer. It is super flexible and built right in.
Method 2: Client-Side Fetching with SWR
Even though server fetching is standard now, you’ll still need to fetch data on the client side sometimes. I explained this earlier as well. A good example of client side fetching is a live dashboard that needs to refresh constantly without reloading the page.
Instead of writing a somewhat complicated useEffect hook to handle client side fetching, the easier approach is to use SWR (Stale-While-Revalidate). It is a lightweight library built by Vercel, which can handle caching and loading states automatically.
Here is a quick example of how you would use it inside a Client Component:
'use client';
import useSWR from 'swr';
const fetcher = (url: string) => fetch(url).then(res => res.json());
export default function Dashboard() {
  const { data, error, isLoading } = useSWR('https://api.example.com/stats', fetcher);
  if (error) return <div>Error loading data</div>;
  if (isLoading) return <div>Loading...</div>;
  return <div>Active Users: {data.users}</div>;
}
Notice how I added ‘use client’ at the very top of my component file. Did this because SWR strictly relies on React hooks, and hooks only work on the client side.
Method 3: Fetching Data Using Axios
If you want to use an alternative to the standard fetch API, Axios is another option. Many developers just prefer it because they are already comfortable using it in their older React projects.
The biggest benefit of Axios in my opinion is that it automatically parses JSON data for you. It also handles error responses in a cleaner way than the native fetch API.
Also, Axios can be used on either the server side or the client side, making it versatile. Here is how you’d use it inside an async Server Component:
import axios from 'axios';
interface Post {
  id: number;
  title: string;
}
export default async function PostsPage() {
  // Axios automatically throws an error if the request fails
  const res = await axios.get<Post[]>('https://api.example.com/posts');
  const posts = res.data;
  return (
    <div>
      {posts.map(post => (
        <p key={post.id}>{post.title}</p>
      ))}
    </div>
  );
}
Quick note: because Axios is a third-party package, keep in mind that you’ll need to run npm install axios before you can actually use it in your code.
Next.js Data Fetching Best Practices
Before I cover the mini project, let me walk you through a few best practices. Going over these will save you a lot of headaches and make your app run significantly faster without issues.
1. Fetch data exactly where you need it
In older React apps, you’d fetch data at the top level and pass it down through props. You don’t need to do that anymore. Instead, just fetch the data right inside the component that needs it.
Next.js automatically deduplicates your requests. This means if you call the same API in three different places, it still only makes one actual network request.
2. Fetch in parallel to avoid waterfalls
If you have two API calls that don’t depend on each other, you don’t have to wait for the first one to finish before starting the second. Instead of writing await calls back-to-back, you can just use Promise.all to fire both calls at the exact same time. This significantly speeds up your page load times.
3. Take advantage of loading.tsx and error.tsx
Next.js has a very clean way of handling loading and error states. So instead of manually managing them, you can easily add a loading.tsx or error.tsx file to your route folder.
Next.js can automatically detect these files and display a loading screen while fetching data, and safely catch any errors if the API fails.
I’ll show you how to use these files in the mini project I’ll cover next.
Mini Project: How to Fetch Data from a REST API in Next.js
To show you guys how the next js data fetching works when you actually use it, I’ll build a mini project as an example. I’m going to keep it simple and build a “Latest Posts” page that is going to pull the latest posts from a public REST API.
For this project, I’m going to use an App Router to fetch the data. I’ll also add a temporary loading screen that’ll popup when the data is being retrieved.
For my setup, since I have IT restrictions on my work laptop, I’ll be using a standalone Node.js binary.
And to run everything locally, I’ll use:
- Command Prompt (CMD)
- VS Code
- My local Node folder
Step 1: Setting Up the Next.js Environment
First, I’ll create the basic structure of my Next.js app. Since I have the standalone binary version, I’ll tell Command Prompt where the Node folder is on my laptop.
To tell this CMD where my Node tools are, I’ll run this command:
set PATH=%PATH%;C:\Users\abdulrehman\Downloads\node-v24.15.0-win-x64\node-v24.15.0-win-x64
This command will tell CMD the path where I unzipped my Node folder.
To check quickly if everything is working, I’ll run these two commands one after the other:
node -v
npm -v
Since I can see the version numbers of both Node and npm, everything is good so far.

Now I’m ready to run the standard Next.js commands. With that, I’ll create my project by running:
npx create-next-app@latest my-blog-project
Command Prompt will now ask me a few setup preferences. To keep things simple, I’ll choose Yes for TypeScript, ESLint, Tailwind CSS, and the App Router.
Once the installation process finishes, a new folder named my-blog-project containing all the necessary files will be created.
Step 2: Creating the Route and Fetch Function
I’ll now open the newly created my-blog-project folder in VS Code.
Now, I’ll need a page to display the posts I’ll pull. To create the page which can be accessible locally at: localhost:3000/posts, I’ll go to my app folder and create a new folder called posts.
Then inside the folder, I’ll create a file called page.tsx. This is the file that contains the user interface.
Inside page.tsx, I’ll write a function to handle all the REST API calls. I’ll use the web fetch API to pull data from this source for this tutorial: https://jsonplaceholder.typicode.com/posts.
The source I mentioned is a free publicly available service called JSONPlaceholder. As the name suggests, it provides dummy data that developers can use to test their applications without having to use a real database.
Here is the code I’ll add to my page.tsx file:
// Define the shape of the data I expect from the API
type Post = {
  id: number;
  title: string;
  body: string;
};
// My asynchronous fetch function
async function getPosts() {
  const response = await fetch('https://jsonplaceholder.typicode.com/posts', {
    // Re-fetch the data every hour (3600 seconds)
    next: { revalidate: 3600 }
  });
  if (!response.ok) {
    throw new Error('Failed to fetch posts');
  }
  return response.json();
}
Now that my fetching logic is added to the file, next I’ll build the UI that will call my fetch function to display the pulled data.
Step 3: Building the Server Component
Now I’m going to build the logic to display the posts that’ll get pulled, on the page I created earlier.
For this, I’ll use the getPosts() function to fetch the data. Then I’m going to use the map() function to loop through the posts. And finally display each post in a card styled using Tailwind CSS.
This is the getPosts() function code I’ll add to my page.tsx file, below the fetch function:
export default async function PostsPage() {
  // Call the fetch function and wait for the data
  const posts: Post[] = await getPosts();
  return (
    <main className="p-10 max-w-4xl mx-auto">
      <h1 className="text-3xl font-bold mb-6">Latest Posts</h1>
      <div className="grid grid-cols-1 md:grid-cols-2 gap-6">
        {/* Loop through the first 6 posts for display */}
        {posts.slice(0, 6).map((post) => (
          <div key={post.id} className="border p-6 rounded-lg shadow-sm">
            <h2 className="text-xl font-semibold capitalize mb-2">{post.title}</h2>
            <p className="text-gray-600">{post.body}</p>
          </div>
        ))}
      </div>
    </main>
  );
}
At this point, my page is complete and should display posts correctly. However, in case the API takes longer than usual to respond, my users won’t see anything while the data is being loaded. To improve the user experience, I’ll add a loading state next.
Step 4: Adding an Automatic Loading State
Next.js makes it easy to handle loading states using a special file convention, so I don’t have to deal with complex React states.
To add the loading state, inside my app/posts folder, I’m going to create a new file called loading.tsx.
What this is going to do is allow Next.js to detect my loading.tsx file and display its contents while the PostsPage component is waiting for the REST API call to finish.
I’ll add this code to the loading.tsx file to display a simple message that says “Fetching posts…” while the data gets pulled:
export default function Loading() {
  return (
    <div className="p-10 max-w-4xl mx-auto">
      <h1 className="text-3xl font-bold mb-6">Latest Posts</h1>
      <div className="text-lg text-blue-600 font-semibold animate-pulse">
        Fetching posts from the API...
      </div>
    </div>
  );
}
At this stage, everything is set up. I have a function to fetch posts, a component to render them, and a temporary loading message in place for improved user experience.
Now the only thing I need to do is start the local development server to test what I’ve built.
Step 5: Running and Testing the Application
Okay…time to test. I’ll go back to the CMD and move to my project folder. To do this, I’ll run cd my-blog-project.
Quick note: Since I already set up my PATH variable earlier in Step 1, the command prompt window already knows where my Node tools are.
So…now I can just start up the development server by running:
npm run dev
Once the server starts, I’ll open this URL in my browser: http://localhost:3000/posts.
And if everything worked properly, when the page loads, I should see a grid of the six latest posts fetched directly from the REST API.
And as you can see in the screenshot below, it works.
To quickly summarize how everything is working: Next.js fetched the data using the REST API, dropped it into the Tailwind-designed cards, and handed the fully built HTML to my browser.
I’ve pushed this working project to my GitHub, so if anyone wants to reuse my project, feel free to clone it and reuse the code.
Wrapping Up
Data fetching in Next.js can feel a bit different if you’re used to working with traditional React apps. That said, it is very easy to work with once you get the hang of it.
For the most part, using the native fetch API inside Server Components will give you the best performance. But for some use cases, you’d need to use SWR for client-side updates, or Axios if that’s what you’re used to using.
Once your Next.js app is built and fetching data without any issues, the last thing you’d want is a slow server ruining all that performance. To avoid that, when you are ready to push your app to production, choose Cloudways.
Our dedicated cloud servers provide top-tier compute resources and optimized caching layers required to run Next.js Server Components and API routes flawlessly.
Q1. Can I still cache fetch requests in Next.js 15?
A. Yes, but it’s not default anymore. If you want to implement caching, you’d have to manually add the cache: ‘force-cache’ option to your fetch call if you want specific data to stick around.
Q2. Can I use the native fetch API inside a Client Component?
A. You can, but it is better to use a tool like SWR on the client side. I say this because SWR handles loading states and background updates automatically, saving you from writing useEffect hooks.
Q3. Is it bad to use Axios instead of fetch in Next.js?
A. Not at all. In fact, a lot of developers still prefer Axios because it automatically parses JSON and handles errors cleanly. Also, it works perfectly fine on both the server and the client side.
Q4. Why did Next.js stop caching fetch by default?
A. They changed this in Next.js 15 because a lot of developers were getting confused by stale data showing up. Loading fresh data on every request is just much more predictable.
Q5. Do I actually need loading.tsx if I have my own loading states?
A. No, you don’t strictly need it, but it helps because it makes your code much cleaner. It allows Next.js to handle the UI rendering automatically while your Server Components pull in data. This means you write a lot less code ultimately.
Abdul Rehman
Abdul is a tech-savvy, coffee-fueled, and creatively driven marketer who loves keeping up with the latest software updates and tech gadgets. He's also a skilled technical writer who can explain complex concepts simply for a broad audience. Abdul enjoys sharing his knowledge of the Cloud industry through user manuals, documentation, and blog posts.