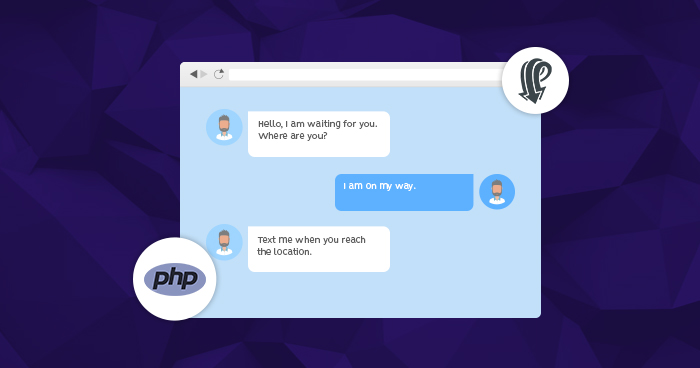
Almost every developer has created a chat application early in the career. Oftentimes, this app is deployed on a certain hosting for PHP & is used by friends and family to chat with the developer.
However, chat applications have now progressed way beyond the student project stage. Many businesses use a chat app to communicate in real-time with customers and other stakeholders.
Keeping the importance of PHP live chat applications in business (and the fun of developing these apps), I decided to develop a chat app based on Pusher. This app works in real-time and ensures almost instant communication among the users.
Prerequisites and the Process
The Pusher based PHP live chat app has the following prerequisites and development steps:
- Setup a Pusher account & get the API keys.
- Install Pusher & jQuery
- Add the Code
- Test the App in several browsers
Note: If you first want to see a quick demo of the chat app, scroll down to the end of this article.
Stop Wasting Time on Servers
Cloudways handle server management for you so you can focus on creating great apps and keeping your clients happy.
Setup Pusher Account & Get API Keys
A pusher is a popular option for adding real-time functionality to applications. To use it, sign up for an account through a GitHub or a Gmail account.
Next, create an application and select the following option for setting up the application. For the cluster option, select the closest location to your target audience.

Now click the Create App button at the bottom of the screen. Your application will be ready in a moment and you could see demo code examples. Here you can also create API Credentials for use in the PHP application.

You can also create new credentials if you want to remove the old ones. You also have to access a console where you could see the application stats, debug the PHP app, and check out Pusher error logs.
Install Pusher & jQuery
Fortunately, Pusher already has a built-in PHP library for interacting with it’s HTTP API. The library was created by Kevin, a software engineer at Pusher. You can download or clone it from Github. However, I believe the Composer is the right way to installing the library.
Login to your Cloudways accounts and launch the SSH terminal. Net, go to the application’s public_html folder and run the following command:
$ composer require pusher/pusher-php-server
You might also like: How To Host PHP Websites On Amazon AWS Cloud
This command will install the HTTP API library and allows you to use the Pusher’s HTTP functions in the application.
Related: Adding Push Notification in PHP
Introduction to Pusher Channels
Pusher introduces channels to work in real-time throughout the application in all devices. Pusher channels provide real-time communication between different devices, apps, and servers. The main purpose of their usage is to update data synchronously without any lag for notifications, chatting, real-time updates in gaming, and scoreboard applications.
You can take a popular example of bitcoin. During the recent Bitcoin surge, its value fluctuated constantly, just like the “typing” status on WhatsApp, despite occasional disruptions like Whatsapp down. When its value updates, it floats throughout the system and web pages automatically. When using WhatsApp you can see your friends typing status like “typing”, which is also possible using pusher channels.
Channels work on every device and browsers. You can have libraries for different languages, device operating systems like ios, android, etc. Pusher channels work on a subscription model which will be demonstrated later in this chat application. You need to subscribe to any of the channels and all the subscribers will get the messages
According to Pusher, It provides three types of channels:
Public channels: can be subscribed by anyone who knows its name.
Private channels: should have a private- prefix. They introduce a mechanism that lets your server control access to the data you are broadcasting.
Presence channels: should have a presence- prefix and are an extension of private channels. They allow you to ‘register’ user information on subscription, and let other members of the channel know who’s online.
If you have subscribed to any of the created channels, you can easily access the channel by its name using pusher.channel function:
var channel = pusher.channel(channelName);
You can also subscribe to any of the available channels like this:
var channel = pusher.subscribe(channelName);
You can see the example code later in my chat application.
What are Events in Pusher
According to the Pusher statement:
“Events are the primary method of packaging messages in the Channels system. They form the basis of all communication.”
You can easily create custom events with whatever name you like and bind them to channels to route data to your apps and devices. But remember they can’t be used as a filter like channels.
Events could be bind on channels so that you can get the notifications and other data only for that specified channel. Let’s see an example of event binding:
channel.bind('my_event', function(data) {

//do something here

});
You can pass arguments an event name and a callback function which is triggered whenever the event itself triggers. You can also bind events regardless of channels and listen to different events subscribed to multiple channels using pusher.bind() method. This also works similar to the above having the same arguments:
pusher.bind(eventName, callback);
Let’s see an extended example of this:
var pusher = new Pusher('APP_KEY');

var channel1 = pusher.subscribe('my-channel-1');

var channel2 = pusher.subscribe('my-channel-2');

var channel3 = pusher.subscribe('my-channel-3');

var eventName = 'new-comment';

var callback = function(data) {

   // add comment into page

 };

// listen for 'new-comment' event on channel 1, 2 and 3

pusher.bind(eventName, callback);
You can see above that we have multiple channels but triggered the same event on all of them. So lastly, you can listen to the triggered event easily regardless of channel binding.
Similarly, you can unbind to an event like this:
channel.unbind(eventName, callback);
Rate Limit of Events
Since events can send and receive multiple bytes of data per second but the good practice is to publish no more than 10 messages per second per client (connection). Any events triggered above this rate limit will be rejected by the API.
So if several clients sending messages at the same time increases, it will be a multiplier of connection and will cause serious lag. While some of the modern browsers can handle that request/sec, but still you will need to follow the best practice.
So, now you have all the necessary details regarding channels, events, and connections. We can now move to the coding part of this article and start building a real-time chat application.
Add Code to the App
The code of this application is super easy because Pusher offers very simple logic(s).
Start by creating the index.php file. I will use Bootstrap to create a simple form with custom CSS. Next, I’ll add jQuery functions with AJAX to send get the response from the PHP file. To help you understand the code better, I have added comments throughout the code. The flow of the code will be:
- Add scripts and links to the header
- Create a basic Bootstrap form
- Enable Pusher by passing the API key
- Enter a unique channel for subscription and event binding
- Create AJAX call to send and receive data to message.php file
- Trigger Enter key click event to send a message.
Next, create another file named message.php which will check the received message and then return it via the Pusher API. Here is the code to include in the file:
Once you have added both files to the application, open it in the browser and move to the console in the terminal. You will see Pusher’s response with the connection state and subscribed channel.

The following screencap showed how the triggered API call will look like in the Pusher console.

Test the App in Popular Browsers
The Chat App is finally ready. The next step is to test it in different browsers to ensure a uniform level of performance across the browsers. Here is a GIF that highlights the testing process:

You can also test the live demo of the application at this URL: http://phpstack-71265-406587.cloudwaysapps.com/
Host PHP Websites with Ease [Starts at $10 Credit]
- Free Staging
- Free backup
- PHP 8.0
- Unlimited Websites

Confused in Pusher and Firebase?
Sometimes newbie developers got confused in Pusher and Firebase services. Previously I’ve also written a blog on integrating firebase with PHP which gives you a brief idea of how Firebase works as an alternative to MySql for real-time database syncing. While pusher provides a complete chatkit to kickstart your chat-based applications with a vast variety of features.
Firebase is a Database as a Service that you can manipulate to try to do Data Streaming, but that’s not it’s primary design/purpose, it’s primary purpose is the have local and remote Database that stay in sync. Whereas pusher provides channel services to subscribe/unsubscribe them and start getting messages to from this particular channel.
So you can say here there is a big difference in Pusher and Firebase which you must know about.
Shahroze Nawaz
Shahroze is a PHP Community Manager at Cloudways - A Managed PHP Hosting Platform. Besides his work life, he loves movies and travelling.


