


Key Takeaways
- A multilingual WordPress site boosts engagement, trust, and conversions by letting visitors view content in their preferred language.
- Plugins like WPML, Weglot, Polylang, and TranslatePress make setup faster and easier, handling pages, menus, and theme text automatically.
- Manual setup gives full control over translations but is time-consuming, making plugins the preferred choice for long-term maintenance.
A WordPress site in one language only reaches a small group.
You’re leaving many potential visitors behind.
Language builds connections. When people understand your content, they feel more comfortable. They stay longer and engage more.
Blogs and businesses thrive when they can connect with more people. Stick to one language, and you limit that connection.
You can add multiple languages with ease. The right tools make it simple to expand your reach.
Let’s go through the process together, step by step. We’ll focus on the essentials and make sure you avoid common mistakes along the way.
Let’s get started…
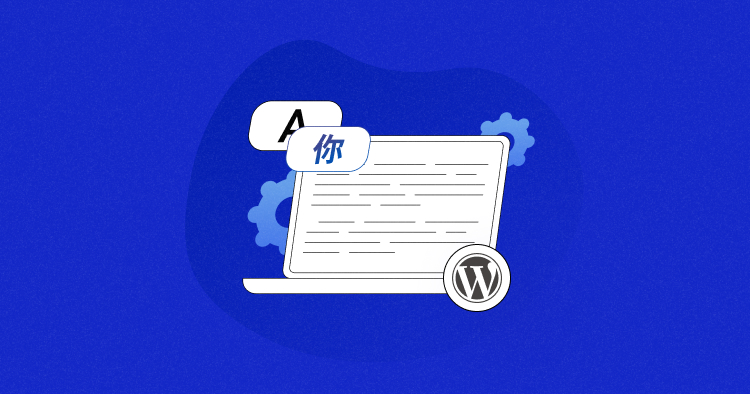
What Is a Multilingual WordPress Website
A multilingual site means your content is available in multiple languages. Visitors click a selector button. The site then shows the exact same pages, menus, and core items in the language they picked.
At a basic level, the system just copies your existing content structure. If you write a post in English, you will also build a Spanish version of that same post. Maybe a French one too. The main structure of the site stays the same. What changes is the actual written text, the direction of the layout (if needed), and the smaller pieces your theme shows. This is a solid approach for blogs, small business pages, and online portfolios.
Creators, small businesses, and global brands all use this method. It helps people truly understand your message without relying on poor quality browser translations. Modern multilingual plugins now use AI to better understand the context and tone, making the resulting translations feel much more natural and much more precise than old tools like Google Translate.
Plus, this gives you total quality control over the tone and clarity of every language version you put out.
Hosting Built for Multilingual WordPress Performance
Cloudways WordPress hosting supports multilingual sites with built in caching, and performance-ready infrastructure so your site stays fast and responsive in every language.
Who Should Use a Multilingual WordPress Site
A multilingual setup is not just for huge corporations. Many small sites get real benefits from it too. For example, even if you have a simple blogging and your audience, customers, or readers come from different countries, sticking to one single language actively holds your site back.
Here are a few use cases where a multilingual site really makes sense:
- Blogs with Readers Everywhere: If your analytics clearly show traffic arriving from several different countries, providing more languages helps those people follow your work without any friction.
- Businesses Serving International Buyers: Service details, contact forms, and product information must be totally clear. Local language versions eliminate confusion and genuinely help people trust your brand more.
- Agencies or Freelancers with Global Clients: A multilingual site makes showing off your work much easier. Clients can grasp your process and review your portfolio in their own language instantly.
- SaaS or Digital Platforms Used Internationally: User guides, onboarding steps, and pricing pages always perform better when they match the user’s native language perfectly.
- Educational or Community Sites: If your site supports learners or communities spanning more than one country, a multilingual setup ensures everyone feels included.
In simple terms, you need a multilingual site the moment your visitors do not all speak the same language. It immediately improves clarity, builds trust, and boosts overall engagement.
A multilingual website is key today. It removes language barriers and improves user experience. It also helps with SEO. However, translation alone doesn’t always guarantee that content feels natural to native speakers. Automatic translations can preserve meaning but still sound rigid, overly literal, or stylistically inconsistent across languages. This is especially noticeable on landing pages, blog posts, and SEO-focused content where tone and flow matter. To address this, many site owners choose to polish translated content for natural readability, ensuring multilingual pages feel human-written rather than machine-translated. This extra refinement step helps maintain trust, engagement, and consistency across all language versions.
How Multilingual WordPress Works Behind the Scenes
A multilingual WordPress site feels simple on the front end, but there is a bit happening underneath. Each language version of your content is stored separately. When someone picks a language, WordPress loads the matching version of that page, menu, or text.
Most setups follow one of these structures:
Separate URLs for each language
Example:
- cloudways.com
- https://www.cloudways.com/es
- https://www.cloudways.com/pt
This keeps things clean and helps search engines understand your language versions.
Language stored inside the same URL
Example:
- cloudways.com/?lang=es
This is less common but still used on smaller sites.
Beyond URLs, WordPress also handles two types of content:
Your content
Posts, pages, categories, menus, and any text you write.
Theme and plugin text
Buttons, labels, forms, and anything created by your theme or plugins.
Translation tools pull both types of text into a single place. From there, you can translate everything at once.
There is also a difference between manual and automatic translation. Manual translation gives you full control. Automatic translation helps you save time and gives you a starting point, which you can refine later.
All of this works together to show visitors a clean experience in the language they choose.
How to Make a WordPress Site Multilingual Using Plugins
In my experience, the simplest way to get a WordPress site multilingual is to use a plugin.
Here is the general process I follow:
First, choose a plugin that fits the site’s needs exactly. Some are for manual translation. This gives you full control. Others offer fast, automatic translations. This saves massive time. A few even let you translate right on the front end. You see exactly what the visitor sees.
After installation, the steps are quick. Pick the languages you want active. Set up the language switcher placement. Start translating.
My personal method: Focus on the most important pages first. The home page, the about page, key blog posts. Then I handle menus, widgets, and smaller theme text.
Below, I’ll walk you through four specific plugins I have personally used to make a WordPress site multilingual.
Note: I’ll be using the premium versions of all four WordPress multilingual plugins. So if you’ll be using their free versions, keep in mind that you’ll notice some feature limitations and UI changes.
Option#1: Use WPML to Make WordPress Multilingual
WPML is one of the most popular multilingual plugins for WordPress. It allows you to translate pages, posts, menus, and theme text, so your site can reach visitors in multiple languages without compromising layout or design.
System Requirements of WPML
To use WPML, your site needs to meet some basic requirements:
- WordPress Version: Should be running on WordPress 4.7 or higher.
- PHP Version: PHP 7.0 or above.
- Database: MySQL 5.6 or above or MariaDB 10.1 or greater.
- Memory Limit: WordPress memory limit should be at least 128MB. Though, 256MB is recommended.
Installing WPML
Start by downloading the WPML plugin from your account. In the WordPress dashboard, go to Plugins → Add New → Upload Plugin, select the WPML file, and click Install.

Now. Once installed, click Activate to enable the plugin on your site. These steps are standard for installing any plugin.
Configuring WPML
After activation, the setup wizard guides you through the initial configuration:
- Select the default language of your site.
- Add the additional languages you want to support.
- Choose how translated URLs should appear (subdirectory, subdomain, or parameters).
- Ensure WPML String Translation is enabled. This is essential for translating buttons, headings, and other text elements that are not part of posts or pages.
Once the setup is complete, the Translation Dashboard becomes the central place to manage all translations.
Translating Content
WPML allows you to translate pages, posts, menus, and custom post types in a few simple steps:
- Go to WPML → Translation Management and select the content that needs translation.
- Choose a translation method: manual, automatic, or via a translation team.
- Click Translate to start the process.
- Review translations in the Translations tab. Adjust any content if needed before publishing.
- Click Complete Translation to make the translations live.
By this point, most of the site content will be translated, but certain elements like buttons, headings, and other CTAs (WPML calls these “strings”) might still appear in the original language. Even though we enabled the String Translation option earlier during the setup.
This is normal. I’ve covered the process for translating these strings in detail in a separate guide: How to Create a Multilingual WordPress Site Using WPML.
Adding a Language Switcher
A language switcher allows visitors to toggle between languages easily:
- Go to WPML → Languages.
- Scroll to the language switcher settings and click Add Language Switcher.
- Decide where it should appear: menu, footer, or sidebar. Customize its appearance to match the site’s design.
- Save the settings. The switcher will now display on the front end, giving your visitors immediate access to different language versions of your site.
- Like so:
Reviewing and Editing Translations
Once translations are published, it’s important to verify how they appear on the live site. WPML provides a front-end review option that lets you see translations exactly as visitors will. You can check page layouts, spacing, and whether buttons or headings appear correctly.
If adjustments are needed, the Advanced Translation Editor allows editing directly within WPML.
Once edits are done, translations can be re-published immediately. This ensures that the site looks polished and professional in every language.
Option#2: Use Polylang to Make WordPress Multilingual
Another popular option you can use for making WordPress multilingual is Polylang. It is a lightweight and user-friendly plugin that allows you to translate your WordPress site into multiple languages. It works with pages, posts, menus, and even media, giving you flexibility in managing content for different audiences.
System Requirements of Polylang
- WordPress version: 6.2 or higher
- Tested up to: 6.8.3
- PHP version: 7.2 or higher
Configure Polylang in WordPress
Once installed and activated, Polylang will launch a setup wizard:
- From your WordPress dashboard, go to Languages. This is where you’ll manage all your language settings moving forward.
- Under the Languages tab, define the languages that you will use on your WordPress site, then click Continue.
- If desired, enable the Allow polylang to translate media option to translate images, attachments, and other media-related text.
- Choose a default language that applies to any content not yet assigned a language.
- Complete the wizard and return to the WordPress dashboard.
Adding and Managing Languages
From your WordPress dashboard, navigate to Languages:
- Click Add New Language to include additional languages.
- Set the text direction, choose a flag (optional), and confirm your selection.
- The star icon indicates your default language, which you can change as per your preference.
Polylang also lets you translate site strings, such as the site title, description, or date formats. This ensures consistency across your site’s interface without editing individual pages.
You can do this in the Strings translations menu from your WordPress dashboard.
Configuring URL Settings
This option is very important to configure. From the Languages tab, click on Settings. Here, you can configure how language URLs appear on your WordPress site. You can:
- Choose which language appears in your links. For example, for German, your URL would something like de/blogexample
- Decide whether to place the language code at the beginning or end of the URL
- Control how WordPress handles language switching for different pages
Setting this correctly ensures your multilingual URLs are clean, consistent, and SEO-friendly.
Translating Content
After you’re done with all the configurations, translation becomes straightforward. To get started:
- Open any page or post in the WordPress editor. You’ll notice a language switcher box on the right.
- The default language is selected by default. Add content in the default language first.
- To translate, click the plus (+) button next to the target language.
- Repeat this process for all languages you want to support, and publish each translated version.
Adding a Language Switcher
To allow visitors to switch languages, just like we did for WPML:
- Go to Appearance → Widgets.
- Search for the Language Switcher widget and add it to a sidebar, footer, or another widget-ready area.
- Customize the display options to match your site’s design.
- Click Update to save.
Now the language switcher will appear on the front end, letting visitors toggle between languages easily.
Option#3: Use Weglot to Make WordPress Multilingual
Another option I recommend is Weglot. It is a popular translation plugin for WordPress that lets you turn your site multilingual with minimal setup. It combines machine translation with the ability to manually refine translations through its dashboard. Weglot also handles technical details like hreflang tags and multilingual SEO automatically, so your WordPress site is optimized across languages without extra effort.
System Requirements
Before starting, make sure your WordPress setup meets Weglot’s requirements:
- WordPress version: 4.5 or higher
- Tested up to: 6.9
- PHP version: 7.4 or higher
Configure Weglot in WordPress
Once the plugin is activated, you’ll see the Weglot menu in your WordPress admin sidebar.
- Go to the Main Configuration page.
- Sign up for a Weglot account if you haven’t already, and copy your unique API key from the dashboard.
- Paste the API key into the WordPress configuration page.
- Select your site’s original language and the additional languages you want to add.
- Click Save Changes.
After saving, you’ll see a confirmation message indicating your WordPress site is now multilingual.
Translating Content
Weglot automatically translates all content on your site, including pages, posts, menus, and theme text.
For finer control, you can use the Translations List in your Weglot dashboard to view every line of content and make manual edits. This includes metadata, archives, and other content outside the WordPress editor.
For more advanced editing, the Visual Editor lets you adjust translations in the context of your live site, making it easier to see how changes appear for visitors.
Language Switcher
Weglot adds a language switcher to your WordPress site automatically. By default, it appears on the front end, allowing visitors to select their preferred language. You can also enable an auto-redirect feature to send users to the correct language based on their browser settings.
Styling the switcher is straightforward via the options in the Weglot tab in WordPress. You can adjust position, appearance, and which languages are displayed.
By now, you’ve made your WordPress site multilingual using the Weglot plugin, but if you want to learn additional but essential localization steps, especially around WooCommerce localization, I’ve covered those in my separate guide on how to localize WooCommerce guide.
Option#4: Use TranslatePress to Make WordPress Multilingual
TranslatePress is a solid choice if you want to translate your WordPress site directly from the front end. Instead of jumping between dashboards, you work in a live visual editor where you can click any part of the page and translate it on the spot. It is simple to use, works with most themes and plugins, and is often preferred by users who want a more visual workflow.
System Requirements
TranslatePress keeps things lightweight, but check the basic requirements before starting:
- WordPress Version: 5.0 or higher
- PHP Version: 5.6 or higher
- Tested with major WordPress builders and themes
Once the plugin is active, a new TranslatePress menu will appear in your WordPress dashboard. Keep in mind that in order to activate the plugin, you’ll need a license key which you can get after registering for an account.
Setting Up TranslatePress
TranslatePress uses a clean setup workflow.
- Go to Settings > TranslatePress.
- Pick your site’s default language.
- Choose your additional languages from the dropdown.
- Save your settings.
TranslatePress supports both manual translation and automatic translation through TranslatePress AI, their integrated automatic translation engine that works out of the box with virtually no setup. All you have to do is enable it, and it will instantly translate your content based on the number of AI words you have included in your plan (limited free plan available too).
It also integrates with Google Translate or DeepL if you want to use your own API. You can enable automatic translation through any of these engines under the Automatic Translation tab.
Translating Your WordPress Website From the Front End
This is where TranslatePress stands out. Instead of hunting for strings in the backend, you translate everything visually on the front end.
To get started:
- Click Translate Site from the WordPress admin bar.
- This opens a visual editing screen where you can hover over any text on the page.
- Select the text you want to translate.
- Enter the translated version in the sidebar.
- Switch languages from the top bar to preview live changes.
This workflow makes it easy to translate every part of your site including:
- Page content
- Headings
- Menus
- Buttons
- Forms
- Widgets
- WooCommerce text if WooCommerce is installed
- Theme and plugin text that appears on the front end
Since everything is visible while you translate, it reduces guessing and avoids the usual back and forth.
Working With Dynamic Strings and Plugin Text
Some text does not appear directly on the page until it is triggered, like form messages or theme labels. TranslatePress helps catch these strings through its dedicated String Translation area.
You can search for strings generated by themes, plugins, and WordPress itself. Once found, add your translated version and save.
This makes it easy to handle things like:
- Button labels
- System messages
- Form validation messages
- Menu labels not part of the normal menu editor
Adding a Language Switcher
TranslatePress includes a few ways to display a language switcher on your WordPress site. You can place it:
- As a floating toolbar
- Inside a menu
- As a shortcode
- As a widget
To configure and style the switcher, go to Settings > TranslatePress > Language Switcher tab. Here, you can choose the type of switcher you prefer, and customize it to a T. Besides it’s location and behavior, you can also specify its colors, layout, flag appearance, language names, and much more.
Once added, just like other plugins we looked at earlier, your visitors can switch languages from the front end.
Accelerate WordPress Load Times by 70% With Cloudways Cloudflare Addon!
Improve your website performance & score higher on Core Web Vitals with Cloudflare’s Edge Page Caching for WordPress!
Build a Multilingual WordPress Site Without a Plugin
If you prefer not to use a plugin, you can still create a multilingual WordPress site manually. For this tutorial, we’ll use French as an example language. This approach is ideal for small sites or landing pages where you only need one or two additional languages.
Step 1: Plan Your Pages
Before you touch your WordPress dashboard, let’s make a simple list of the pages you need to translate. This is your roadmap.
| English Page URL (Original) | French Page URL (Translation) |
|---|---|
| /about/ | /fr/about/ |
| /contact/ | /fr/contact/ |
| /services/ | /fr/services/ |
| /home/ (or just /) | /fr/home/ |
Step 2: Duplicate and Translate Your Pages
This is where you create the French versions of every page on your list. Remember, each translated page is a completely separate WordPress page.
- Log into your WordPress site. Just for reference, my site is hosted on Cloudways.
- In the left sidebar, click on Pages > All Pages.
- Find the page you want to translate (e.g., your “About” page) and click the Add Page button at the top to create a completely new page.
- To save time on layout and formatting, you can duplicate the page. I’ll go with the duplicate page approach and clone my Home page. For this, I’ll use the Yoast Duplicate Post plugin.
- Once you have your cloned page, go through the content blocks and manually replace the English text with the French translation. Like this:
- Look for the “URL Slug” or “Permalink” setting and change it. Since my English homepage is the domain root (/), I will set the slug for the French clone to fr.
- This ensures my final French homepage link will be: https://wordpress-1070279-3883303.cloudwaysapps.com/fr/
- Click the Publish button to make the French homepage live.
- Repeat the same steps for all the other pages on your list (Contact, Services, etc.).
Step 3: Add the Manual Language Switcher
This is crucial so visitors can easily jump between the English and French versions of the homepage I translated in French.
To do this,
- To do this, in your WordPress dashboard, click Appearance > Menus.
-
- Click the “Create a new menu” link at the top and name it “Languages”. Click Create Menu.
-
- In the “Pages” section on the left, click on the Custom Links option.
- URL: Enter the URL for your English homepage root: / (just the forward slash).
- Link Text: Enter the text you want visitors to click, like “English”.
- Click Add to Menu.
- Do the same for the French homepage as well. Enter the URL and Link Text and then Add to Menu.
- After adding English and French menu items, I’ll also add Services, Testimonials, Contact and About.
- Click Save Menu at the bottom right.
Now, let’s visually assign this new menu to the spot your English menu uses.
- Click on the Customize option in your top WordPress admin bar (or go to Appearance > Customize).
- In the Customizer sidebar, click on Menus > View All Locations.
- Find the Primary Menu or Main Navigation location (the spot where your English menu currently sits) and use the dropdown selector to choose “Languages”.
- Click Publish at the top of the Customizer sidebar to save the menu assignment.
- Now go ahead and test. I’ll add a GIF below so you can see my home page switching from English to French and vice versa from the navigation menu items I added.
That’s it. This is a basic example of making your WordPress site multilingual without using a plugin. Though you get full control and you’re not relying on any extra tools, it does take time, especially once you start adding more pages or another language.
After walking through these steps, it becomes pretty clear why most site owners end up using something like WPML. Those plugins cut out most of the repetitive work and make long-term upkeep a lot easier.
What Parts of a WordPress Site Should Be Translated
When you make your site multilingual, you’re not only translating the obvious stuff like pages. A typical WordPress site has small bits of text scattered in menus, buttons, forms, and even image metadata. If you want visitors to feel like the site was built for them, every piece of visible text should match their language.
Pages and Blog Posts
This is usually where everyone starts. Your core content needs a translated version so readers can follow your message without switching back and forth. Each page or post should have its own translated copy, not a machine-generated preview or mixed-language layout.
Menus and Navigation
Your navigation needs to make sense in every language. If you leave the menu in one language, the whole experience feels broken. Each language should have its own version of the main menu, footer menu, and any custom navigation you use.
Widgets and Sidebars
Text inside widgets often gets overlooked. If you have a newsletter box, a short blurb in the sidebar, or even a simple “Follow Us” section, those need translations too. Otherwise the layout ends up with random words in the wrong language.
Theme Text
Themes come with built-in text for buttons, forms, labels, and messages. Things like “Read More”, “Search”, “Comments”, “Next Page”, and “404 Not Found”. These strings don’t live in your posts, so you usually translate them separately through your plugin’s string translation feature.
Forms and Popups
Any form plugin you use will have field labels, error messages, success messages, and button text. Same goes for popups, banners, or opt-ins. These elements are triggered based on visitor behavior, so they need to feel natural in every language.
Media Titles and Alt Text
When you translate your content, the images should follow along. That includes the title, caption, and alt text. Besides looking cleaner, this helps your SEO because search engines use your alt text to understand what’s on the page.
Wrapping Up
Building a multilingual WordPress site takes a bit of planning, but once everything is in place, the impact is hard to miss. Your content becomes easier to follow, visitors feel more at home, and your message lands the way you intended.
Whether you used one of the plugins I walked through earlier or decided to go with the manual method, the real difference comes from the attention you give to each language version.
As you keep adding pages and refining translations, your site starts to feel like it was built for a global audience from day one. Keep an eye on how visitors interact with each language, update anything that looks off, and adjust your structure as your reach grows.
In the end, the goal is simple. Help people understand your content without effort. When that happens, everything else on your site performs better.
Frequently Asked Questions
Q1. Do I need a plugin to make my WordPress site multilingual?
No, you don’t have to use a plugin, but most people do because it saves a lot of time. WordPress can be translated manually by creating separate pages and linking them together, though this takes more work and gets hard to maintain as your site grows.
Q2. Will translating my site affect my SEO?
Yes, but in a good way if everything is set up correctly. Search engines prefer clear language versions, unique URLs, and proper hreflang tags. When these pieces are in place, your translated pages can rank on their own and reach the right audience.
Q3. Can I translate everything on my site, including menus and buttons?
You can. Some things like pages or posts are straightforward, while smaller items like button text, form labels, or theme strings might need a plugin feature or a string translation tool. As long as your setup supports it, your whole site can stay consistent across languages.
Abdul Rehman
Abdul is a tech-savvy, coffee-fueled, and creatively driven marketer who loves keeping up with the latest software updates and tech gadgets. He's also a skilled technical writer who can explain complex concepts simply for a broad audience. Abdul enjoys sharing his knowledge of the Cloud industry through user manuals, documentation, and blog posts.


