To run a successful Magento store, you have to execute a large number of store functions and Magento attribute is one of them.
The properties of an attribute determine how it can be used in your store’s catalog and how it appears throughout your store. In addition to the basic properties, there are additional properties for drop-down and multiple-select input types, their values, and associated labels.
The title, or label, identifies the attribute in the Admin Area and the storefront. If your store is available in multiple languages, you can enter a different translated label in each language. Attributes can be created with the Manage Attributes tool, and also from inside a product record.
In this guide, I am going to discuss how to create Magento attributes.
Scale Your Magento 2 Store With Ease
One-Click Magento installation with your own managed hosting solution.
What Are Magento Attributes?
All the listing of a particular Magento product attributes, also known as Magento Attribute set, describes the characteristics and features of the product in detail. Whenever a new product is created, the attributes are set to be unique. This step allows you to import all the information regarding the product in just a single step.
Also, doing so makes products differ from other items on offer. By default, Magento offers a large number of product attributes such as color, size, etc.
I hope now you have a clear idea about the Magento attribute, let’s create Magento attributes.
For Magento 1.x
Create Magento Attributes
To create Magento product attributes, go to Attributes → Manage Attributes from the admin panel of your store:

You will be redirected to the available Magento attributes list. Here, click the Add New Attribute button:
Enter the required details for creating the Magento attribute.
Let’s start with Attribute Properties:
Before going to the next step, let’s first discuss the fields on the screen:
- Attribute Code: A unique attribute code of your choice. In my case, I have entered my_new_attribute as the attribute code.
- Scope: Here you have three options: Store View, Website, Global. Select the one that best fits the attribute usage/visibility.
- Catalog Input Type for Store Owner: Here you have multiple options. Select the one that best fit your scenario.
- Default value: Use this field if you want to set a default value for the product that would be tagged by this attribute.
- Unique Value: Select Yes, if you want to set the condition where each attribute value for the product must be unique.
- Values Required: Select Yes, if you want to set the condition where the attribute value can’t be empty while creating the product.
- Input Validation For Store Owner: Use this option if you want to set validation for the attribute field. Popular validation requirements include requiring a decimal number, integer, e-mail, URL, or alphanumeric values.
- Apply To: Use this option to make the attribute applicable store-wide or to specific products.
Now scroll down and enter the details for your Magento product attribute frontend properties:
Before going to the next step, let’s first discuss the fields on the screen:
- Use in Quick Search: Select Yes, if you want to make attribute value available in the store’s Quick Search option.
- Use in Advanced Search: Select Yes, if you want to make attribute value available in the store’s Advanced Search option.
- Comparable on Front-end: Select Yes, if you want to make the attribute visible in the compare box feature.
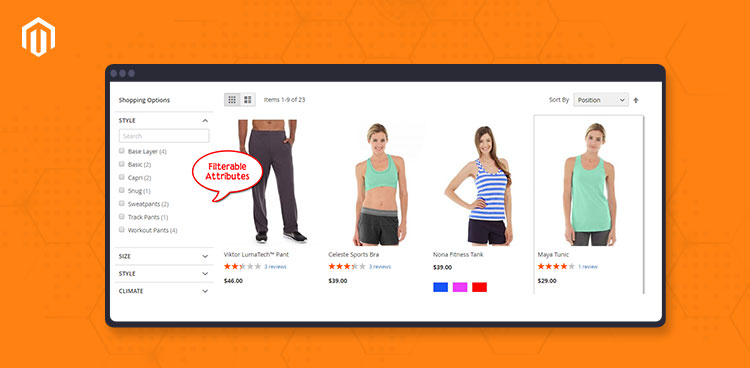
- Use in Layered Navigation: Select Yes, if you want to make attribute filterable on the left or right side of a category page.
- Use in Search Results Layered Navigation: Select Yes, if you want to allow the user to filter search results by using this attribute.
- Use for Promo Rule Conditions: Select Yes, if you want to create promo rule conditions via the attribute.
- Position: Set the position of the attribute for layered navigation.
- Allow HTML Tags on Frontend: Select Yes, if you want to add attribute values that contain HTML tags.
- Visible on Product View Page on Front-end: Select Yes, if you want to show the attribute and its value on product pages.
- Used in Product Listing: Select Yes, if you want to show the attribute on the category page
Now click Manage Label/Options in the left menu bar and then set your attribute labels which you would like to display in your admin panel and store’s frontend.
And now just click Save Attribute at the top of the page:
You will be redirected to the list of Magento product attributes. As you can see in the following screenshot, the attribute that I just created is visible in the list.
Now, I will create the Magento attribute set.
Create Magento Attribute Set
Go to Attributes → Manage Attributes Sets in the Admin Panel of your store:
Here, click the Add New Set:
Now, set the attribute set name and select the attribute on which you wish to base the attribute set from the Based On dropdown. When done, click Save Attribute Set:
Now you will see that the newly created my_new_attribute is listed under unassigned attributes. Drag it to any assigned attribute group of your choice. Then click Save Attribute Set:
It’s time to check if the attribute set has been created properly. For this, go to product creation page, select the newly created attribute My New Attribute Set and click Continue:
Here you will see a new field My New Attribute:
As you can see, the Magento attribute set has been created and working properly.
For Magento 2.x
Create Magento 2 Attributes
Note: For creating Magento 2 product attributes, I will not discuss each option as its already covered in Magento 1.x process.
Go to STORES → Product from the admin panel of your store.
Then, click Add New Attribute:
Here, add the details in Attribute Properties and Advanced Attribute Properties section according to your requirements:
Now go to the Manage Labels section in the left bar. Set the labels for the Magento 2 attributes:
Then, go to the last section Storefront Properties, and configure it according to your requirements:
Finally, click Save Attribute:
You will be redirected to the list of Magento 2 product attributes. In the list, you can see the newly created attribute.
The above screenshot indicates that the Magento 2 Attribute has been created successfully.
Create Magento 2 Attribute Set
Go to STORES → Attribute Set in the admin panel of your store:
Click the Add Attribute Set at the top of the page:
Add the Magento 2 attribute set details and click Save:
You can now see the newly created Magento 2 attribute under unassigned attributes. Move it to any assigned attribute group of your choice and click Save:
To confirm whether you have created the attribute set properly, select the attribute while adding a new product. You will see My New Attribute field:
As you can see the newly created Magento 2 attribute is available on the page.
Create Magento 2 Product Attribute Programmatically
There are scenarios where you might have to create a custom module in order to create Magento 2 product attribute. To do so, you need to configure and register the module.
Start by configuring the module by creating module.xml file in app/code/Cloudways/Demomodule/etc, and add the following lines to it:
<?xml version="1.0"?>
<config xmlns:xsi="http://www.w3.org/2001/XMLSchema-instance" xsi:noNamespaceSchemaLocation="urn:magento:framework:Module/etc/module.xsd">
    <module name="Cloudways_Demomodule" setup_version="1.0.1"></module>
</config>
Next, register the module by creating registration.php in app/code/Cloudways/Demomodule and add the following lines to it:
<?php
\Magento\Framework\Component\ComponentRegistrar::register(
\Magento\Framework\Component\ComponentRegistrar::MODULE,
'Cloudways_Demomodule',
__DIR__
);
Create InstallData.php in app/code/Cloudways/Demomodule/Setup to create Magento 2 attribute set and attribute. Add the following lines to the file:
<?php

namespace Cloudways\Demomodule\Setup;

use Magento\Eav\Setup\EavSetup;
use Magento\Eav\Setup\EavSetupFactory;
use Magento\Framework\Setup\InstallDataInterface;
use Magento\Framework\Setup\ModuleContextInterface;
use Magento\Framework\Setup\ModuleDataSetupInterface;
use Magento\Catalog\Setup\CategorySetupFactory;
use Magento\Eav\Model\Entity\Attribute\SetFactory as AttributeSetFactory;

class InstallData implements InstallDataInterface

{
    private $eavSetupFactory;
    private $attributeSetFactory;
    private $attributeSet;
    private $categorySetupFactory;

    public function __construct(EavSetupFactory $eavSetupFactory, AttributeSetFactory $attributeSetFactory, CategorySetupFactory $categorySetupFactory )
        {
            $this->eavSetupFactory = $eavSetupFactory;
            $this->attributeSetFactory = $attributeSetFactory;
            $this->categorySetupFactory = $categorySetupFactory;
        }


    public function install(ModuleDataSetupInterface $setup, ModuleContextInterface $context)
    {
        $setup->startSetup();

                // CODE FOR CREATING ATTRIBUTE SET

        $categorySetup = $this->categorySetupFactory->create(['setup' => $setup]);
        $attributeSet = $this->attributeSetFactory->create();
        $entityTypeId = $categorySetup->getEntityTypeId(\Magento\Catalog\Model\Product::ENTITY);
        $attributeSetId = $categorySetup->getDefaultAttributeSetId($entityTypeId);
        $data = [

            'attribute_set_name' => 'CloudwaysAttribute',
            'entity_type_id' => $entityTypeId,
            'sort_order' => 200,
        ];

        $attributeSet->setData($data);
        $attributeSet->validate();
        $attributeSet->save();
        $attributeSet->initFromSkeleton($attributeSetId);
        $attributeSet->save();

                // CODE FOR CREATING PRODUCT ATTRIBUTE

        $eavSetup = $this->eavSetupFactory->create(['setup' => $setup]);

            $eavSetup->addAttribute(

                    \Magento\Catalog\Model\Product::ENTITY,

                'cloudways_attribute',

                [
                    'type' => 'varchar',
                    'label' => 'Cloudways Attribute',
                    'backend' => '',
                    'input' => 'text',
                    'wysiwyg_enabled'   => false,
                    'source' => '',
                    'required' => false,
                    'sort_order' => 5,
                    'global' => \Magento\Catalog\Model\ResourceModel\Eav\Attribute::SCOPE_STORE,
                    'used_in_product_listing' => true,
                    'visible_on_front' => true,
                    'attribute_set_id' => 'CloudwaysAttribute',
            ]
        );

        $setup->endSetup();
    }
} ?>
As you can see, in the above code, I have assigned the attribute to the attribute set ‘CloudwaysAttribute’ (created separately). You can use the above code as a template for adding Magento 2 attributes and Magento attribute sets for your store.
Finally, run the following CLI commands in your store’s root directory:
php bin/magento module:enable Cloudways_Demomodule
php bin/magento setup:upgrade
php bin/magento setup:di:compile
php bin/magento cache:clean
php bin/magento cache:flush
To verify the results, go to Magento 2 Attribute Set list by navigating to STORES → Attribute Set and you will see CloudwaysAttribute in the list:
Go to CloudwaysAttribute, and you will see cloudways_attribute under the assigned attributes:
That’s simple is to set Magento 2 attributes.
Wrapping Up
In this tutorial, I described how you can create product attributes and product attribute sets for both Magento 1 and 2. Additionally, I also presented a simple template to create Magento attributes and Magento product attribute sets via code. If you think I have missed anything that should be covered or you need to clarify a point, do let me know in the comments section below.
Abdur Rahman
Abdur Rahman is the Magento whizz at Cloudways. He is growth ambitious, and aims to learn & share information about Ecommerce & Magento Development through practice and experimentation. He loves to travel and explore new ideas whenever he finds time. Get in touch with him at [email protected]


