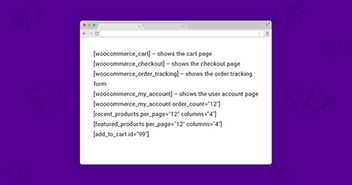
The “Add to Cart” button in WooCommerce allows customers to easily purchase items from your online store. When a customer clicks the “Add to Cart” button, the item is added to their shopping cart, and they can continue shopping or proceed to the checkout process.
This button helps you streamline the purchasing process for your customers, making it easy for them to add items to their cart and complete their purchases. However, you may need to customize it to increase sales and improve the overall user experience for your customers.
In this tutorial, I’ll tell you the benefits of a custom add to cart button and how you can customize it on your WooCommerce store.
Benefits of Custom Add to Cart Button
There are several benefits to using a custom “Add to Cart” button in WooCommerce. Let me tell you 3 of them.
- Improved aesthetics: It can help improve your website’s overall aesthetics by allowing you to match the button’s design to your brand’s style and color scheme. This can help to create a cohesive and professional look for your online store.
- Enhanced functionality: It can also offer enhanced functionality, such as displaying additional information about the product, i.e., price, availability, or applicable discounts or promotions.
- Increased conversion rate: By improving the aesthetics and functionality of your “Add to Cart” button, you can increase your conversion rate and overall revenue and profitability.
Display Add to Cart Button on Template
The following code snippet will display add to cart button on any WooCommerce template page you choose.
<?php

/* Template  Name: Customize Add To Cart*/

get_header(); ?>
<div id="primary" class="content-area">
    <main id="main" class="site-main" role="main">
        <ul class="products">
            <?php
            $args = array(
                'post_type' => 'product',
                'posts_per_page' => 12,
            );
            $loop = new WP_Query( $args );
            if ($loop->have_posts()) {
                while ($loop->have_posts()) : $loop->the_post();
                    ?>
                    <div id="product-image1">
                        <a href="<?php echo esc_url( get_permalink( $product->get_id() ) ); ?>"
                           title="<?php echo esc_attr( $product->get_title() ); ?>">
                            <?php echo $product->get_image(); ?>
                        </a>
                    </div>
                    <div id="product-description-container">
                        <ul>
                            <a href="<?php echo esc_url( get_permalink( $product->get_id() ) ); ?>"
                               title="<?php echo esc_attr( $product->get_title() ); ?>">
                                <li><h4><?php echo $product->get_title(); ?></h4></li>
                            </a>
                            <li><?php echo apply_filters( 'woocommerce_short_description', $post->post_excerpt )?></li>
                            <li><h2><?php echo $product->get_price_html(); ?> </h2></li>
                            <?php
                            echo apply_filters(
                                'woocommerce_loop_add_to_cart_link',
                                sprintf(
                                    '<a href="%s" rel="nofollow" data-product_id="%s" data-product_sku="%s" class="button %s product_type_%s">%s</a>',
                                    esc_url( $product->add_to_cart_url() ),
                                    esc_attr( $product->get_id() ),
                                    esc_attr( $product->get_sku() ),
                                    $product->is_purchasable() ? 'add_to_cart_button' : '',
                                    esc_attr( $product->product_type ),
                                    esc_html( $product->add_to_cart_text() )
                                ),
                                $product
                            );?>
                        </ul>
                    </div>                     <?php endwhile;
            } else {
                echo __( ' o products found' );
            }
            wp_reset_postdata();
            ?>
        </ul>
        <!--/.products-->         </main>
    <!-- #main -->
</div><!-- #primary --> <?php
do_action( 'storefront_sidebar' );
get_footer();
The following snapshot shows the code snippet in action.

Explanation of the Code Snippet
The above code snippet, although long, is rather simple to understand. I will provide a short description of the important components of the code snippet so that you can understand and modify it as per your requirements.
- ‘post_type’ => ‘product’ – This is the default WooCommerce custom post type.
- ‘posts_per_page’ => 12 – This is the maximum number of posts displayed on a page. At the moment, it is set to 12. You can change it to fit your store’s requirements.
- apply_filters( ‘woocommerce_short_description’, $post->post_excerpt ) – This displays the product’s short and long descriptions.
- esc_url( $product->add_to_cart_url() ) – coupled with the echo statement, displays the cart’s page URL and the items in the cart (if any).
- esc_attr( $product->get_id() ) – This gets the product ID.
- esc_attr( $product->get_sku() ) – This gets the SKU for the product.
- esc_html( $product->add_to_cart_text() ) – This gets the cart text.
From launching to customizing your WooCommerce stores, Cloudways is at your service.
Whether you’re a beginner or an expert, Cloudways Platform is based on UI, where you can create and customize your online store in a few seconds.
Add Text Above the Add to Cart Button
Another great customization opportunity is adding text above the custom add to cart button. The following snippet adds the line of text. This is made possible with the echo statement.
add_action( 'woocommerce_single_product_summary', 'add_to_cart_button_woocommerce', 20 );
function add_to_cart_button_woocommerce() {
    echo '
WooCommerce customize add to cart button
';
}
This is how the line of text would be displayed:

Change the Text of Add to Cart Button
Finally, it is time to add the final bit of customization. It is easy to change the text that appears on the button. This is done through the simple code snippet:
add_filter('woocommerce_product_single_add_to_cart_text','custom_add_to_cart_button_woocommerce');
function custom_add_to_cart_button_woocommerce() {
return __('WooCommerce custom add to cart button code', 'woocommerce');
}
As you can see, the label on the button changes to the text mentioned in the return statement of the custom_add_to_cart_button_woocommerce() function.

Summary
A custom “Add to Cart button” in WooCommerce is a useful feature that allows store owners to customize the appearance and functionality of their product pages. This can improve the customer journey and impact the online store’s overall success as it plays a crucial role. If you’ve got any questions related to this article, please write it in the comments.
Owais Alam
is the WordPress Community Manager at Cloudways - A Managed WooCommerce Hosting Platform and a seasoned PHP developer. He loves to develop all sorts of websites on WordPress and is in love with WooCommerce in particular. You can email him at [email protected]


