


Key Takeaways
- WooCommerce is a beginner-friendly platform for dropshipping stores.
- WooDropship allows easy import of AliExpress products in a few clicks.
- Free shipping is essential for higher conversions.
- Optimize product titles and descriptions to improve search rankings.
Ecommerce market is predicted to reach $4 trillion in next two years. If you want to be a part of it, then now is the right time to establish your online business.
There are many ways to start an online business and one way that is becoming popular these days is dropshipping.
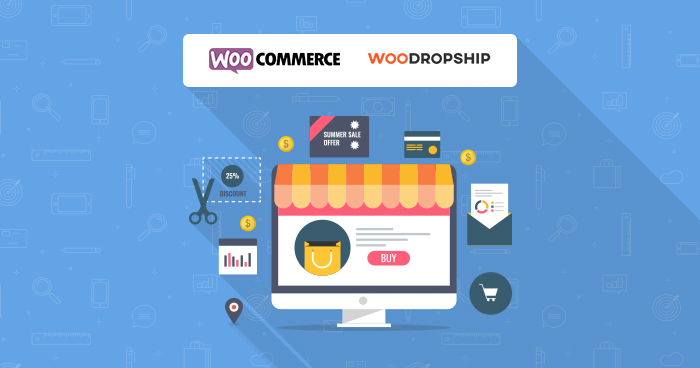
So, in this article, we will lay down a step-by-step process to set up drop shipping business. We will be using WooCommerce and WooDropship plugin to set up a dropshipping store using AliExpress.
Before we go into the details, let’s discuss what is dropshipping and how it is profitable in 2025?
What is Dropshipping?
Dropshipping is an arbitrage business. You set up an ecommerce store and add products from wholesale retailers such as AliExpress, DHGate, Amazon, or eBay. You set your own prices for the products you are adding to the online store. Once someone buys a product from your store, they pay the price that you have set for the product. You then select the details of the order and place the same on a wholesaling website. The wholesaler then ships the product to the customer.
You earn a profit by keeping a margin on every product.
For example, you selected a few keychains from AliExpress. These keychains were $1 each on the wholesale store. You placed the products in your store for $5 each with free shipping. The shipping cost is $2. So, when you order it from the wholesaler you pay $3 and keep $2 as your own commission.
Why Use WooCommerce for Dropshipping?
WooCommerce is a widely used ecommerce platform. It is used by almost 10 percent ecommerce websites globally. It is an extension of WordPress and would require one to install it before setting up the WooCommerce platform.
WooCommerce is an easy to use ecommerce platform. It is used by most ecommerce and dropshipping platforms due to its easy customization options, anyone without technical expertise can set up his store on WooCommerce with ease.
Why Use WooDropship Dropshipping Plugin?
WooDropship is a freemium plugin that makes it easier to import dropshipping products from AliExpress ecommerce store. Its users can import products with just a single click and set their own prices for arbitrage of the product. The main reason we are using WooDropship for this tutorial is because this tool is one of the easiest to start with for beginners. Here are a few important features of WooDropship plugin.
- Import dropshipping products from AliExpress with a single click
- Fulfill orders automatically
- Comes with built-in image editor
- Comes with easy product customization
- Lets you set your own selling price
You can upload over three thousand products with the basic WooDropship plugin. Let’s learn how to establish your first dropshipping store on WooCommerce using WooDropship plugin.
Setting up WooCommerce with WooDropship Dropshipping Plugin
Here’s how to set up a dropshipping store using WooCommerce.
Step 1: Set up WooCommerce Dropshipping Store
First, set up WooCommerce by following the WooCommerce store setup tutorial. Note that we have used Cloudways because it eases the process with one-click installation feature.
Step 2: Add Free Shipping Option
Any store that doesn’t have a free shipping option available is bound to fail. So, to improve sales and conversions, I strongly recommend having one shipping option for all: free shipping. You can easily offer free shipping because most products shipped through AliExpress use ePacket shipping, which takes only a couple of dollars. So, if you are selling products at a good margin, the cost can easily cover shipping charges.
Now let’s see how to add free shipping option. Go to “WooCommerce > Settings”.

In Settings, choose Shipping tab.
Note: You can add various shipping methods based on the geographic location.
Now, click on “Add Shipping Zone”.
So far the “Zone name”, the easiest thing to call it is “Free Shipping”, for example.
Note: You can also limit the free shipping option to a selected few regions. This is entirely optional.
Let’s say you selected the United States, you can offer free shipping in the US region only.
But since the Chinese suppliers from AliExpress usually offer to ship for free worldwide, I suggest leaving it blank for now.
After you have added “Free Shipping” as the “Zone Name”, scroll down click on “Add Shipping Method”.
In the “Add shipping method”, select Free Shipping and then select Add Shipping Method form the drop-menu list.
That’s it, we are done!
Now you know how to set up a free shipping method for your products. You can also add paid shipping methods in the same way. It is entirely up to you.
Now let’s move to the next step.
Step 3: Sign up for WooDropship WooCommerce Plugin
There are many dropship plugins available but we will be using a free one called WooDropship dropshipping plugin so that anyone who doesn’t have the budget can also start a drop shipping business.
So, download WooDropship WooCommerce plugin and click on the Get Started for Free button to set up a WooCommerce store.
Enter your username, password, and email address to sign up for an account. After entering all the required details, click on “Get Started for Free” button
We were given 14 days free trial instead of the standard 7-day trial because of a WooDropship offer.
After signing up, you will be directed to the WooDropship plugin dashboard.
Tip: It is a good idea to make yourself familiar with the platform so you can work with it with ease in the future.
Now click on “Connect Store” option.
Add the URL of your new WooCommerce store and click on the “Connect Shop” button to add your webstore to WooDropship interface.
You will see a prompt on WooCommerce website. Click the “Approve” button and that’s it.
Your website is now integrated with WooDropship plugin.
Step 4: Install WooDropship Chrome Extension
Now, we will install the WooDropship chrome extension to import products to our website. First, visit the chrome store and select WooDropship Aliexpress extension.
Now click on “Add to Chrome” and click add the extension.
After you have successfully installed the extension, you will see the WooDropship icon on the right top bar of the browser.
![]()
Note: WooDropship now works without a “User Key“.
That’s it, we have successfully created a WooDropship account. Also, we have added the chrome extension to our store as well.
Let’s move on to the next step and import products to our WooCommerce dropshipping store.
Step 5: Import Products from AliExpress to Your Store Using WooDropship Plugin
Now that we have added the dropshipping plugin to our store, we just need to populate our store with dropshipping products. WooDropship makes it pretty easy to import products from AliExpress.
First search for the products that you would like to add to your store.
Go to AliExpress and search all products that fall into your niche. If you are not sure whether to go general or niche while establishing a dropshipping store, then read about “Niche vs General Dropshipping’.
Next, search any product that you want to add to your store.
I am choosing “men’s shirts“.
There are a lot of shirts here, and you will get confused about what types of shirts will work best in your store. I am going to select shirts that have the most orders and higher ratings – that is a criterion most dropshippers also follow.
Also, make sure you select only those shirts that have ePacket symbol enabled. This means they can be shipped to your desired country for a lower price, allowing you to offer free shipping.
WooDropship has a feature that informs us which products have epacket enabled.
Now, let’s add these items to your store. Click on the below image button to do so.
The button in red square is available because of the WooDropship chrome extension we installed on our browser.
When we click on the button, the product’s data will be automatically uploaded to our website.
Now, let’s go back to the WooDropship Dashboard.
Come to the menu click “Products” and then click “Import List”.
As you can see the shirt has been added to our list.
You can import multiple items in the same way.
Next, you can add descriptions, images, and variants of all the products. It is considered better to optimize titles instead of using the same ones that were available on AliExpress, as that would increase your rankings in search and make you stand out.
When you are finished with the editing, simply click “Push to Store”.
It takes some time for all the productals to be pushed to the store. So, be patient and wait a little bit. Once you are done, WooDropship will show you a message saying that all products were pushed successfully.
Now go back to your WordPress dashboard. Click on the Products page, and you will see that all products have successfully been pushed to the store.
Add categories to the products to keep them separate. You can also set your own price by click on each product. The product’s plugin also allows ratings that you can use to add user reviews.
There are additional settings that you can adjust such as variable products, simple products, products price, feature images, and much more.
This is how the product will look on the item details page.
Dropshipping Can Boost Your Sales Dramatically
Viesso mastered it, going from $0 to $1 million in sales in 24 months. You can too!
Final Words!
That’s it! We have created a fine looking dropshipping store using WooCommerce in just a few minutes.
In order to take the store to the next level, simply add more products and start promoting them on Facebook or other social media websites. This will help you understand if your products are actually selling or not.
If they don’t sell well, don’t lose hope. Change the products that you have promoted and then again start promotion.
WooCommerce dropshipping stores have become an ideal online business model, and if you use it well, you can easily rack thousands of dollars.
Have a question in mind about how we set up a dropshipping store using WooCommerce? Let us know in the comments below.
Frequently Asked Questions
Q1: What is WooDropship plugin?
WooDropship is a plugin that allows easy importing of products from AliExpress to WooCommerce, with automated order fulfillment.
Q2: Can beginners use WooDropship?
Yes, it’s designed for beginners with a user-friendly interface and free trial options.
Q3: How does dropshipping make money?
By selling products at a markup over the supplier price, including shipping costs.
Q4: Is WooCommerce good for dropshipping?
Yes, WooCommerce is flexible, widely supported, and integrates easily with dropshipping plugins like WooDropship.
Q5: Do I need to stock inventory?
No. With dropshipping, suppliers ship products directly to your customers.
Danish Naseer
Danish Naseer is a WordPress Community Manager at Cloudways. He is passionate about designing, developing, and engaging with people to help them. He also actively participates in the community to share his knowledge. Besides that, he loves to watch documentaries, traveling and spending time with family. You can contact him at [email protected]

