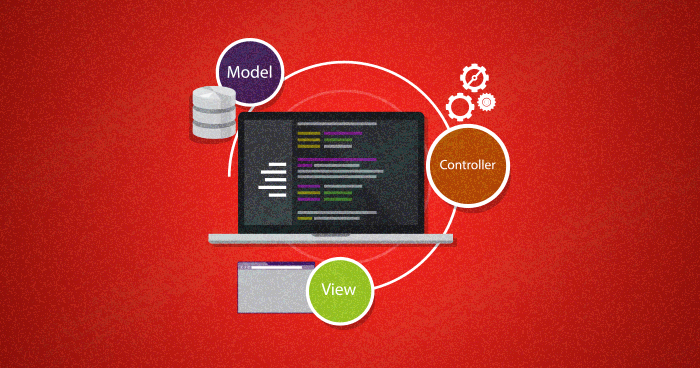
Laravel Create Model is an MVC based PHP system. In the MVC architecture, ‘M’ stands for ‘Model’. A model is used as a way for questioning data to and from the table within the database. Laravel gives a basic way to do that using Eloquent ORM where each table incorporates a Model to interact with it.
Views contain the html code required by your application, and it could be a strategy in Laravel that isolates the controller logic and domain logic from the introduction rationale. Views are found within the assets organizer, and its way is resources/views. Let’s see the simple illustration of views.
In my previous article in the Laravel 5.5 series, I covered the Controller (the third part of the MVC) and Middleware. Today, I will describe the Model and View of the MVC architecture, and how these ideas are implemented in Laravel.
Models in Laravel 5.5 are created inside the app folder. Models are mostly used to interact with the database using Eloquent ORM. Eloquent provides simple ActiveRecord implementations for database interaction.
The easiest way to create a model is the Artisan command:
php artisan make:model <model name>
Let’s first create new table books in the database. Use the following schema:
CREATE TABLE `books` (

 `id` int(11) NOT NULL,

 `name` varchar(256) NOT NULL,

 `category` varchar(256) NOT NULL,

 `description` text NOT NULL

);
Stop Wasting Time on Servers
Cloudways handle server management for you so you can focus on creating great apps and keeping your clients happy.
Next, I will create a new model for the books table in Laravel. For this, run the following command.
php artisan make:model Books
Once the command is completed, a new model will be created in the app folder. At the moment, this model looks like:
<?php

namespace App;

use Illuminate\Database\Eloquent\Model;

class Books extends Model

{

   //

}
In the above code, the model class Books is extended from Illuminate\Database\Eloquent\Model class of Laravel. You will notice that there are no database CRUD operation related functions in this model. You could use several prebuilt Eloquent functions for this purpose.
Working with Eloquent ORM
The best thing about Eloquent ORM is the ease with which you could perform CRUD operations on the database. Usually, Eloquent uses the class name of the model as the name of the table. However, you could also define the name of the table explicitly by defining a protected variable `$table`.
<?php
namespace App;
use Illuminate\Database\Eloquent\Model;

class Books extends Model
{
    protected $table = “my_books”;
}
By default Eloquent will assume that each table have a primary key of column name id and that it autoincrements. If your primary key has a different name, you can easily set it by defining it in `protected $primaryKey`. This overrides the default settings. In addition, if your primary key does not autoincrement, you can easily set it off by defining `public $incrementing` to `false`.
For example, let’s use book ISBN number as a primary key in the table. Now, I can make the following changes in the model to tell Eloquent about this primary key and that it should not be auto-incremented.
namespace App;
use Illuminate\Database\Eloquent\Model;
class Books extends Model
{
    protected $table = “my_books”;
    protected $primaryKey = “isbn_no”;
    public $incrementing = false;
}
Saving Data Using Eloquent
Saving data using Eloquent is super easy.
In the previous example, I created a resource `BooksController`.
Let’s start editing `store(Request $request)` method so that it can save my request to the database. The first method of saving data is:
public function store(Request $request)
{
    $books = new Books();
    $books->name = $request->name;
    $books->category = $request->category;
    $books->category = $request->category;
    if($books->save()){
        return true;
    }
}
And the second one is:
public function store(Request $request)
{
    if(Books::Create($request->all())){
        return true;
    }
}
In order to save data using the `Create()` method, you need to do two things first. You need to define fillable columns in the model:
namespace App;
use Illuminate\Database\Eloquent\Model;

class Books extends Model
{
    protected $fillable = ['name','category','description'];
}
Secondly, make sure that the name of the request parameter you want to save in your database is the same as the name of the column in the database.
Update Data Using Eloquent
Updating data using Eloquent is as easy as saving data.
I will now edit `update(Request $request, Books $book)` method so that it can update in the data.
public function update(Request $request, Books $books)
{
    if($books->fill($request->all())->save()){
        return true;
    }
}
How does it work? When a user sends a put request to `book/{book}`, the model in Laravel app will automatically get the book appropriate to `{book}`. If there is no match, it will return an error. The reason behind this is that the model is bound to the update method. Since I have defined fillable, all the data will be saved easily.
Get All Data Items
Let’s now edit `index()` method of the controller so it can return all the data saved in the database.
public function index()
{
    $books = Books::all();
    return $books;
}
Since I have used `$books`, Laravel will return the JSON of the data, by default.
Get a Single Data Item
I will edit `show(Books $books)` method to return a specific book when the user sends a get request to `book/{book}`. It will return the book corresponding to the primary key.
public function show(Books $books)
{
    return $books;
}
Delete a Single Data Item
Let’s now edit the `destroy(Books $books)` method of the controller to delete the corresponding data to the primary key.
public function destroy(Books $books)
{
    if($books->delete()){
        return true;
    }
}
As you could see, Eloquent takes out much of the work from working with RDBMS. You can define table relationships in it and easily get data from different tables. To learn more about Eloquent and its magic, refer to the official Eloquent documentation.
Views in Laravel 8.x
Views in Laravel are created in the resources/views folder. You can change base path for views by editing config/view.php file and changing `realpath(base_path(‘resources/views’))` to the new location for the views.
Laravel offers a simple view that routes to home. Loading a view in the controller is easy. You just need to add `view(‘viewname’)` method while returning from the controller method.
public function index()
{
    return view('home');
}
`view()` is a global helper in Laravel. In this method, you just need to pass the name of the view. For example, if the full name of the view is home.blade.php, you just need to pass home to the `view()` method.
What if you are saving your views inside a new directory in the views folders? No need to worry about that!
For example, if home.blade.php is saved inside the dashboard directory, then you just need to pass the folder name, add a dot “.” and then the name of the view to the `view()` method i.e. `view(“dashboard.home”);`
Passing Book Data to the View
Let’s create a new view in Laravel website with the name book.blade.php inside the views folder. This view will contain the following code:
<html>

<head>

<link rel="stylesheet" href="https://maxcdn.bootstrapcdn.com/bootstrap/3.3.7/css/bootstrap.min.css" integrity="sha384-BVYiiSIFeK1dGmJRAkycuHAHRg32OmUcww7on3RYdg4Va+PmSTsz/K68vbdEjh4u" crossorigin="anonymous">

<!-- Optional theme -->

<link rel="stylesheet" href="https://maxcdn.bootstrapcdn.com/bootstrap/3.3.7/css/bootstrap-theme.min.css" integrity="sha384-rHyoN1iRsVXV4nD0JutlnGaslCJuC7uwjduW9SVrLvRYooPp2bWYgmgJQIXwl/Sp" crossorigin="anonymous">

   <!-- Scripts -->

 <script type="text/javascript" src="https://code.jquery.com/jquery-2.1.1.min.js"></script>

 <!-- Latest compiled and minified JavaScript -->

<script src="https://maxcdn.bootstrapcdn.com/bootstrap/3.3.7/js/bootstrap.min.js" integrity="sha384-Tc5IQib027qvyjSMfHjOMaLkfuWVxZxUPnCJA7l2mCWNIpG9mGCD8wGNIcPD7Txa" crossorigin="anonymous"></script>

</head>

   <body>

       <div class="row">

       <div class="col-md-6">

          <div class="panel panel-primary">

             <div class="panel-heading"><h3>{{title_case($book->name)}} <a href="{{url('/todo/'.$todo->id)}}" class="btn btn-warning btn-group-sm pull-right ">Edit</a></h3>

             </div>

                 <div class="panel-body">

                   {{$book->description}}

                 </div>

             <div class="panel-footer"><strong>Category:</strong> {{$book->category}}</div>

             </div>

       </div>

     </div>

   </body>

</html>
This view will show a single book from the table. This is how this view works.
I will pass a book to this view in the `show(Books $books)` method of the controller.
public function show(Books $books)
{
    return view('book',['book' => $books]);
}
Now, whenever the user sends a GET request to `/book/{book}`, it will return the view of the book. A large number of the views in Laravel are created using Blade Templating Engine. I will now show you how this engine works.
Blade Templating Engine
The blade is a simple and powerful templating engine for Laravel. You can also add your vanilla PHP code in it easily. Blade template files have the extension .blade.php and are saved in the resources/views folder. You could create one master template and several child templates can be extended from this master template. In this example, I will start with defining a master layout and then extending it further. To learn more about creating layout from blade, I will suggest you also read Create Layouts In Laravel Using Blade Templating Engine.
Create a Master Layout
All master layouts are saved in the layouts folder inside resources/views folder.
I will create a simple layout with the name app.blade.php. This layout will contain the following code:
<!DOCTYPE html>

<html lang="en">

<head>

   <meta charset="utf-8">

   <meta http-equiv="X-UA-Compatible" content="IE=edge">

   <meta name="viewport" content="width=device-width, initial-scale=1">

   <title>@yield('title')</title>

    <!-- Compiled and minified JavaScript -->

   <!-- Styles -->

   <!-- <link href="/css/app.css" rel="stylesheet"> -->

   <!-- Latest compiled and minified CSS -->

<link rel="stylesheet" href="https://maxcdn.bootstrapcdn.com/bootstrap/3.3.7/css/bootstrap.min.css" integrity="sha384-BVYiiSIFeK1dGmJRAkycuHAHRg32OmUcww7on3RYdg4Va+PmSTsz/K68vbdEjh4u" crossorigin="anonymous">

<!-- Optional theme -->

<link rel="stylesheet" href="https://maxcdn.bootstrapcdn.com/bootstrap/3.3.7/css/bootstrap-theme.min.css" integrity="sha384-rHyoN1iRsVXV4nD0JutlnGaslCJuC7uwjduW9SVrLvRYooPp2bWYgmgJQIXwl/Sp" crossorigin="anonymous">

   <!-- Scripts -->

 <script type="text/javascript" src="https://code.jquery.com/jquery-2.1.1.min.js"></script>

 <!-- Latest compiled and minified JavaScript -->

<script src="https://maxcdn.bootstrapcdn.com/bootstrap/3.3.7/js/bootstrap.min.js" integrity="sha384-Tc5IQib027qvyjSMfHjOMaLkfuWVxZxUPnCJA7l2mCWNIpG9mGCD8wGNIcPD7Txa" crossorigin="anonymous"></script>

</head>

<body>

<div class="container-fluid">

           @yield('content')

</div>

</body>

</html>
Inside the app view, I have used HTML markup and bootstrap for styling. I have used the `@yield` directive. This directive is used to display the content for the given section. You can pass a unique name to `yield` so that when this view is extended in another view, I could easily add new content to this section.
Extending a Master Layout
Now let’s extends the master layout. I have created a view to display books in the beginning of this tutorial. I will now extend it from the master layout.
@extends('layouts.app')

@section('title', 'Book')

@section('content')

       <div class="row">

       <div class="col-md-6">

          <div class="panel panel-primary">

             <div class="panel-heading"><h3>{{title_case($book->name)}} <a href="{{url('/todo/'.$todo->id)}}" class="btn btn-warning btn-group-sm pull-right ">Edit</a></h3>

             </div>

                 <div class="panel-body">

                   {{$book->description}}

                 </div>

             <div class="panel-footer"><strong>Category:</strong> {{$book->category}}</div>

             </div>

       </div>

     </div>

@endsection
Let’s see what I have done. First, I told Blade that I am extending from a previous layout using `@extends`. Next, I used `@section`, which bind content to the `@yield` that I created in the master layout. In the content section, I have defined the HTML markup code to view a single book.
What More You Can Do With Blade?
This was a very simple example that highlighted the functionality of Blade. You can also use if-else and loops in Blade. To learn more about Blade, refer to the official Blade documentation.
Winding Up The Series
I started this series with an installing Laravel, and discussed how MVC works with Laravel. Next, I covered how you can perform routing in Laravel . In this series, I covered the concepts of MVC in Laravel. I also discussed controllers and middlewares in Laravel. In the end, i.e., in this tutorial, I discussed models and views in Laravel. I also offered a short introduction to the Blade templating engine and showed how to create a template in Blade.
Inshal Ali
Inshal is a Content Marketer at Cloudways. With background in computer science, skill of content and a whole lot of creativity, he helps business reach the sky and go beyond through content that speaks the language of their customers. Apart from work, you will see him mostly in some online games or on a football field.


