


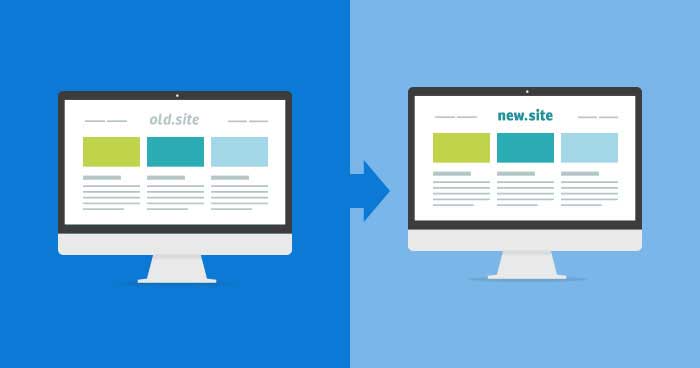
Moving content from one WordPress website to another, at times, can become quite a stressful and hefty task. Now when you are talking about moving content, there are two ways of doing it; you can either migrate the whole website or you can simply copy specific data from one site to another. The following tutorial aims to educate WordPress users how to move specific data from one WordPress site to another. However, if you wish to migrate the entire content of your website, we have provided instructions of doing it at the end of this article.
So Let’s begin,
In order to copy selected data from one WordPress/WooCommerce site to another WordPress/WooCommerce, we’ll be using a single WooCommerce store with WordPress blog pre-installed.
Why?
So we can transfer both content, posts from blog side by side data from our WooCommerce store.
Before we begin, there are certain things that you should be aware of. Firstly, the kind of data a WordPress blog and WooCommerce Store contains.
A WordPress Blog contains the following two types of data,
- Posts (included comments, authors, categories, status, publishing date etc)
- Pages
On the other hand, a WooCommerce Store contains
- Products
- Variations
- Orders
- Refunds
- Coupons
- Webhooks
- Media
You can access and transfer such data by navigating to “Tools > Export”.

When you are going to navigate to “Tools” option in WordPress, by default, it is set to “All Content”. Underneath that option are a number of individual options such as Posts, Pages, Products, Variations, Orders, etc. You can simply select the information that you want to transfer and click “Download Export File”. It will automatically generate a XML file that will be imported on your new WordPress website.
Importing Posts:
In order to Import Posts from your old website to a new one, all you have to do is navigate to “Tools > Export” and select “Posts”. You get a variety of options to set such as categories, authors, date and status. Once you are done then click on “Download Export File” which will generate a XML file that will contain all posts, comments, authors, categories etc.
In our example we’re going to select:
- Posts: 2 posts with single comment on each post.
- Category: Uncategorized
- Author: Mustaasam Saleem
- Date: All dates
- Status: Published
Now we are going to download the XML file and upload it to our new WordPress website.
In order to do so go to your new website “WordPress Admin Dashboard” and navigate to “Tools > Import”. You’ll see a number of options that can be used. Select “WordPress”.
Once you select it, a new popup will be shown asking you to install “WordPress Importer Plugin”. Click on “Install Now” while ignoring compatibility warnings. It has been tested on the new WordPress 4.5 and it works perfectly fine.
Once installed and activated successfully, you’ll be asked to upload the XML file. Click on “Choose File” and select the XML file that we’ve downloaded as shown above and click on “Upload File and Import”. There you go! All done!
On successfully importing information to your new website, WordPress allows you to change the authors of the posts. Check “Import Attachments” and mark it if you want to download attachments.
Click “Submit” and you will be able to see all imported data on your new website.
Importing Selective Data in WooCommerce:
Similar to importing data from one blog to another, data transfer from one WooCommerce store to another is quite an easy task as well. In order to do so, visit the Back end panel of your old WooCommerce website and Navigate to “Tools > Export”. You will be provided with a number of options to import. Refer to the image below.
WordPress for WooCommerce is by default set to “All Content”.
But today we’ll learn about copying “Products” only.
In order to export data from your old website to the new one, navigate to “Tools > Export” and select “Products”. Click on “Download Export File” it will generate a XML file that contains all of your product details.
In our example we’re going to set the following attributes:
Products: 25 products
From your new WooCommerce store website, navigate to “Tools > Import” and click on “Choose File”. Select XML file and click on “Upload File and Import”. WordPress will import all data that we’ve exported in XML format.
When the process is completed, you’ll see all products on new store. Refer to the image below.
Import Images:
If you noticed there aren’t any Images present with related product information. As you know that images are stored in “Media”. In order to access it, you’ve to Export media from old store and Import them to the new one. Every product image will appear as it was previously set.
P.S: All steps will be followed the same way as importing products for other data too. Just Export from old website and Import to new website.
Few points to remember:
The above article is just to educate users about copying selective data. The above method is not recommended if you want to transfer all content from your old website to a new one, as it will disturb other settings of your website. To copy complete website we would recommend users to use WordPress Migrator Plugin. Learn How to Migrate WordPress website using WordPress Migrator Plugin in just a few clicks.
XML upload file size limit:
As you can see, a maximum of 10mb XML file can be uploaded only. If you’ve a large XML file, then there are number of ways to increase file size limit such as modifying functions.php file, modifying .htaccess or wp-config.php file and increasing file size limit in php.ini file. If you’re a non technical person, you can ask your WordPress hosting provider to increase your file size limit.
Conclusion
Doesn’t it sound easy to copy selected data from one WordPress/WooCommerce website to another? If you’ve faced any difficulty in understanding it, feel free to ask using the comment section below. Have a great day 🙂
Sarim Javaid
Sarim Javaid is a Sr. Content Marketing Manager at Cloudways, where his role involves shaping compelling narratives and strategic content. Skilled at crafting cohesive stories from a flurry of ideas, Sarim's writing is driven by curiosity and a deep fascination with Google's evolving algorithms. Beyond the professional sphere, he's a music and art admirer and an overly-excited person.

