Key Takeaways
- Unified Codebase: Next.js API routes allow you to build and manage backend endpoints directly within your frontend project.
- Standard Methods: Endpoints manage data by mapping standard HTTP methods (GET, POST, PUT, DELETE) to specific backend actions.
- API Reliability: Regardless of the specific database or tools used, a secure endpoint requires strict input validation and proper error handling.
REST endpoints are used by apps to connect the frontend to the backend. Whichever web app you use, for example Amazon where you load data, fill up a form, or update items in your shopping cart, all the actions happen via an API.
And Next.js makes creating endpoints using API routes very easy. What I mean by this is that you don’t need a separate backend project. Everything stays inside the same Next.js app, which keeps things simple, especially if you want to build features fast.
In this blog, I’ll also cover what API routes are and how they work. Then I’ll build a small Tasks API with five endpoints. To it, I’ll add validation and basic error handling as well.
By the end, you’ll have a working example that I’ll also push to my GitHub so you can reuse it in your own projects.
- What Are Next.js API Routes?
- When to Use Next.js API Routes
- Common HTTP Methods
- How to Build REST Endpoints Using Next.js API Routes
- What I’ll Be Using
- Step 1: Setting Up the Next.js Project
- Step 2: Installing and Setting Up Prisma with SQLite
- Step 3: Defining the Task Model and Running the First Migration
- Step 4: Building the GET and POST Endpoints for /api/tasks
- Step 5: Building the GET, PUT, and DELETE Endpoints for /api/tasks/[id]
- Step 6: Adding Input Validation with Zod
- Step 7: Adding Error Handling
- Wrapping Up
What Are Next.js API Routes?
API routes are just files that handle incoming requests in Next.js. These routes files live inside your project, and each file acts as a backend endpoint. So…when a request hits a specific URL, Next.js runs the file that matches automatically.
So this way, as I said earlier, there’s no need to set up a separate backend.
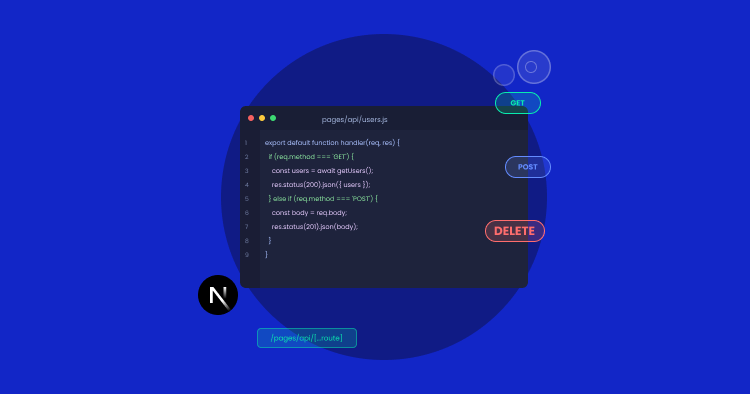
The way it works is pretty straightforward. Inside the app folder, you create a route.ts file inside a folder. The folder name becomes part of the URL.
So for example, app/api/users/route.ts handles the requests to /api/users.
Still with me?
Inside our route.ts file, we export functions like GET, POST, PUT, PATCH, or DELETE. When a request comes in, Next.js runs the function that matches the HTTP method. That is all there is to it.
When to Use Next.js API Routes
Next.js API routes are good for most, but… not for every situation. In my opinion, here’s when they make sense and when they absolutely don’t.
Makes sense when:
- you’re building a full stack app and want to keep the frontend/backend in one project
- the API is mostly used for your own frontend and not as a public API for third parties
- you want quick endpoints for actions like form submissions, database reads, etc
- you’re deploying to Vercel or any other serverless platform that runs Node.js
Doesn’t makes sense when:
- you need long-running tasks like large file uploads that can halt due to timeouts
- your backend is heavy and would be better off in a dedicated server
- you need WebSockets or real-time connections (API routes are stateless)
- you’re building a public API that needs more control over things like rate limiting, caching, and versioning
For small to medium scale projects, like the ones that have the frontend and backend tightly coupled, Next.js API routes are worth using.
High-Performance Database and PHP Hosting for Your APIs
Support your Next.js API routes with a dedicated backend. Cloudways provides optimized PHP stacks and scalable databases to serve your data instantly.
Common HTTP Methods
Each HTTP method has a specific job when used with the REST APIs. Let me quickly explain what each one does.
| Method | What It Does | Example Use Case |
| GET | Fetches data from a server | Gets all tasks or a single task |
| POST | Creates new data on a server | Adds a new task |
| PUT | Updates existing data (full replace) | Updates a task’s title, status, etc |
| PATCH | Updates part existing data (partial replace) | Marks a task as completed |
| DELETE | Removes data from a server | Deletes a task |
In the mini project I’ll build next, I’ll use GET, POST, PUT, and DELETE. PATCH is more or less like PUT but used for partial updates. I won’t cover it separately.
How to Build REST Endpoints Using Next.js API Routes
To show you how REST endpoints work using Next.js API routes, I’ll create a mini project. It’ll basically be a backend for a to-do kind of app with five endpoints that let you:
- fetch all of the tasks
- fetch just one task
- create a task
- update it
- and delete the task
This will cover the main HTTP methods you’d use in any REST API. I’ll skip building a UI for this project and instead show you the API requests firing through Postman.
What I’ll Be Using
- Node.js
- VS Code
- Postman
- Next.js, Prisma, and SQLite
Step 1: Setting Up the Next.js Project
The first thing I need to get started is a Next.js project. But…before I create that, I need Node.js on my machine.
Installing Node.js
I can go to nodejs.org and get the LTS version. I’m getting the standalone binary version because my office laptop has IT restrictions.

Once downloaded, I’ll unzip the file in my downloads folder.
C:\Users\abdulrehman\Downloads\node-v24.15.0-win-x64\node-v24.15.0-win-x64
Opening the project folder in Command Prompt
Now I can go ahead and create a new folder for my project. I’ll call it: tasks-api.
Next I’ll open the command prompt. Here I’ll be running all the commands.
Once command prompt opens, I’ll go to my project folder:
cd C:\Users\abdulrehman\Desktop\tasks-api
Pointing Command Prompt to the Node binary
Since I downloaded the standalone binary version, command prompt doesn’t know where Node is on my machine. So I need to tell it.
To to this, I’ll run this command with the path where I unzipped my Node folder:
set PATH=%PATH%;C:\Users\abdulrehman\Downloads\node-v24.15.0-win-x64\node-v24.15.0-win-x64
To confirm everything is working for me, I’ll run these two commands one after the other:
node -v
npm -v
Since I can see the version numbers for Node and npm, everything is A-OK.
Creating the Next.js project
With Node and npm now ready, I’ll can create my Next.js project by running this command:
npx create-next-app@latest .
I added the dot at the end of the command to tell Next.js to set up the project inside my current folder, the tasks-api one, instead of creating a new folder.
After running the command, I’ll just hit enter to accept a few on-screen prompts.
After I do that, Next.js starts installing all the dependencies. Once it finishes, it shows a Success! message confirming the project is created.
Opening the project in VS Code
Now I’ll open our project in VS code and go to File > Open Folder, and select tasks-api folder.
The app/ folder is where all routes live. I’ll create my API endpoints in this same folder later on.
Running the project
Now I can hop back in command prompt and start the development server by running this command:
npm run dev
After starting, I can verify by going to: http://localhost:3000. Since I can see the default Next.js welcome page, that means it is working.
Step 2: Installing and Setting Up Prisma with SQLite
Now I need a database to store my tasks. For this tutorial, I’ll use SQLite and Prisma.
Installing Prisma
To install Prisma v6, I need to first stop the development server that is running. To do that, I’ll CTRL + C.
Then in the same command prompt window, I’ll run:
npm install prisma@^6 --save-dev
After installing, I also need Prisma Client. This will be the library my code will use to query the database. To install it, I’ll use this command:
npm install @prisma/client@^6
Initializing Prisma
Next, I’ll set up Prisma in my project by running:
npx prisma init --datasource-provider sqlite
This command:
- Creates a folder called prisma/ with a file inside called schema.prisma.
- Also creates a .env file at the root of the project.
Checking the generated files
Now I’ll open the .env file in VS Code and look for this line:
DATABASE_URL="file:./dev.db"
This tells Prisma to create SQLite database as a file called dev.db inside the prisma/ folder.
I’ll also open prisma/schema.prisma to make sure I see this:
generator client {
  provider = "prisma-client-js"
}
datasource db {
  provider = "sqlite"
  url      = env("DATABASE_URL")
}
Everything checks. I can safely move forward.
Step 3: Defining the Task Model and Running the First Migration
Now I’ll tell Prisma that each task in my database will have an ID, a title, a description, a completion status, and a timestamp.
Adding the Task model
To do this, I’ll open prisma/schema.prisma in VS Code and add the following:
model Task {
  id          Int      @id @default(autoincrement())
  title       String
  description String?
  completed   Boolean  @default(false)
  createdAt   DateTime @default(now())
}
Running the first migration
Since I added the Task model, I’ll run a migration so Prisma can create a matching table in SQLite.
To do this, I’ll run this command in CMD:
npx prisma migrate dev --name init
The –name init part is just a label for this migration. I could’ve named it anything.
Quick check
To verify everything is going okay so far, I should see the following files in the prisma/ folder in VS Code:
Since I can see the files I need in my project folder, I can continue.
The dev.db file in the image above is the actual SQLite database my project will use. It’s empty right now, but it has the Task table ready to receive data.
Step 4: Building the GET and POST Endpoints for /api/tasks
I will now create two endpoints:
- GET will return all tasks
- and POST will add a new task
In Next.js, API routes in the App Router are built using a route.ts file inside a folder. The folder name becomes the URL.
Setting Up the Prisma Client
Before I create the endpoints, I need a Prisma Client instance that the rest of the app can import.
Inside the app folder, I’ll create a folder named lib, and inside it, a file called prisma.ts.
Then in it, I’ll paste this code:
import { PrismaClient } from "@prisma/client";
const globalForPrisma = global as unknown as { prisma: PrismaClient };
export const prisma = globalForPrisma.prisma || new PrismaClient();
if (process.env.NODE_ENV !== "production") globalForPrisma.prisma = prisma;
This code prevents Prisma from creating new client on every reload. If I don’t do this, my server could open several connections which can cause performance problems.
Creating the Route File
Inside app folder, I’ll create a folder called api. Inside api, another folder called tasks. Inside tasks, a file called route.ts.
Path would look like this:
app/api/tasks/route.ts
The GET Endpoint
Now I’ll open app/api/tasks/route.ts and add:
import { NextResponse } from "next/server";
import { prisma } from "@/app/lib/prisma";
export async function GET() {
  const tasks = await prisma.task.findMany();
  return NextResponse.json(tasks);
}
prisma.task.findMany() will fetch all tasks for me.
NextResponse.json() will return them.
The function name GET is what will tell Next.js that it is a GET handler. POST, PUT, and DELETE work the same way.
The POST Endpoint
In the same file, below the GET function, I’ll add the POST function code block:
export async function POST(request: Request) {
  const body = await request.json();
  const task = await prisma.task.create({
    data: {
      title: body.title,
      description: body.description,
    },
  });
  return NextResponse.json(task, { status: 201 });
}
Testing the Endpoints
To test, I’ll start the dev server:
npm run dev
Open the Postman desktop application.
GET /api/tasks
I’ll set the method to GET, enter http://localhost:3000/api/tasks in the URL bar, and click Send. Since my database is empty, the response I’ll see will be:
[]
POST /api/tasks
Next I’ll change the method to POST and keep the same URL.
And also select Body > raw > JSON, paste this code and click Send.
{
  "title": "Write the tutorial",
  "description": "Finish the Next.js API routes guide"
}
I should see this response:
{
  "id": 1,
  "title": "Write the tutorial",
  "description": "Finish the Next.js API routes guide",
  "completed": false,
  "createdAt": "2026-05-12T10:32:14.000Z"
}
As you can see in the screenshot above, it worked.
Now I’ll confirm if the task got saved in the database. So I’ll change the method back to GET, and click Send.
Instead of an empty array, this time I should see what got saved earlier.
[
  {
    "id": 1,
    "title": "Write the tutorial",
    "description": "Finish the Next.js API routes guide",
    "completed": false,
    "createdAt": "2026-05-12T10:32:14.000Z"
  }
]
And great, the screenshot below confirms both endpoints are working for me. POST is writing the tasks to the database, and GET is reading them back.
Next I need to set up GET by ID, PUT, and DELETE.
Step 5: Building the GET, PUT, and DELETE Endpoints for /api/tasks/[id]
Now the end points I need to create, they work on a single task by its ID.
Creating the Dynamic Route File
For this, inside the app/api/tasks folder, I’ll create a new folder named [id]. And inside the folder, I’ll create a file named route.ts.
The path would look like this:
app/api/tasks/[id]/route.ts
[id] in the folder name acts as a placeholder.
The GET by ID Endpoint
Now I’ll open app/api/tasks/[id]/route.ts and add this code:
import { NextResponse } from "next/server";
import { prisma } from "@/app/lib/prisma";
export async function GET(
  request: Request,
  { params }: { params: Promise<{ id: string }> }
) {
  const { id } = await params;
  const task = await prisma.task.findUnique({
    where: { id: Number(id) },
  });
  if (!task) {
    return NextResponse.json({ error: "Task not found" }, { status: 404 });
  }
  return NextResponse.json(task);
}
The PUT Endpoint
Below the GET function in the same file, I’ll add this:
export async function PUT(
  request: Request,
  { params }: { params: Promise<{ id: string }> }
) {
  const { id } = await params;
  const body = await request.json();
  const task = await prisma.task.update({
    where: { id: Number(id) },
    data: {
      title: body.title,
      description: body.description,
      completed: body.completed,
    },
  });
  return NextResponse.json(task);
}
The DELETE Endpoint
And below the PUT function, I’ll just add this:
export async function DELETE(
  request: Request,
  { params }: { params: Promise<{ id: string }> }
) {
  const { id } = await params;
  await prisma.task.delete({
    where: { id: Number(id) },
  });
  return NextResponse.json({ message: "Task deleted" });
}
Testing the Endpoints
With the dev server running, I’ll open Postman and test each new end point I created.
GET /api/tasks/1
The response should be the task I created earlier:
{
  "id": 1,
  "title": "Write the tutorial",
  "description": "Finish the Next.js API routes guide",
  "completed": false,
  "createdAt": "2026-05-12T10:32:14.000Z"
}
PUT /api/tasks/1
Now I’ll change to PUT with the same URL http://localhost:3000/api/tasks/1. And paste this code:
{
  "title": "Write the tutorial",
  "description": "Finish the Next.js API routes guide",
  "completed": true
}
The response should now show completed: true:
{
  "id": 1,
  "title": "Write the tutorial",
  "description": "Finish the Next.js API routes guide",
  "completed": true,
  "createdAt": "2026-05-12T10:32:14.000Z"
}
DELETE /api/tasks/1
Lastly, I’ll change to DELETE, keeping the same URL http://localhost:3000/api/tasks/1.
The response should be:
{
  "message": "Task deleted"
}
And to verify if the delete function worked, I’ll use the GET method with this URL: /api/tasks.
The array should return empty again, as you can see in the GIF below as well.
So all 5 endpoints are working properly. Next, I’ll add input validation so my API doesn’t accept bad data.
Step 6: Adding Input Validation with Zod
Right now POST and PUT will accept whatever data I input. That is a problem. To fix this, I’ll implement input validation.
For validation I am going to use Zod, which will allow me to define what the data should look like and then check incoming data against it.
Installing Zod
I’ll stop the already running dev server. And then in command prompt, I’ll run this install command:
npm install zod
Creating a Validation Schema
Inside the app/lib folder, I’ll create a file called validations.ts.
Inside the file, I’ll add this code:
import { z } from "zod";
export const taskSchema = z.object({
  title: z.string().min(1, "Title is required"),
  description: z.string().optional(),
  completed: z.boolean().optional(),
});
Wiring Validation into POST and PUT
To connect things up, I’ll open route.ts file at app/api/tasks/route.ts and add this below the existing imports:
import { taskSchema } from "@/app/lib/validations";
And replace the existing POST function with this code snippet:
export async function POST(request: Request) {
  const body = await request.json();
  const result = taskSchema.safeParse(body);
  if (!result.success) {
    return NextResponse.json(
      { error: result.error.issues },
      { status: 400 }
    );
  }
  const task = await prisma.task.create({
    data: result.data,
  });
  return NextResponse.json(task, { status: 201 });
}
Now I’ll go to the other route.ts file at app/api/tasks/[id]/route.ts and use the same validation approach for the PUT function. Add taskSchema import at the top and update PUT function:
export async function PUT(
  request: Request,
  { params }: { params: Promise<{ id: string }> }
) {
  const { id } = await params;
  const body = await request.json();
  const result = taskSchema.safeParse(body);
  if (!result.success) {
    return NextResponse.json(
      { error: result.error.issues },
      { status: 400 }
    );
  }
  const task = await prisma.task.update({
    where: { id: Number(id) },
    data: result.data,
  });
  return NextResponse.json(task);
}
Testing the Validation
To test, I’ll start the dev server again and send a POST to http://localhost:3000/api/tasks with an empty title:
{
  "title": "",
  "description": "Trying to break the API"
}
I’ll see a 400 with an error message that the title is required.
If I try again with a valid body, the task will get created with a 201 OK.
And with that, validation is in place for both POST and PUT.
Step 7: Adding Error Handling
To make sure everything doesn’t break when something goes wrong, I’ll need to add try/catch around my database calls.
Wrapping the Endpoints
To do this, I’ll need to go to app/api/tasks/route.ts and wrap the body of the GET function in a try/catch.
In the catch, I’ll return a message like “Failed to fetch tasks”. And apply the same wrapping to POST.
Then I’ll go to the app/api/tasks/[id]/route.ts and add the try/catch block to GET by ID, PUT, and DELETE functions.
Testing the Error Handling
To test, I’ll send a DELETE request to http://localhost:3000/api/tasks/9999. This ID does not exist so instead of a crash, the error handling I implemented will show 404 with a message.
I’ll test with the PUT request too at /api/tasks/9999 with a valid JSON body. This will also show me 404 with an error message.
And that’s it. All 5 endpoints are working and data is being saved into SQLite. This completes my mini project on REST API using Next.js API routes.
Wrapping Up
To do a quick recap, in this tutorial, I connected Prisma to an SQLite database, built five CRUD endpoints, added validation with Zod and error handling using try/catch.
As I promised earlier, the full project is available on my GitHub. You can clone it and use it as a starting point for your own project.
If you have any questions, let me know in the comments.
Q1: What are API routes in Next.js?
API routes allow creating backend endpoints inside Next.js projects. Any file inside app/api is considered an API endpoint instead of a page. Routes run on the server and handle incoming HTTP requests.
Q2: Does Next.js handle routing?
Yes. Next.js has its own routing system. It supports navigation between pages using the Link component. This makes navigation feel smooth, similar to a single pager app.
Q3: What HTTP methods are supported in Next.js routes?
Inside the routes file, you can have handlers for common HTTP methods like GET, POST, PUT, PATCH, DELETE, HEAD, and OPTIONS. Next.js fires the matching function based on the request type it receives.
Q4: What’s the difference between API routes and Server Actions?
API routes are backend endpoints that can be called from anywhere, even external services. Server Actions, as the name suggests, run on the server and are mainly used directly inside your React components to handle tasks like form submissions or internal updates.
Abdul Rehman
Abdul is a tech-savvy, coffee-fueled, and creatively driven marketer who loves keeping up with the latest software updates and tech gadgets. He's also a skilled technical writer who can explain complex concepts simply for a broad audience. Abdul enjoys sharing his knowledge of the Cloud industry through user manuals, documentation, and blog posts.