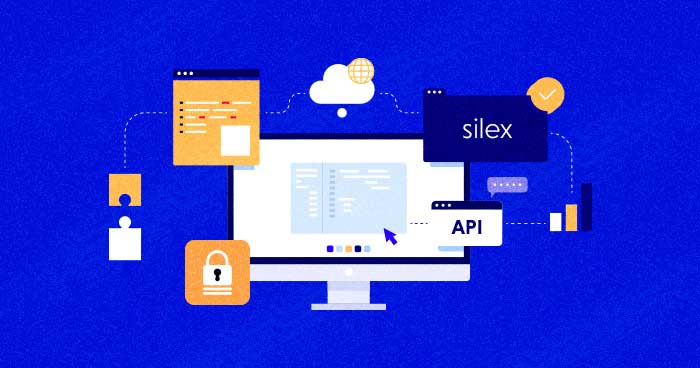
Using Silex Rest API with user authentication is much more secure and practical. Rest API is an application programming interface that conforms to the imperatives of REST architectural style and permits the interaction with Restful web services. Silex is a PHP micro-framework that’s built on the basis of a few key Symfony components. It permits you to quickly create both websites and APIs without the.
When you are working with cross-device applications you need to develop a REST API to interact with the application smoothly. In a previous article, I covered a Slim based REST API in detail. In essence, REST API acts as a bridge or medium between data resources and the application interface; irrespective of the devices.
In this article, I am going to develop a simple REST API using the Silex framework on Cloudways’ PHP MySQL hosting . Once authenticated, the user can perform further actions. This article will cover the following topics:
All you need to develop this API are a code editor, Composer, and Postman. My main focus in this tutorial is background service, so I will not be doing much work on the views. For the purpose of this article, I assume that you have launched a PHP stack server on Cloudways. If not consult the following GIF for more details:

Understanding Silex Framework
Silex is a PHP microframework built with Symfony components and Pimple. The framework is ideal for single-page applications. Silex has an extension system based around the Pimple micro service container that makes it even easier to tie in third party libraries. It uses the Symfony HTTPKernel to request and respond to HTTP requests.
The composer is the most proper way of installing Silex. For this, go to your project folder using this command:
cd application/{your_app_folder}/public_html
Next, execute the following command:
composer require silex/silex “2.0”
Alternatively, If you do not wish to install it from the Composer, you can download Silex 2 from here.
Once Silex has been successfully installed, I will next edit the autoload.php and initialize Silex in the application through index.php.
require 'vendor/autoload.php';
$app = new Silex\Application();
Now to run the application, add `$app-> run()` at the very end of the application before closing the PHP tags. All the code will be reside before the above $app-> run().
HTTP Codes
Silex makes use of the HTTP codes extensively while sending and receiving responses. Thus, You should be aware of HTTP codes while working with REST API in Silex. Following is the list of some of the most common codes that I will use in the REST API code:
| HTTP Code | Description |
|---|---|
| 200 | OK |
| 201 | Created |
| 204 | No Content |
| 400 | Bad Request |
| 401 | UnAuthorized |
| 403 | Forbidden |
| 404 | Not Found |
| 500 | Internal Server error |
For more detailed coverage of HTTP codes, check out this article.
Middleware
Silex allows you to run the code that altered the default behavior of Silex, at different stages during the handling of a request through middleware. This Middleware can run before and after the matching route. I will use middleware to check whether a user exists in the database. Silex provides two types of middlewares: Application and Route.
Developing the REST API
Let’s get started with the real scenario of this tutorial.
First, you need to import tables in the demo database that contain both the user and the messages tables. Copy the following SQL code and run it in the SQL box in the database:
SET SQL_MODE = "NO_AUTO_VALUE_ON_ZERO";
SET time_zone = "+00:00";

CREATE TABLE `messages` (

 `id` int(10) NOT NULL,
 `user_id` int(10) NOT NULL,
 `body` varchar(255) NOT NULL,
 `image_url` varchar(255) NOT NULL,
 `created_at` datetime NOT NULL
) ENGINE=InnoDB AUTO_INCREMENT=5 DEFAULT CHARSET=latin1;


INSERT INTO `messages` (`id`, `user_id`, `body`, `image_url`, `created_at`) VALUES
(1, 1, 'Visiting New York for the first time. Any suggestions on great places to visit?', '', '2016-07-01 01:00:00'),
(2, 1, 'Wow, the buildings are so big! ', '', '2016-07-05 01:00:00'),
(3, 1, 'So let me tell you what happened last night. I was just hanging out minding my own business and saw the Empire State Building.', '', '2016-07-12 00:00:00'),
(4, 1, 'So I decided to go see it. That''s when the trouble started', '', '2016-07-12 01:00:00');


CREATE TABLE `users` (
 `id` int(10) NOT NULL,
 `username` varchar(32) NOT NULL,
 `password` varchar(64) NOT NULL,
 `email` varchar(50) NOT NULL,
 `profile_icon` varchar(255) NOT NULL,
 `apikey` varchar(255) NOT NULL
) ENGINE=InnoDB AUTO_INCREMENT=5 DEFAULT CHARSET=latin1;


INSERT INTO `users` (`id`, `username`, `password`, `email`, `profile_icon`, `apikey`) VALUES
(1, 'peter', '000c285457fc971f862a79b786476c78812c8897063c6fa9c045f579a3b2d63f', '[email protected]', 'peter.jpg', 'd0763edaa9d9bd2a9516280e9044d885'),
(2, 'marcia', '4d6b96d1e8f9bfcd28169bafe2e17da6e1a95f71e8ca6196d3affb4f95ca809f', '[email protected]', 'marcia.jpg', 'd0763edaa9d9bd2a9516280e9044d885'),
(3, 'cindy', '81ba24935dd9a720826155382938610f1b74ba226e85a7b4ca2ad58cf06664fa', '[email protected]', 'cindy.jpg', 'd0763edaa9d9bd2a9516280e9044d885'),
(4, 'mike', 'ef1b839067281c41a6abdf36ff2346700f9cd5f17d8d4e486be9e81c67779258', '[email protected]', 'mike.jpg', 'd0763edaa9d9bd2a9516280e9044d885');

ALTER TABLE `messages`
 ADD PRIMARY KEY (`id`),
 ADD KEY `user_id` (`user_id`);

ALTER TABLE `users`
 ADD PRIMARY KEY (`id`);

ALTER TABLE `messages`
 MODIFY `id` int(10) NOT NULL AUTO_INCREMENT,AUTO_INCREMENT=5;

ALTER TABLE `users`
 MODIFY `id` int(10) NOT NULL AUTO_INCREMENT,AUTO_INCREMENT=5;
This query will create the tables and insert the dummy data. The next step is to install the ORM to communicate with the tables.
Stop Wasting Time on Servers
Cloudways handle server management for you so you can focus on creating great apps and keeping your clients happy.
Install Eloquent in Silex
I will use Laravel’s Eloquent in Silex. The Eloquent ORM included in Laravel provides a beautiful, simple ActiveRecord implementation for working with the database. Each database table has a corresponding “Model” which is used to interact with that table. Models allow you to query for data in the tables, as well as insert new records into the table.
Eloquent can be installed and use independently. To install it, run the following Composer command:
composer require illuminate/database “5.2”
Once the Eloquent ORM is successfully installed, create a file connection.php for establishing a connection with the database.Remember you need to add your database credentials (available in the Application Access area of the Cloudways Admin).
Open connection.php and add the following code to it:
<?php

require 'vendor/autoload.php';
use Illuminate\Database\Capsule\Manager as Capsule;

$capsule = new Capsule();

$capsule->addConnection([

   "driver"     => "mysql",
   "host"       => "localhost",
   "database"   => "database",
   "username"   => "root",
   "password"   => "password",
   "charset"    => "utf8",
   "collation"  => "utf8_general_ci"
]);

$capsule->bootEloquent();

?>
The connection will be established now. The next step is to create the Models of the tables.
Create User and Message Models
When you install Silex, you just got the vendor folder and some composer files. You need to add the src folder in the root, and then add a Todo folder. The Todo folder contains two more sub folders, Models and Middleware.
Create Authentication.php in the Middleware folder. Similarly, the Model folder will contain Message.php and User.php files (check the image below)
As I explained earlier, each database table has a corresponding “Model” which is used to interact with that table. I will now add the Message class in Message.php, which will extend the Eloquent models.
<?php

namespace Todos\Models;

Class Message extends \Illuminate\Database\Eloquent\Model
{

}

?>
This is a simple class with no code. Now, I shall add the User class in the User.php. However, before doing it, I am going to authenticate the user by wiring up a middleware. Open the Authenticate.php file and add the Authentication class in it.
<?php

namespace Todos\Middleware;
use Todos\Models\User;

class Authentication {
public function authenticate($request, $app)
{

   $auth = $request->headers->get("Authorization");
   $apikey = substr($auth, strpos($auth, ' '));
   $apikey = trim($apikey);
   $user = new User();
   $check = $user->authenticate($apikey);

   if(!$check){
       $app->abort(401);
   }

   else $request->attributes->set('userid',$check);

   }
}

?>
This class contains an authenticate() method which gets the header information and saves the API key from the header. This API key will be used in the User model which also has an authenticate() function taking apikey as an argument. If the API key is not found, a 401 HTTP error code (user is not authorized) will be generated.
Next, I saved the user id in $request->attributes->set(‘userid’,$check); variable which I will use to get selected user’s messages.
Now open the User.php. I will use the above API key to retrieve user information using Eloquent.
<?php

namespace Todos\Models;

class User extends \Illuminate\Database\Eloquent\Model

{
   public function authenticate($apikey)
   {
       $user = User::where('apikey', '=', $apikey)->take(1)->get();
       if(isset($user[0])){

           $this->details = $user[0];
           return $this->details->id;
       }

       return false;
   }
}
In the first line of this code, I get the the user from the database. This line `$user = User::where(‘apikey’, ‘=’, $apikey)->take(1)->get();` generates a query similar to the SQL query `select * from the users where apikey = $apikey`. Next, it returns the details of the user that will then be used for getting messages.
At this point, I have finalized the models and the middleware. Now, I am going to create the routes and perform REST actions for user based messages.
Create Routes and Perform API Actions
Previously, I initialized Silex In index.php file. Now the code in this file will be extended to include the connection file,Request/Response component, Models and Middleware.
include 'bootstrap.php';

use Todos\Models\Message;

use Todos\Models\User;

use Symfony\Component\HttpFoundation\Request;

use Symfony\Component\HttpFoundation\Response;

use Todos\Middleware\Authentication as TodoAuth;
I need to set up the authentication middleware before every action. I am using the before application middleware which allows me to tweak the Request before the controller is executed.
$app->before(function($request, $app) {

            TodoAuth::authenticate($request, $app);
});
Retrieving User Messages
I will get the messages of the user with the get() request. Remember, I have saved the user id in the User model, which I am going to pass here to get the messages.
$app ->get('/message', function(Request $request) {

$message = Message::where('user_id', $request->attributes->get('userid'))->get();
$payload = [];

foreach ($message as $msg){

       $payload[$msg->id] =
       [
               'body' => $msg->body,
               'user_id' => $msg->user_id,
               'created_at' => $msg->created_at
       ];
}

 return json_encode($payload, JSON_UNESCAPED_SLASHES);

});
I will save the necessary details in $payload array and return the encoded data. Here, I am using Postman to test out the API. First, I am getting the messages without the apikey. It should give a 401 unauthorized error from the User model.
Now, let’s pick the apikey of a user from the database and add in the Authorization value. The user messages are now retrieved.
So now that the testing is done, I am getting messages by authenticating a user with his/her apikey.
Retrieving the Messages of a Single User
Now, if you want to retrieve the messages of a single user, simply pass the message ID with `/message` route (use the syntax /message/{message_id}). Similarly, I will use the payload array to show the record.
$app->get('/message/{message_id}', function($message_id) use ($app) {

  // $_message = $request->get('message');

    $message = Message::where('id', $message_id)->get();

   //$message = new Message();

   $payload = [];

foreach ($message as $msg){
       $payload[$msg->id] =

       [
               'body' => $msg->body,
               'user_id' => $msg->user_id,
               'created_at' => $msg->created_at
       ];
}
 return json_encode($payload, JSON_UNESCAPED_SLASHES);

});
Simply pass the message id in where() to retrieve the matching message.
Create a New Message via Post
Now I will create a new message for the current authenticated user by getting the message value and passing the userid. The Eloquent save() method will then create a new message in the database.
For instance, I will check whether the selected message ID exists. Next, I will pass the message_id and message_uri to $payload array with a 201 code. If the message creation fails, a 400 error code will be generated.
$app->post('/message', function(Request $request) use ($app) {

   $_message = $request->get('message');
   $message = new Message();

   $message->body = $_message;
   $message->user_id = $request->attributes->get('userid');
   $message->save();

   if ($message->id) {

       $payload = ['message_id' => $message->id, 'message_uri' => '/messages/' . $message->id];
       $code = 201;

   } else {

       $code = 400;
       $payload = [];
   }

   return $app->json($payload, $code);

});
This will get the message and the route from which the message is created.
Update the Message via PUT
Next, I will try to update a previously created message by getting the message value as a parameter and the message ID from the route.
$app->put('/message/{message_id}', function($message_id,Request $request) use ($app) {

   $_message = $request->get('message');
   $message = Message::find($message_id);
   $message->body = $_message;
   $message->save();

   if ($message->id) {

       $payload = ['message_id' => $message->id, 'message_uri' => '/messages/' . $message->id];

       $code = 201;

   } else {

       $code = 400;
       $payload = [];
   }

   return $app->json($payload, $code);

});
Delete the Message via Delete
The last action of the API is to delete the user message. For this, I need to pass the message ID and the delete() method will take care of the deletion of record. In the event of success, a 204 response code is returned.
$app->delete('/message/{message_id}', function($message_id) use ($app) {

   $message = Message::find($message_id);
   $message->delete();

   if ($message->exists) {
       return new Response('', 400);

   } else {

       return new Response('', 204);
   }

});
Conclusion
REST API is a great solution for creating cross-device applications. It provides a set of HTTP codes through which the developer could easily identify the flow of data. In this article, I explained how to make a REST API in Silex that integrates user authentication as a core component.
SILEX Rest API works with module lazy load and uses microservices. It uses token authentication and is useful for different cross-platform languages.
If you have any questions about the topic, do leave a comment below.
Inshal Ali
Inshal is a Content Marketer at Cloudways. With background in computer science, skill of content and a whole lot of creativity, he helps business reach the sky and go beyond through content that speaks the language of their customers. Apart from work, you will see him mostly in some online games or on a football field.