Quite a few websites these days require users to log in to use the full complement of their services. As a result, the average Internet user has more accounts and passwords than they can remember. Often enough, people even forget the usernames associated with their accounts.
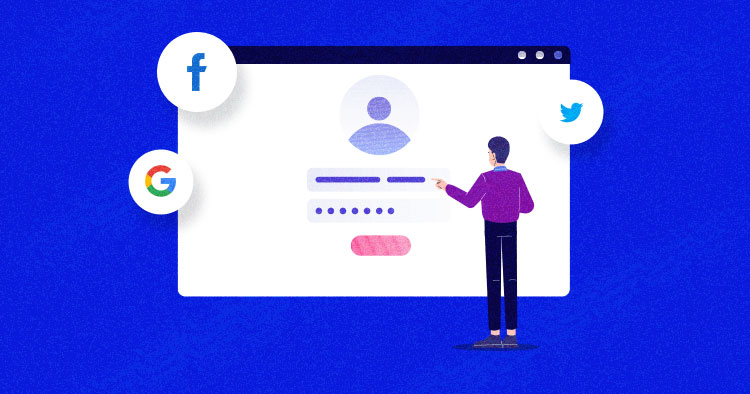
A single set of credentials that work everywhere is thus an appealing notion. Most people use at least one social media account regularly, and it can simplify the logging in process to use that account to sign into other sites. Facebook, Twitter and LinkedIn are some of the popular platforms that have opened up their API to use user credentials as social login for other websites.
WooCommerce’s signup and login process is similar to WordPress, which means it’s lengthy and requires the user to submit an email address, password, and username. The user then receives the signup link in the email. Using social media accounts as login credentials for WooCommerce and WordPress websites considerably shortens this process and saves the users from remembering another set of credentials.
To help you get started, I will show you how you can integrate WooCommerce social login and increase the conversion rate of your WooCommerce store.
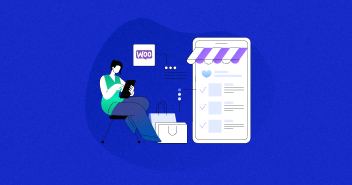
What is WooCommerce Social Login?
WooCommerce social login helps users speed up the login process. All they have to do is click a button that’s connected to their social media profiles. For WooCommerce store owners, social login offers accurate data, and above all, a verified profile (with an active email address) that they can use for nurturing campaigns.
Benefits of WooCommerce Social Login
WooCommerce social login comes with a whole lot of benefits:
- The administrator gets access to verifiable user data.
- Store owners see a significant boost in the conversion rate of WooCommerce stores.
- Users save a lot of time and wasted effort.
- Security is improved for everyone.
- Administrators can fill a lot of gaps in user details through social login.
How WooCommerce Social Login Works
WooCommerce social login is easy to use, and the users don’t have to enter additional details during the process. The process is applicable on all pages, including the login page, checkout page, and more.
Let’s have a look at the Packwire website that employs social login for the users:

As you can see in the above image of a login page, users don’t need to enter any additional information. All they have to do is click their preferred social media login button, and they are good to go.
How to Install & Configure Social Login Plugin for WooCommerce Store
I will now discuss how you can configure a plugin to enable social login for your WooCommerce store. You can use any plugin to enable social login. In this guide, I will demonstrate the process using Super Socializer, because of its excellent compatibility with WooCommerce.
I also assume you’ve already installed WordPress with WooCommerce on your staging server. Let’s move to step one!
Step 1: Install Super Socializer Plugin
- Login to your WordPress website and navigate to WordPress Dashboard > Plugin > Add New.
- Search Super Socialize on the top-right search bar.
- Click on the Install button.
- Activate the plugin by clicking on the Activate button after successful installation.
- Once the plugin is activated, you’ll see the new menu bar named Super Socializer.
Now, it’s time to get into the configuration part of the plugin and see how we can manage the plugin for the social login.
Step 2: Configure Super Socializer
Under the Super Socializer menu, you have configuration options such as General Options, Social Commenting, Social Login, Social Sharing, and Like Button. Let’s figure out every option in detail.
General Options
Under the General Options section, you’ll see some of the JavaScript settings you can check and uncheck, as well as a custom CSS field where you can add your CSS code. If you are not a techie, I highly recommend choosing the default settings. Don’t forget to click the Save button to keep the changes.
Social Commenting
The Social Commenting section enables visitors to comment on your website’s posts, pages, attachments, and products by using their existing social media accounts. Check Enable Social Commenting to enable the commenting option.
You can label your WordPress, Facebook, and Disqus commenting tab and control the tabs’ styling.
Social Sharing
You’ll see multiple tabs in a Social Sharing tab that offer different settings. These tabs are responsible for interface styling. Let’s have a look at each option.
Theme Selection
The Theme Selection tab contains icon styling and settings for the two types of themes. The first one is the Standard Interface theme, and the second is the Floating Interface theme. You can select the shape, size, logo color, background color, border styling, and position of the social icons according to your theme.
Standard Interface
The Standard Interface tabs contain the Target URL option to put the URL where you want to locate your social icon on your website. You can also set the title for your social icons, select the sharing services, and have many social network accounts so you can checkmark the one you are planning to use.
Also, you can manage the horizontal and vertical positioning of your social icons and select the placement where you want to show these icons.
Floating Interface
The Floating Interface tab has similar options as the Standard, but you can configure the plugin according to your chosen interface.
Miscellaneous
The Miscellaneous tab contains the URL shortener, share count cache, language, username, and AMP Pages options. You can enable these settings by checking the option.
Like Button
Here you can set the like button setting and where you want to add it. The available options include the homepage, posts, pages, excerpts, posts page, category archives, the archive pages (category, tag, author, or date-based pages), attachments, products, and tabs.
Social Login
The Social Login section has an option: Enable Social Login. This means that this master control tab is responsible for enabling and disabling the social login option on your website.
The Social Login enables the visitors to log in using their social network accounts, including Facebook, Twitter, LinkedIn, Google +, etc.
- Select Enable Social Login
- Under the Basic Configuration tab, select the providers (social media networks) you want to include in the Login screen.
You need to get the API for each provider you include on the login page. This tutorial will cover this part using Facebook as a social account
Step 3: Get the Facebook App ID
To get your Facebook account API, log in to your Facebook account and go to the Facebook developers options. If you don’t have a developer account, register yourself first.
- Go to developers.facebook.com and click on Register.
- Your Facebook account is already selected here. Just click on the Continue button.
- Now, confirm your email address, agree on the terms and conditions, and click on Confirm Email.
- At last, select the option that describes you, and click on Complete Registration.
- Now, click on the Create App button.
- Select the type of your app. The app type can not be changed after your app is created. Click on the Next button.
- Provide the basic information about your app, enter the display name, confirm the email address, select the business account, and click on Create App.
- Now, you have to re-enter the password and click on the Submit button.
- Your app is created successfully. Now you need to set up a Facebook Login in it.
- Click Set up on the Facebook Login card.
- Select the web option.
- You have to fill out specific options to complete the process, including Tell Us About Your Website, Set up the Facebook SDK for Javascript, Check Login Status, Add the Facebook Login Button, and Next Steps.
- Next, navigate to Settings > Basic. Here you can get the App ID and the App Secret Key.
- Copy the App ID and App secret.
- Now go back to the WordPress Admin Panel and navigate Super Socializer > Social Login. Paste the App ID and App Secret, and click the Save button to keep the changes.
You have successfully integrated the social login into your WooCommerce store. For other social networks, here is how you can get the respective API keys:
Once you have the API keys, paste them into the Super Socializer > Social Login.
Click the Save Changes button at the bottom of the screen.
Now visit your WooCommerce store and click the Login option.
You’ll see the WooCommerce social login icons.
Since I only integrated the Facebook login option, this is the only login option available.
WooCommerce Social Login Plugins
Like every other area, WooCommerce offers several plugins that get the job done when it comes to social login. To save you the trouble of searching for the right plugin, I have collected the top WooCommerce social login plugin you can use on your sites and improve the user experience of your stores.
Super Socializer
Super Socializer is a lightweight and free plugin that adds social login buttons for the login, registration, checkout, and comments sections. This fully responsive plugin is ideal if you have a lot of traffic coming in from mobile devices.
Active installations: 50,000+
WordPress Version: 2.5.0 or higher
Tested up to: 5.9.1
Notes:
- This plugin does not work on the local server. You need to install it on a live site to test plugin functionality.
- You should install Fancy Facebook Comments if you want to integrate only Facebook Comments.
- If you’re going only to incorporate Social Share, you should install Sassy Social Share.
Features
- Enable WooCommerce Social Login interface at WordPress Login, Register pages, and comment forms
- Enable WooCommerce Social Login at WooCommerce checkout page and customer login forms
- Syncs basic user social profile data with the WooCommerce profile
- Enable URL shortening for use in social sharing
- Enable/disable total/individual share count(s)
- 24/7 customer support
Nextend Social Login and Register
Nextend Social Login is easy to use. It allows simple user registration without the need for additional details. It also simplifies user registration and login processes and improves user login speed.
Active installations: 300,000+
WordPress Version: 4.9 or higher
Tested up to: 5.9.1
Features
- Super fast and super easy
- One-click registration and login
- Customized design
- User-friendly
- Great support
- Multiple social options are available
Social Login & Register for WordPress
Social Login is another free plugin that works great for your WooCommerce stores. When activated on the site, the users can log in, register, and comment using 40+ social network accounts, including Facebook, Instagram, Twitter, LinkedIn and Google+.
Active installations: 10,000+
WordPress Version: 5.4 or higher
Tested up to: 5.9.1
Features
- Supports multiple social networks
- Fully customizable interface
- Shortcodes available
WooCommerce Social Login
WooCommerce Social Login is a premium plugin that ensures your user will be able to login into the website by using their social media accounts. You can get this plugin at $79 with a 1-year extension update and support.
WooCommerce Version: 3.6.0 or higher
WordPress Version: 5.2 or higher
Tested up to: 5.9.1
Features
- Compatible with WooCommerce Product Reviews plugin
- Help your users to login into your site through their social media accounts
- Connect Facebook, Twitter, Google, LinkedIn, Amazon, etc.
Summary
With social login, you can simplify the entire signup and login process. As a store owner, you get the advantage of verified user data and access to social media profiles that you can use to nurture leads.
Launch a WooCommerce Managed Hosting server today to integrate WooCommerce social login into your online store.
Q. How do I enable Social Login on WooCommerce?
A. To enable Social Login on your WooCommerce store,
install a plugin like WooCommerce Social Login or Nextend Social Login.
After activation, configure the settings by connecting the desired social media platforms (Facebook, Google, etc.) with your WooCommerce store.
The plugin will then add login buttons to the login and checkout pages.
Q. Can Social Login increase sales on my WooCommerce store?
A. Yes, Social Login can increase sales by providing a faster, more convenient login process, which encourages users to register and complete purchases. Since users don’t have to remember new login credentials, they are more likely to return to your store and make repeat purchases
Q. Are Social Login plugins for WooCommerce free?
A. Many Social Login plugins for WooCommerce offer free versions with basic features. For example, Nextend Social Login provides a free version with Facebook, Google, and Twitter login options.
Danish Naseer
Danish Naseer is a WordPress Community Manager at Cloudways. He is passionate about designing, developing, and engaging with people to help them. He also actively participates in the community to share his knowledge. Besides that, he loves to watch documentaries, traveling and spending time with family. You can contact him at [email protected]