EXPLORE CLOUDWAYS
Experience lightning-fast loading times and seamless platform
View Demo >PRODUCTS
CLOUD PROVIDERS
SUPPORTED APPS
WHO WE SERVE
PARTNERSHIP PROGRAMS
Lifetime deal: 75% OFF
Advanced Support
POWERFUL FEATURES
DISCOVER
WHY CLOUDWAYS
 Read Case Study >
 Jesse Tutt
Founder & CEO

A Cloudways tutorial on setting up WordPress Multisite: what it is, when to use it, and how to install and configure a network of sites from one dashboard.
✨ What you’ll learn
✦ What Multisite is and when it beats managing separate WordPress installs.
✦ How to install WordPress Multisite from the Applications tab on Cloudways.
✦ The difference between subdirectory and subdomain structures, and how to choose.
✦ How to update .htaccess and wp-config.php safely, then add new sites via Network Admin.
Hey there, and welcome to Cloudways. In this video I’ll walk you through setting up WordPress Multisite on the Cloudways platform. But before we jump in, let’s first understand what WordPress Multisite is and how it differs from managing multiple separate websites.
Simply put, WordPress Multisite allows you to create and manage a network of websites from a single dashboard. This is super useful for businesses where websites share similar content and functionality, such as blogs, educational platforms, e-commerce marketplaces, multilingual websites, and so on. The main benefit is that as an admin you can efficiently manage multiple websites while keeping the same themes and plugins across all of them. WordPress Multisite is of two types: subdirectories, where your sites look like this, and subdomains, where your sites look like this.
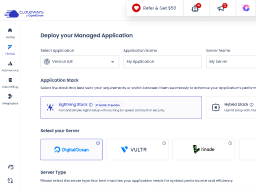
Now that we’ve covered the basics, let’s dive into setting up your WordPress Multisite on Cloudways. First, log into the Cloudways platform and navigate to the server where you want to set up your WordPress Multisite. Click on Applications and then Add Application. Choose WordPress Multisite from the dropdown, give it a name, and fill in the required details. Make sure to select the correct server and project, then click Install. Once the installation is complete, navigate to your application, click on the URL provided to access the WordPress login page, and log in with your admin username and password.
Deactivate all installed plugins before setup, as it prevents compatibility conflicts, ensures clean configuration, and avoids data corruption from incompatible plugins. You can activate them after the Multisite is up and running. For this, go to Tools, then Network Setup. Select all plugins, choose Deactivate from the dropdown, and click Apply. This will deactivate all the plugins.
Now go to Tools, then Network Setup, and decide whether you want to organize your sites as subdomains or subdirectories. You can make your selection based on your preference. Here we are choosing subdirectories. After choosing your site structure, WordPress will provide you with two important code snippets that need to be added to specific files. Let’s handle them one by one.
Go to your application’s public_html directory. For updating .htaccess, in the directory find the .htaccess file, make a backup by copying all the contents of the file and save it in a safe place, then replace the entire content with the provided code. For updating wp-config.php, locate the file, then copy and paste the provided code before the line that says “That’s all, stop editing.” You have to consider a few things while adding the code: choose the correct .htaccess code block based on whether you selected subdomains or subdirectories, and keep a backup of both files before making changes.
Now log into your WordPress dashboard, go to My Sites on the wp-admin dashboard, select Network Admin, click on Sites, and add a new site as per your requirement. That’s it. You’ve successfully set up WordPress Multisite on Cloudways. For more detailed information, check out the Knowledge Base article attached in the description. Stay tuned for more Cloudways tutorials. Thank you for watching, and we’ll see you in the next video.
Answer a few questions, and we'll present you with a personalized tour of the Cloudways platform based on your answers.