Key Takeaways
- Configure Cloudways for Multisite before migrating as network type is permanent.
- Include all database tables in the transfer or subsites will break.
- Test locally using the hosts file before updating DNS.
- Subdomain networks need a wildcard SSL certificate while subdirectory networks only need one.
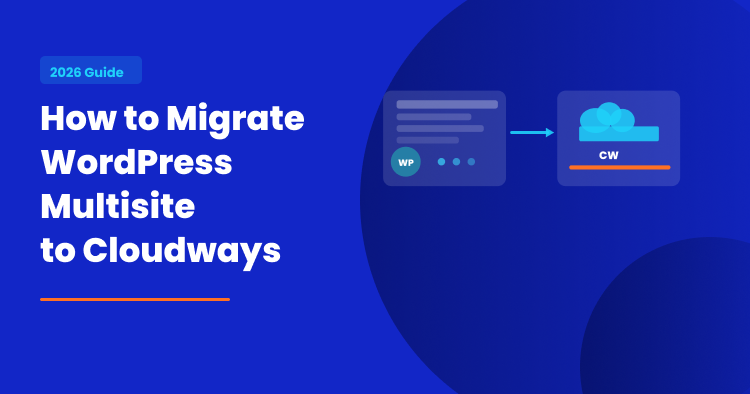
Migrating a regular WordPress site is quite easy. You back up, move the files, transfer the database, update DNS, and you are done. Multisite is a different story.
When you run a WordPress Multisite network, you are not moving one site. You are moving an entire network. Multiple subsites, a shared database with network-level tables, plugins and themes that serve every site on the network, and in some cases, individually mapped domains for each subsite.
One wrong step can take down every site on the network at once, not just one.
If you are looking for a general WordPress migration guide, we have a full checklist for that. For everyone else, let’s get into it.
Why Migrating a Multisite Is Different From a Regular WordPress Migration
Most migration guides cover single-site WordPress installs. Multisite has a different database structure that makes the process more complex.
In a regular WordPress install, you have one set of database tables. In a Multisite network, you have network-level tables that manage the entire installation, plus separate tables for each subsite. All of it sits in one shared database. If the database does not transfer correctly, subsites will break even if the main site loads fine.
The type of network you are running also matters. A subdomain network where subsites live at site1.yourdomain.com behaves differently from a subdirectory network where they live at yourdomain.com/site1.
The destination server needs to be configured to match your source setup before migration begins. You cannot migrate first and configure later.
If any of your subsites use domain mapping, where a subsite has its own completely separate domain, those will need extra attention during and after the move.
Before You Start: What to Prepare?
Document your network structure. Write down every subsite, its URL, and whether you are running a subdomain or subdirectory setup. If you have domain-mapped subsites with their own separate domains, list those too. You will need this information at multiple points during the migration.
Also make a note of which plugins are network-activated and which are activated on individual subsites only. After migration, you will need to verify that network-activated plugins are working correctly across the whole network, not just the main site.
Also confirm that your Cloudways account is on a paid plan before you begin. Managed migration is not available during the free trial period. If you plan to have the Cloudways expert team handle the migration for you, upgrade first.
Ready to take your WooCommerce product variations to the next level?
Experience unparalleled performance, security, and customization options with Cloudways WooCommerce Hosting.
How to Migrate Your WordPress Multisite Network to Cloudways
The migration itself follows five steps. The order matters here. Cloudways requires specific configuration on the destination before any data moves across, so do not skip ahead or run steps out of sequence.
Step 1 — Set Up Your Cloudways Application for Multisite
Most migrations follow a simple pattern: set up the destination, then migrate. With Multisite, the destination needs specific configuration before any files or data move across. Skip this and the migration will not work correctly.
Here is what to do:
Note: One important thing to keep in mind before you begin. Make sure you are installing a fresh WordPress application on your Cloudways server. Any existing data on the destination application will be overwritten during migration. Do not migrate into an application that already has content you want to keep.
- Install a fresh WordPress application on your Cloudways server.
- . Once it is created, go to the Applications tab and select the application you just created.
- From there, navigate to Application Settings and switch to the WordPress tab.
- Find the WordPress Multisite option and enable it.

- A popup will appear asking you to choose your network type.
- Choose Subdomain if your subsites currently live at site1.yourdomain.com.
- Choose the Subdirectory if they live at yourdomain.com/site1. Match your source site exactly.
- This setting is permanent and irreversible. There is no way to switch between subdomain and subdirectory after this point without significant manual work. Double check before confirming and then click Proceed.
- After enabling Multisite, go to Domain Management in the same Application menu.
- Add your primary domain and set it as the primary domain for the application.
- If you are running a subdomain network, make sure to add all your subdomains here as well so you can test every subsite before going live.
- For a step-by-step guide on adding domains on Cloudways, refer to this guide. The Migrator plugin uses this domain as the destination URL during migration.
- If it is not set correctly, the plugin may update the wrong URLs across your network.
Step 2 — Run the Migration Using the Cloudways Migrator Plugin
With the destination configured, it is time to move the actual network. WordPress and WooCommerce migrations to Cloudways are completely free, whether you use the Migrator plugin yourself or have the Cloudways expert team handle it.
Install the Cloudways WordPress Migrator Plugin on your source site. Once activated, you will be asked for your destination server details. Here is what to enter:
- Destination Site URL — Enter the primary domain you set in Domain Management in Step 1. Do not use the temporary Cloudways URL. Using it will cause the plugin to update URLs incorrectly across your network.
- SFTP and database details — You will find these in your Cloudways Application Management panel under Access Details.
There is one setting that is critical for Multisite and easy to miss. When you reach the Migrate Additional Database Tables option, set it to Yes. Then select all tables. A Multisite network has more database tables than a single site install. If you leave any out, subsites will be missing data or will not load after migration.
Once everything is filled in, start the migration and let it run. Large networks can take a while depending on total size, so do not close the browser or interrupt the process.
Step 3 — Test Before You Change DNS
The migration is done but do not touch your DNS yet. Before pointing your domain to the new server, test the entire network locally using the hosts file method. This lets you see exactly how the migrated network behaves before any of your visitors do.
The hosts file on your computer acts as a local DNS override. By adding your server IP and domain to it, your browser will load the new Cloudways server when you visit your domain, while everyone else still sees the old site.
On Windows, open Notepad as Administrator and navigate to
C:\Windows\System32\drivers\etc\hosts.
On Mac or Linux, open Terminal and run sudo nano /etc/hosts. Add these lines at the bottom:
YOUR.SERVER.IP yourdomain.com YOUR.SERVER.IP www.yourdomain.com
Replace YOUR.SERVER.IP with the public IP from your Cloudways Application Management panel.
Once added, open your browser and check the following:
- The main site loads correctly
- Each subsite loads with the right content
- The Network Admin dashboard is accessible
- Plugins and themes are active across the network
- Any domain-mapped subsites load correctly
Fix anything that is broken before going live. Once you are satisfied, remove those lines from the hosts file. Leaving them in means your computer will always load the new server regardless of where DNS points.
Step 4 — Update DNS
Once testing is complete, point your domain to the new server before setting up SSL. Let’s Encrypt verifies domain ownership by checking that your domain resolves to the server, so DNS must be updated first or the SSL installation will fail.
Here is what to do:
- Log into your domain registrar account
- Click “Domain List” in the left side menu.
- Find the relevant domain and click “Manage.”
- You’ll see four options. Click on “Advanced DNS.”
- Update the A record for your root domain (@) to point to your Cloudways server’s public IP
- Add a second A record for www pointing to the same IP
- For subdomain networks, make sure your wildcard DNS is also configured so all subdomains resolve correctly
You can find your server’s public IP on the Cloudways Platform by clicking your server’s settings and getting it from the Master Credentials.
DNS updates can take anywhere from a few minutes to 48 hours to propagate globally. Monitor the progress using dnschecker.org.
Keep your old hosting account active during this period. Do not cancel it until DNS has fully propagated and SSL is confirmed on the new server.
Step 5 — SSL Setup for Your Multisite Network
SSL setup for Multisite works differently depending on the type of network you are running.
For a subdirectory network, the process is simple. You only need one SSL certificate on your primary domain. All subsites sit under the same domain so they are automatically covered. Here is what to do:
- Go to the SSL Certificate section in your Cloudways Application Management panel
- Add your primary domain
- Install a free Let’s Encrypt SSL certificate
- Turn on Auto Renewal so the certificate never expires
For a subdomain network, one standard certificate is not enough. Each subsite lives on its own subdomain, so you need a wildcard SSL certificate that covers all subdomains at once. Here is how to set it up:
- Go to the SSL Certificate tab in your Application Management panel
- Add your primary domain and check the Wildcard option before installing
- Add a CNAME record at your domain registrar with the hostname _acme-challenge and the value provided by Cloudways during setup
- Verify DNS propagation using whatsmydns.net before completing the installation
- Once installed, turn on Auto Renewal
Let’s Encrypt certificates expire every 90 days. With auto renewal enabled, Cloudways handles this automatically so your network never goes down due to an expired certificate.
Common Multisite Migration Issues and How to Fix Them
Even with careful preparation, things can go wrong. Here are the most common issues specific to Multisite migrations and how to resolve them quickly.
Subsites Showing 404 Errors
This usually means the permalink structure was not refreshed after migration. Here is how to fix it:
- Go to Settings → Permalinks in your Network Admin dashboard
- Click Save Changes without changing anything
- This regenerates the rewrite rules for the entire network
Network Admin Dashboard Is Inaccessible
If you cannot access yourdomain.com/wp-admin/network, it usually points to a problem with the wp-config.php file. Here is what to check:
- Open your wp-config.php file via SFTP
- Verify that the Multisite constants are correctly defined including MULTISITE, SUBDOMAIN_INSTALL, and DOMAIN_CURRENT_SITE
- These should have carried over during migration but are worth confirming manually
Domain-Mapped Subsites Not Loading
If a subsite with its own mapped domain is not loading, the DNS for that domain has not been updated yet. Here is what to do:
- Log into the registrar for each mapped domain
- Update the A record to point to your Cloudways server IP
- Monitor propagation using dnschecker.org
SSL Errors on Specific Subsites
For subdomain networks, this usually means the wildcard SSL was not installed correctly or the CNAME record has not fully propagated. Here is how to resolve it:
- Verify CNAME propagation using whatsmydns.net
- If propagation is complete but SSL still fails, go back to the SSL Certificate tab and reinstall the wildcard certificate
- Make sure Auto Renewal is still switched on after reinstalling
URL Problems After Migration
If subsites are redirecting incorrectly or loading old URLs, here is the fix:
- Install the Better Search Replace plugin
- Run a search for your old domain and replace it with your new domain
- Run it as a dry run first to preview changes before applying them
- Apply the replacement across all database tables
Why Cloudways Works Well for WordPress Multisite
Running a Multisite network puts more demand on your hosting than a single site install. Every subsite shares the same server resources, the same database, and the same core files. Here is what Cloudways brings to the table for Multisite specifically.
| Feature | What It Means for Multisite |
| No application cap | Host your entire network on one server and only pay for the resources you use |
| Redis Object Cache Pro (free) | Reduces database load across all subsites, included free on eligible plans |
| One-click staging | Clone the entire network to test updates before pushing live |
| Hourly backups | Schedule backups as frequently as once per hour for the whole network |
| Cloudflare Enterprise CDN | Fast load times for subsites serving visitors from different regions |
| Wildcard SSL support | One certificate covers all subdomains in your network, set up in a few clicks |
| Pay as you go | Scale the server up as the network grows without paying per site |
| 24/7 Expert Support | Engineers available around the clock for complex Multisite issues |
Final Thoughts
Migrating a WordPress Multisite network is not something you want to rush. The stakes are higher than a single site migration because one mistake can affect every site on the network at once.
But if you follow the steps in order, prepare properly, and test before touching DNS, the process is more manageable than it looks. The key things to get right are enabling Multisite on the destination before migrating, setting the correct network type, making sure all database tables are included in the transfer, and setting up SSL only after your DNS has fully propagated to the new server.
If you want the Cloudways expert team to handle the migration for you, WordPress migrations are completely free. Just make sure your account is on a paid plan before submitting the request.
For more on WordPress migration, check out our WordPress Migration Checklist and the WordPress Post-Migration Checklist for what to do in the first 72 hours after going live.
Sarim Javaid
Sarim Javaid is a Sr. Content Marketing Manager at Cloudways, where his role involves shaping compelling narratives and strategic content. Skilled at crafting cohesive stories from a flurry of ideas, Sarim's writing is driven by curiosity and a deep fascination with Google's evolving algorithms. Beyond the professional sphere, he's a music and art admirer and an overly-excited person.