EXPLORE CLOUDWAYS
Experience lightning-fast loading times and seamless platform
View Demo > Read Case Study >
 Jesse Tutt
Founder & CEO

Tired of doing the same server tasks manually?Cron jobs can handle backups, cleanups, updates, and more. This video explains how cron works, the difference between server-side cron and WP-Cron, and how to set up both on Cloudways. You’ll also learn how to use the Cron Optimizer on Cloudways to keep WordPress tasks running on schedule, even with low site traffic.
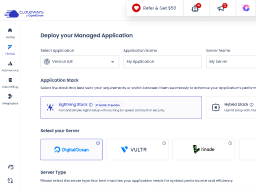
What is a Cron Job? In this video, we’ll show you how to use Cron jobs to automate routine tasks on your server or website. Whether it’s scheduling backups, cleaning up files, or running scripts, Cron lets you handle it all automatically, no manual work needed. Let’s start with the basics. What exactly is a Cron job? Think of Cron as your server’s built in assistant. It’s a tool available on Unix like and Linux systems that allows you to schedule tasks to run at specific times or intervals. Instead of logging in to run the same commands over and over, you can set them up once with Cron and your server takes care of the rest. Here are some common ways Cron jobs can save you time by handling repetitive tasks automatically Cleanups Automatically remove temporary files or old logs. Schedule regular backups for your site or databases Monitoring track disk usage or system health and send alerts. Database and file management Optimize tables or update files on a schedule. System maintenance Run updates or security scans without logging in every time. Server-Side Cron vs WP-Cron There are two main types of Cron jobs, and knowing the difference helps you pick the right tool for the job. Server side Cron jobs run directly on your server. You can set them to run every five minutes, once an hour or on a custom schedule. These are ideal for system wide tasks or resource heavy operations. WP CRON is specific to WordPress. It schedules things like publishing posts, checking for plugin updates, or sending emails. But here’s the catch. WP Cron doesn’t run on time. It’s only triggered when someone visits your site. So if your site has low traffic, tasks might not run when expected. Depending on your goals, you might choose one over the other, or even both. How to Create a Cron Job on Cloudways Let’s walk through how to create a Cron job on the Cloudways platform. It’s simple and only takes a few steps. Log into your Cloudways account, go to the Applications tab. Choose the application you want to add the Cron job to. Scroll down to Cron Job Management, click Add New Cron Job. Cron Expressions Explained Here you can choose how frequently you want the task to run. Use the dropdown for predefined options, or set your own custom schedule using Cron expressions. Next, choose the type of command to run. Paste your command or script in the box, then click Submit. Your job will now appear under the Basic tab. And if you want more control, switch to the Advanced tab to fine tune your Cron job with detailed timing, environment variables or additional parameters. What is WP-Cron and Its Limitations Now let’s talk more about WP Cron. Since WP Cron relies on visitors to your website to trigger tasks. It’s not ideal for time sensitive jobs, especially if your site has low or inconsistent traffic. Cloudways Cron Optimizer That’s where Cloudways gives you a feature called Cron Optimizer, which lets you run WP Cron jobs reliably on a fixed schedule, regardless of site traffic. Here’s how to enable Cron Optimizer on Cloudways. Log in to your Cloudways account, click on the Servers tab, select the server where your WordPress app is hosted, click WWW, then select your application. Go to Application settings, open the WordPress settings tab, you’ll see the Cron Optimizer option. Just toggle it on, confirm your selection, and you’re done. Once enabled, WP Cron jobs will run automatically in the background, even if your site has no visitors. And that’s a wrap on Cron Jobs. You’re now ready to automate and manage tasks like a pro. Thanks for watching, and we’ll see you in the next video.
Answer a few questions, and we'll present you with a personalized tour of the Cloudways platform based on your answers.