


In the previous article on caching technologies, I discussed how to integrate Redis with Yii2 as a cache and session handler. In this blog, I will demonstrate how to use Memcached with Yii2.
Memcached is a free and open source distributed memory caching system. It is mainly used to speed up dynamic database-driven websites by caching data to reduce the execution and access times. Cloudways comes pre-installed and activated Memcached on users’ servers and I will use it in this tutorial.

Yii2 provides its own Memcache class, which works with both Memcache and Memcached. Let’s get started with this class.
Related: How To Host Yii 2 Framework On Cloudways Using Composer
Adding Memcache Class In Yii2
Go to the config folder inside the main folder of Yii2 and open web.php. Under components add this line:
       'cache'         => [

           'class'        => 'yii\caching\MemCache',

           'useMemcached' => true,

       ],
By setting useMemcached as true, Yii2 will know that I am using Yii2 Memcached.
Using Memcached in Yii2
As i have already added Yii2 Memcache class, it is time to add and save some data in Memcached. Go to the controllers folder in Yii2, create a new file in it and name it MemController.php. Paste the following code in it.
namespace app\controllers;

use Yii;

use yii\web\Controller;

class MemController extends Controller

{

   public function actionIndex()

   {

       $cache = Yii::$app->cache;

       $key   = 'Mem';

       $data  = $cache->get($key);

       if ($data === false) {

           $key  = 'Mem';

           $data = 'My First Memcached Data';

           $cache->set($key, $data);

       }

       echo $data;

   }

}
After saving the file, launch the browser and point it to this controller’s index by adding ?r=mem/index. The result would be this line:
![]()
Now the data is saved in Memcached.
Refresh the page one more time so that it could be ascertained that the data is coming from Memcached and not from any other source(s).
Let’s now verify the data and check whether Memcached is being accessed.
Get Ready for Core Web Vitals Update
Ebook to Speed Up Your Website Before You Start Losing Traffic.
Thank You
Your list is on it’s Way to Your Inbox.
Verifying Data In Memcached
There are two ways you can verify that the data is being saved in Memcached
1. Using Console:
Open your console and type the following command to make a connection to Memcached server:
telnet localhost 11211
Once you are connected, you will get the following screen:
Now we are connected to Memcached server. Type the following to check whether your key exists.
get Mem
If you see the following screen, then your value have been successfully added in MemCached.
Next, check the hits on Memcached. Type the following command:
stats
Now look for variable get_hits. You will find the number of hits that Memcached received and the data returned.
2. On Cloudways Panel
On Cloudways, you can easily look up the hit rate of Memcached by going to the server and then choosing Monitoring from the sidebar.
In the monitoring window, select the Server tab, and from the dropdown, select Memcached Hit Rate. A graph of the hits received by the MemCached will open up.
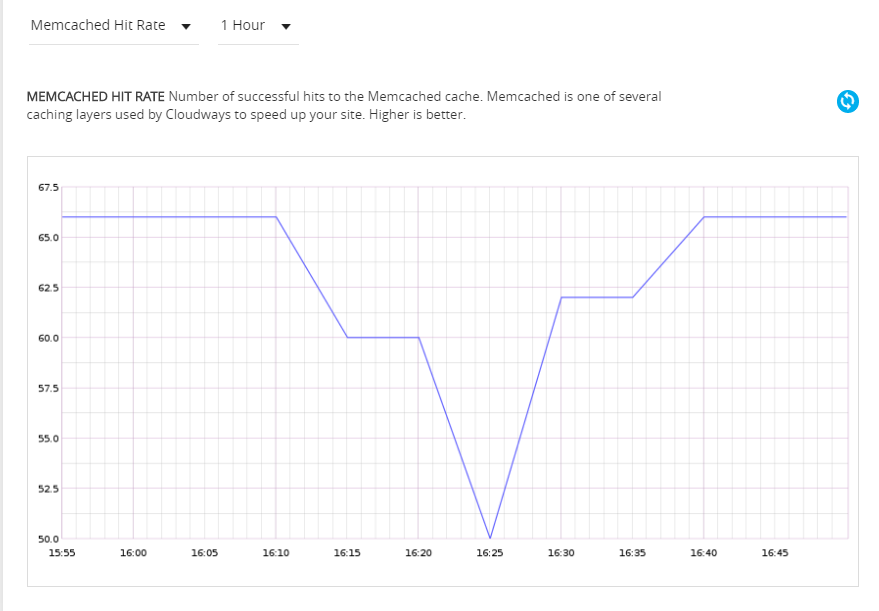
If you are unable to see the hit rate, try refreshing it by clicking the Refresh button.
Final Thoughts
In this tutorial I discussed how to use Memcached with Yii2 as the default cache for your site. If you have a question or wish to contribute to the discussion, please leave a comment below.
Shahzeb Ahmed
Shahzeb is a Digital Marketer with a Software Engineering background, works as a Community Manager — PHP Community at Cloudways. He is growth ambitious and aims to learn & share information about PHP & Laravel Development through practice and experimentation. He loves to travel and explore new ideas whenever he finds time. Get in touch with him at [email protected]


