Many developers start web development in their local environment and when the work is done, they migrate their site to a live environment. The local setup provides a flexible development environment for experimenting the new techniques and most importantly managing the project code is a simple matter. If you are working with WordPress, setting up virtual hosts and XAMPP stack is a straightforward task.
XAMPP stack provides you a local platform where you can install and run your WordPress sites right from your Desktop/Mac. The stack supports the same components as the actual web server and it ensures that when the time comes to take the project live, the database(s) and whole website (s) could be moved easily without any hassle.
In this tutorial, I am going to demonstrate how you can set up and configure virtual hosts for WordPress websites with XAMPP running on Windows 10. I am assuming that you already have XAMPP and WordPress installed on your Windows 10. If you are interested in setting up a new WordPress site on XAMPP, we have created a detailed guide that goes into the details of installing and running up a WordPress site on XAMPP using our managed WordPress hosting.
What is a Virtual Host?
A virtual host is used for hosting multiple domain names on a single server. This means different websites share the same server and utilities for their desired project. There are many advantages when you use the virtual host concepts in a live environment and various large-scale companies follow the same principle to provide low-cost web hosting server for their customers. The best example would be shared hosting.
There are three types of virtual hosts; name, IP, and port-based.
In name-based, you can host multiple websites on the same server IP.
In IP-based, each website uses a unique IP address.
In Port-Based, different websites host on a common IP address but distinguish on the basis of the unique port number.
Managed WordPress Hosting Starting From $11/Month
Get rid of all the hosting complexities, and enjoy Cloudways’ quick 1-click solutions.
Create Virtual Host
In this article, I’m creating a virtual host in a local environment to work around different WordPress projects.
So, let’s get started!
First, you need to navigate to D:\xampp\apache\conf\extra or wherever your XAMPP files are located. In my case, my XAMPP file is located in drive D.

Then, edit httpd-vhosts.conf with any text editor. In my case, I am using Notepad++.
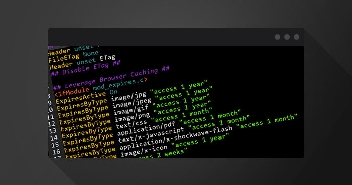
The file looks something like this:
Now, paste the following code at the end of the file text/code:
<VirtualHost *:80>

DocumentRoot "D:\xampp\htdocs\testing"

ServerName farhan.cw

<Directory "D:\xampp\htdocs\testing">

</Directory>

</VirtualHost>
In the above code:
- VirtualHost: Most web servers use port 80 as their default port. However, you can change the port to 8080, 8081, etc.
- DocumentRoot: The folder where files of a site will exist. In our case, the folder name is “testing”.
- ServerName: It is the URL for our virtual host.
- Directory: It is the directory of our virtual host.
Now, go to Windows > Search > Run and paste the following line:
C:\Windows\System32\drivers\etc\hosts
Next, open the Host file in your text editor and add the following line in the Host file.
127.0.0.1 farhan.cw
Once you are done, you need to restart Apache and MySQL from the XAMPP control panel and check whether http://localhost/testing opens up in your browser.
You can see that the domain has been changed successfully and a 500 internal server error appears for your previous URL (http://localhost/testing).
Next, we need to change the site URL of our WordPress and therefore, we need to access the database.
Setting up Virtual Hosts for WordPress is easy with Cloudways
Use our managed WordPress hosting for a hassle-free experience
Configure WordPress Site URL
At this point, I am assuming that you have a WordPress website set up.
Now, it’s time to change the database URL (a very important step to configure virtual host).
For this, open your browser and go to http://localhost/phpmyadmin/ and select your database. In my case, it is “testing”.
Then open wp_options and click edit the site URL from http://localhost/testing/ to http://farhan.cw, and home URL from http://localhost/testing to http://farhan.cw.
Restart Apache and visit your virtual host URL, in our case it’s “farhan.cw” and check whether the domain has been set up successfully.
Since the setup of Virtual Hosts for WordPress Website is done, here is what the final results would look like:
Final Words
That’s it! I hope you have a clear idea of setting up Virtual Hosts for WordPress with XAMPP running on Windows 10. If you have any queries or suggestions, feel free to ask me in the comment section below.
Q. What is a virtual host in XAMPP?
A. In XAMPP, a virtual host is the name given to the localhost so that the developer can easily access assets without the issue of broken links or similar issues. A XAMPP installation can have multiple virtual hosts.
Q. How do I add multiple virtual hosts to XAMPP Windows 10?
A. Adding multiple virtual hosts to XAMPP for Windows 10 is a four-step process.
1. Create individual folders for the virtual php hosts in the htdocs folder.
2. Edit httpd-vhosts.conf to include information (including hostname, document root, and server name) about each virtual host.
3. Edit hosts file to include the IP address (usually 127.0.0.1) and the name of the virtual hosts.
4. Restart XAMPP and access each virtual host to test the success of the process.
Q. How do I change my domain name from localhost in XAMPP?
A. Changing the domain name from localhost requires first editing the local hosts file to include the new domain name and the IP address of localhost (127.0.0.1). Next, edit httpd-vhosts.conf file to include the new domain information (hostname, document root, and server name). Finally, restart XAMPP and then access the new domain in the browser.
Q. How does a virtual host work?
A. A virtual host emulates the functionality of a live server and provides a similar directory structure and database connectivity. You can have multiple virtual hosts at your local development machine, each hosting different websites (or versions of a website). If you wish, you can also connect the virtual host to a live domain to further test the functionality of the project.
Q.How to check if the Laravel scheduler is working?
A. Here’s how you can verify your Laravel scheduler’s functionality:
- Check scheduler configurations.
- Set up a cron job for the scheduler.
- Monitor cron job logs for anomalies mean that the scheduler is working fine.
- Inspect logs for errors.
- Set up test executions to ensure that the actual task executes at the desired time.
Q.How to call a controller function from Schedule and pass parameters?
A. To invoke a controller function from the Laravel Schedule with parameters:
- Define the Schedule via code. Example: $schedule->call(‘App\Http\Controllers\YourController@yourFunction’)->daily();
- Pass Parameters using the args method on the CallQueuedClosure instance.
- Ensure the controller function accepts the parameters.
Farhan Ayub
Farhan is a community manager at Cloudways. He loves to work with WordPress and has a passion for web development. Mostly, he spends his time interacting with the people in the WordPress community. Apart from his work life, Farhan spends his time gaming and playing sports. Feel free to contact him at [email protected]