


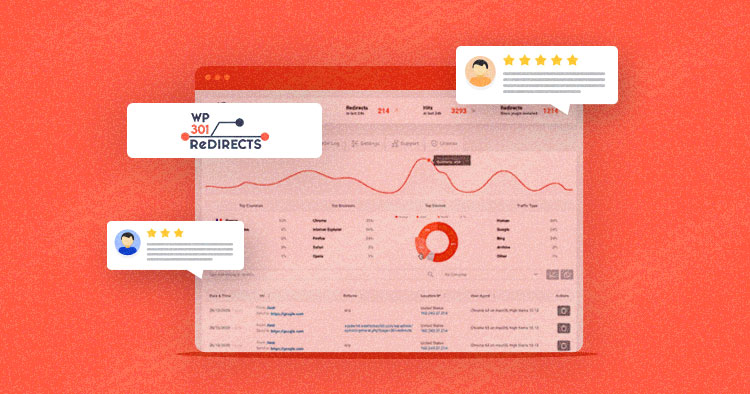
- WP 301 Redirects ensures visitors never land on a 404 error page, automatically redirecting them to the most relevant content while preserving SEO rankings.
- Easily manage redirects, block bad traffic, and monitor stats with detailed reports and an intuitive dashboard, ensuring a smooth user experience.
Once you have created your WordPress site and start marketing to increase traffic, many unexpected problems can crop up. One of the most common problems is when your user wants to access some content and gets a “404 error” page instead.
The WP 301 Redirects plugin ensures that you never have a problem with a non-existent page or a “404 page” again. Even if the page doesn’t exist on your blog, this great plugin will do a redirect, and visitors will land on relevant content.
What Is The WP 301 Redirects Plugin?
WP 301 Redirects is a plugin that solves some of the most critical issues in SEO, and these are redirects and 404 errors. The plugin will redirect a non-existent page and show visitors the content they want to see. It’s completely secure and works with every theme and plugin.

The plugin also notifies the search engines if you have edited a post or page’s URL to keep track of the said post/page. Here are some features of this plugin:
- Boost meaningful traffic: visitors will see the page they want to see and not a 404 page.
- Take control of redirects: if you have changed the link structure, it will not be a problem. The plugin will do the optimization, and all links will be available.
- Safely change post URLs: if you change the URL of a post, this plugin will remember the original URL and automatically create a redirect rule.
- Ignore bad traffic: the plugin has advanced algorithms that know how to block bad bots. When it comes to search engines like Google, Bing, or any other, they will be whitelisted.
- Charts: you can follow absolutely all actions through detailed views and statistics within a dashboard.
- Plugin support: there is a large community of users who use this plugin, and you can get help from them; also, the makers of the plugin provide excellent support
Using a WP Redirects Plugin? There’s More to Explore.
Streamlined your WordPress site with WP 301 Redirects? But why stop there? Download our FREE expert-curated ebook packed with 45+ essential plugins to optimize your site’s performance further.
Thank You
Your list is on it’s Way to Your Inbox.
How to Install The Plugin?
There is a free version of the plugin that you can download from the WordPress repository. To be able to use the PRO version on your WordPress pages, you must first download and install it on your site.
The procedure is as follows:
- Visit https://dashboard.wp301redirects.com/ and log in with your account.
- Download the plugin to your PC
- Log in to your WordPress site with an administrator account and add the plugin
- Once you have successfully installed the plugin, just activate it. Activation is a simple, few steps process.
First, visit the provided URL. Once you login, there will be an option called “Licenses” on the left. Select a license from the list or create a new one. Copy the key, then go back to your WordPress site and click on the 301 Redirects plugin. Open the “License” tab and paste the license key, then click on the activation button.
You can activate the plugin without using a license key if you have created a domain-type license key in the admin panel.
Open the plugin page, then the “License” tab, and simply click on “Keyless Activation” to activate the plugin.
WP 301 Redirects Features
You can easily white-label this plugin. If you do that, everything related to licenses and support will be removed, and the name of the creator, WebFactory Ltd., will not be seen anywhere.
To activate the white-label option in your WordPress site, you must first login via the URL we provided above and add or edit an existing license in the “Licenses” tab. On the right side of the screen will be the “Extra Features” option. Click on it, turn on white-labeling, and save the changes. It is important to note that not all licenses have a white-label option.
Now it is time to add a new redirect rule. Redirect rules are used to redirect traffic to avoid errors related to non-existent pages (404 errors).
To add a new redirect rule, log in to your WordPress site, then open the WP 301 Redirects page. Within the settings, there is a “Redirect rules” tab. Click on the “Add new redirect rule” option.
After clicking on that option, a new window will open, containing all the options for creating a new redirection.
If you do not have time or do not want to create a new redirect rule, you can simply update some of the existing ones:
Log in to your WordPress site, open the plugin page and select the redirect rule you want to change from the list. On the right side of the screen will be “Actions,” and inside it, the option to “Edit.” After clicking that, a popup window will appear inside which you can make the changes you want and save them.
Once we have created or edited our rule, it is time to check if it works properly.
We will check this by opening the redirect rule we are interested in within the plugin, then selecting the second option (shielded checkmark) within “Actions.” After that, a new window will appear with redirection information such as the URL, result, status message, and status: 301.
If you want to disable or completely delete a redirect rule, there are simple options for doing so. Go to the page inside the plugin where the redirect rules are located. If you want to delete the redirect rule, then click on the trash can icon on its right side. If you wish to turn it off, then just switch it off from the left side.
If once you put the auto-redirect option on, for some reason, the plugin can not do the redirection, then your visitors will see a 404 page. The default 404 page comes with a WordPress theme and is called 404.php. With this plugin, you have several options; you can use the default 404 page, you can create a completely new one, or you can also choose an existing one.
Simply click on the “General” tab within “Settings,” and under the “404 page” option, select which page to display as your 404 pages.
Once you’ve set up all the options and made all the redirects, you may want to know what happens to redirects. There is an “Email Reports” option for this. You can easily choose to receive an email with a report.
You will turn on email reports by logging in to your WordPress site, going to the plugin page, and opening the general settings. There is an option called “404 email reports.” You can set whether to receive an email once within 24 hours or once a week. Reports will be sent to the default admin email address, but you can set which email address reports should be sent within the plugin.
Like any good tool, this plugin also has logs to see what is happening with your redirects.
Logs take up extra space on your server, so you can decide in what time period to delete them.
If your license has the option to see logs inside the dashboard, then you can upload logs. On the plugin page, in the “General” tab, there is an option “Upload Logs to your 301 Redirects Dashboard.” Don’t forget to save the changes, and all the logs will be available to you inside the dashboard.
WP 301 Redirects also has some very advanced options that you will rarely use, but you can do a lot of things with them.
One of these options is to disable all redirects. If you want to stop all redirects, simply within the plugin, go to “Settings,” then to “Advanced,” and select the “Disable all redirect rules” option.
The following advanced option is to disable redirects only for logged-in users. By default, redirects are set for all users. To turn them off for logged-in users, go to “Settings,” then “Advanced,” and select the “Disable for logged-in users” option.
If you no longer want to use the plugin and decide to delete it, you may want to restore the database to an earlier state by deleting all tables and options leftover from the plugin. You will do this by going to “Settings,” then “Advanced,” and selecting the option “Delete all tables and options when the plugin is deleted,”
If you want to start over and use the plugin again, there is no need to reinstall the plugin. Instead, just restore the database by going to “Settings,” then “Advanced,” and selecting the “Recreate / Reset 301 Redirects Pro Tables” option. A window will then open where you will be able to confirm this decision.
Pricing Plans
A Personal package costs only $39/year and is enough for a personal WordPress site. The next package is Team which costs $79/year, and the most expensive is the Agency package which costs $149/ year, and you can manage 100 sites with it.
Conclusion
We have tried to list all the advantages of the WP 301 Redirects plugin. Any serious WordPress administrator should have this plugin in their collection. Using this plugin guarantees that your visitors will never see the “404 error” page again.
Note: This article was published in collaboration with WebFactory LTD.
Frequently Asked Questions
Q. What is the 301 redirect plugin used for?
A 301 redirect plugin helps permanently redirect old URLs to new ones, preserving SEO rankings and ensuring users & search engines reach the correct page. It’s essential for fixing broken links, changing permalink structures, and site migrations without losing traffic.
Q. How do I enable 301 redirects?
Here’s how you can enable 301 redirects:
- Install & activate a 301 redirect plugin (e.g., Redirection, WP 301 Redirects).
- Go to the plugin settings in your WordPress dashboard.
- Add the old URL and enter the new target URL.
- Save changes, and test the redirection.
- Alternatively, you can add 301 redirects via .htaccess or server settings.
Q. Does WP 301 Redirects plugin slow down my website?
No, a properly optimized 301 redirect plugin does not significantly affect speed. However, excessive redirects or misconfigured settings can impact performance. Use minimal redirects, clear cache, and enable server-side redirects when possible for optimal speed.
Q. Why is my 301 redirects plugin not working?
Your 301 redirects plugin might not be working due to the following possible reasons:
- Caching issues: Clear your website cache.
- Conflicting plugins: Deactivate other redirect or security plugins.
- Incorrect redirect rules: Double-check URL paths.
- Server-level redirects: Check your .htaccess or Nginx settings.
Mansoor Ahmed Khan
Been in content marketing since 2014, and I still get a kick out of creating stories that resonate with the target audience and drive results. At Cloudways by DigitalOcean (a leading cloud hosting company, btw!), I lead a dream team of content creators. Together, we brainstorm, write, and churn out awesome content across all the channels: blogs, social media, emails, you name it! You can reach out to me at [email protected].


