Like other WordPress page builders, SiteOrigin is here to help you build a powerful and responsive website with some CSS and zero coding knowledge. There are a few themes from their end you can use (both free and premium) as well as free and Pro page builder plugins.
I have tested the Pro version of SiteOrigin and built a landing page. It comes with the drag-and-drop functionality and works with any theme and you can use all Free, Pro, and WordPress widgets at the same time. Let’s read this article to know more about SiteOrigin installation and configuration with WordPress.
Why Choose SiteOrigin Page Builder?
Building the site starts from the toolbar in WordPress Editor, which we are all familiar with, both Classic and Gutenberg. It generates a small amount of output code and it’s not bloated but every line of the output code is optimized as much as possible for a one-page builder.
It has a live preview of every change you’ve made since it doesn’t have a front-end builder.
You can also easily check the history and revert back to a previous design if you’re not satisfied with what you did. Also, it uses as usual Rows and Widgets like other page builders.
Features of SiteOrigin Page Builder
The free version of SiteOrigin comes with quite limited options “widgets” but with the Pro version, you have a bunch of useful add-on widgets to build your site with ease.
Custom Post Type Builder
One of the most popular and useful features of SiteOrigin is Custom Post Type Builder with reusable Page Builder layouts and WooCommerce templates. It is a bit different from other tools and I will give a bit deeper explanation on how to use it.
There are important steps to follow in order for you to create a custom post-type template in SiteOrigin.
Step 1
You would need to add a new custom post type, build the post type layout using Page Builder and choose the post type display settings.
From your WordPress Dashboard, navigate to Tools → Post Types and click the Add New Button, name it Portfolio, for example. Now, click on the Page Builder tab next to the Text and Visual tabs, use the Page Builder Add Widget and Add Row buttons to build your portfolio custom post type layout.

Please note that any content you add to the template will be displayed on every portfolio post published in the future. So it’s quite useful if you want to display a specific block of content on each of these pages like Call to Action, Subscribe to Our Newsletter, About Me, Testimonials, etc.
Step 2
You need to know how to add content to a custom post type you’ve created.
Once you’ve created the Custom Post Type portfolio, you will be able to see the Portfolio Item in the left-hand sidebar of your WordPress Dashboard. Click on it and then click on the Add New.
When you name your Portfolio item, it will let you add content to it. Remember, you can only edit widgets that are not part of the global template and those widgets will be marked with read me a text. And last but not the least, how to add those posts into a post carousel or a post loop widget.
Post Loop Widget
SiteOrigin has the Post Loop Widget included but it relies on loop templates inside the active theme.
To insert Post Loop Widget, just add a row on a page or post where you want it to be displayed, select the blog or grid layout and you’re done. Next, you would need to choose what widget will be displayed by clicking the button Build post query.
In the last step, click on your Custom Post Type from the Post Type Dropdown at the top of the query builder widget.
If you want to do it in the post carousel, the only difference is picking the post carousel widget instead of Post Loop, the rest of the procedure is the same.
WooCommerce Template Builder
WooCommerce templates allow creating beautiful WooCommerce specific pages and a single product visual appearance. The WooCommerce Template Builder interface is separated into seven tabs:
- Product
- Product archive
- Shop
- Cart
- Empty cart
- Checkout
- My account
For WooCommerce, all actual individual items you need to build the single product are distributed as a widget, which allows you easy creation of products. You can create a layout and use WooCommerce widgets like price, SKU, Add to Cart, Short/Long Description, Product Image, Title, etc.
There is also one very useful widget for a product upsell, which is giving you the freedom of using WooCommerce Upsell functionality. However, please note that the design of these widgets and WooCommerce pages is set by your theme CSS and it can be edited by using CSS.
Other widgets are common like Maps, Accordions, CTAs, Tabs, Social Widgets, Carousels, etc.
With Pro Subscription, you are not getting only Pro Page Builder but access to all Pro features, Premium Themes, CSS, and widgets.
Pricing and Plans of SiteOrigin Page Builder
SiteOrigin is offering two pricing models. The first and the most useful one is a Yearly Subscription, which comes in 3 packages.
- Single for one site at the price of $29
- Business for up to 5 sites at the price of $49
- Developer for unlimited sites at the price of $99
Also, there is a Single Year License where you have everything the same except it’s not the subscription but one year of updates and support.
- Single for one site at the price of $38
- Business for up to 5 sites at the price of $64
- Developer for unlimited sites at the price of $128
System/Hosting Requirements of SiteOrigin
Even though it’s a bit hard to find the system requirements of SiteOrigin. From some support forums and comments online, it seems the PHP 7.4 with at least 512MB of PHP Memory will do the trick. However, I have used VultrHF with 2GB PHP Memory for testing purposes.
Of course, you would need the latest WordPress version and all other plugins up to date.
Install and Configure SiteOrigin Page Builder
When it comes to installation and configuration, SiteOrigin does offer something interesting that most page builders don’t.
As for everything in WordPress, you should install free SiteOrigin directly from Repository, and afterward, you upload the Pro version downloaded from your SiteOrigin account. After you’re done with the installation, follow the steps and install/activate recommended plugins.
After you’ve successfully installed the bundle of plugins, you should activate the license and widgets you need. As for the license, it needs to be activated right away and for the widgets, you can activate them now or later when you need some of them.
What is great about SiteOrigin is that you don’t have to activate widgets you don’t need and by doing that, you can save some resources and have functional only the options you need. The blue ones are active and the gray ones are inactive widgets.
When you’re done, you can start building your site by using the SiteOrigin page builder. Navigate to Pages → Add New and by clicking on the dropdown arrow, you’ll be offered to Add New Page with SiteOrigin Page Builder and Block Editor → select SiteOrigin Page Builder.
Personally, not the greatest fan of backend page builders in the era of front-end builders. However, it means it will consume fewer resources and it’s lighter for your server. Not that hungry as builders in general.
This is how the page builder actually looks in Live Editing mode which is the useful one. The back-end editor is quite hard and time-consuming since you need to tap preview every time to see any changes you’ve made.
When you click the Edit page, you will end up inside the back-end editor, from there just click Live Editor from the toolbar and you’ll end up in it.
On the left side, you have a similar sidebar as Customizer, from which you are actually building the site and on the right side it will reload the view to display changes after any change is made.
It doesn’t support any kind of drag and drop directly in the site but everything has to be done through the left-hand sidebar customizer.
In the top left corner, you will see the toolbar with 4 items in it. From left to right they would do the following.
Gear Icon will open available widgets you can insert into rows you’ve created. You can see both WordPress widgets and the SiteOrigin ones in the same place. However, you can also pick on the left side to see only WordPress or only SiteOrigin.
The next icon is a Burger, which will add a new row and that is the moment when you’re choosing the row layout. Don’t worry if you need to change the layout it can be done at any moment later.
After clicking the Layout icon, it would actually open the option to import/export the existing Layout. What I’ve noticed is that SiteOrigin is lacking more layouts and more modern designs. Also, from this tool, you can clone existing pages you’ve already created or mirror sections/blocks.
The last icon is History, the place where you can roll back what you did if you don’t like results or simply if you’ve made a mistake.
SiteOrigin Page Builder Performance on Cloudways
As it was expected, SiteOrigin performs quite nicely since it doesn’t have much bloat in the code and it’s quite simple, which is at the same time the benefit and downside. We need to mention, we did none image optimization whatsoever.
– Results of SiteOrigin on GTMetrix
– Results of SiteOrigin on Pingdom Tools
– Results of SiteOrigin on WebPageTest
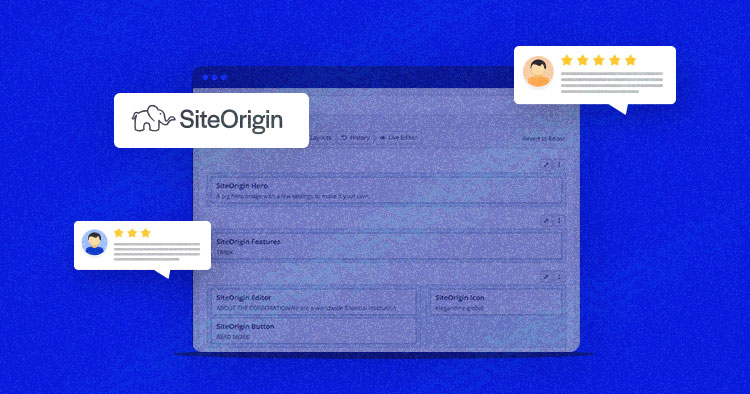
SiteOrigin Page Builder User Reviews
And what is always one of the things you should check before installing any plugin are reviews and ratings on the WordPress.org plugin repository. For SiteOrigin, there are 922 5-star ratings so far and the recent reviews are awesome.
Summary
If you need a lightweight tool to build a simple website or a landing page, SiteOrigin might be the perfect choice for you. The downside is that it doesn’t offer a header and footer builder, so you need some theme that will allow editing of the header and footer of your site.
The learning curve is steep and you need some previous experience with WordPress and an understanding of widgets and elements. Lack of a front-end editor is also a limiting factor for newbies and it definitely requires some CSS knowledge and skills to make your end result look awesome. However, on the other side as a developer, most of the features are quite convenient even though not much intuitive for beginners.
The ecosystem around the SiteOrigin is not that big as for some other page builders, but we need to take into account it has 1 million active installations for the Free Version and 900.000 for the Widget Bundle and some of the external add on authors have 30.000+ active installations.
Sarim Javaid
Sarim Javaid is a Sr. Content Marketing Manager at Cloudways, where his role involves shaping compelling narratives and strategic content. Skilled at crafting cohesive stories from a flurry of ideas, Sarim's writing is driven by curiosity and a deep fascination with Google's evolving algorithms. Beyond the professional sphere, he's a music and art admirer and an overly-excited person.