


Key Takeaways
- PayPal is one of the most trusted and widely used payment gateways for WooCommerce stores worldwide.
- It offers global reach, multiple payment options, and advanced fraud protection for secure transactions.
- Creating a PayPal Sandbox account lets you safely test payments before going live on your WooCommerce store.
- Top PayPal plugins like WooCommerce PayPal Payments and Angell EYE enhance checkout experience and flexibility.
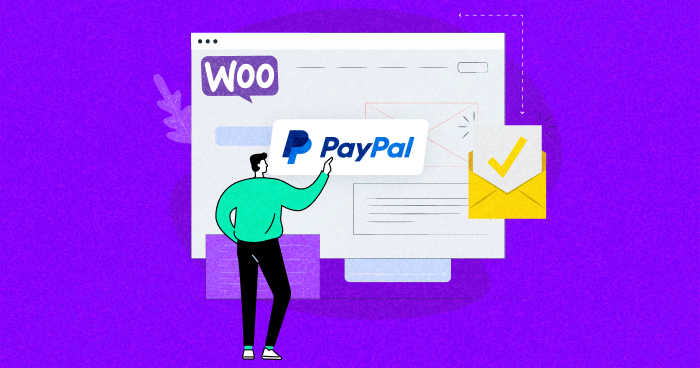
Are you running a WooCommerce store and looking for a reliable payment gateway to accept online payments from your customers? Look no further than PayPal!
As one of the most widely used and trusted payment gateways, PayPal offers merchants and customers a seamless and secure payment experience.
In this blog post, we’ll walk you through the process of setting up PayPal for your WooCommerce store, so you can start accepting payments quickly and easily.
Whether you’re a seasoned eCommerce veteran or just starting out, this guide will help you simplify your customer payment processes and improve your online sales.
So, let’s get started!
Why Should You Use PayPal Payment Gateway for WooCommerce?
As a WooCommerce store owner, you have several popular payment gateway options, including Stripe, Skrill, and PayPal. However, PayPal stands out as the most reliable choice.
With over 29 million merchants using PayPal in 2023 to run and grow their businesses, it is a popular choice in the industry. Customers worldwide trust PayPal with their sensitive financial information, such as credit card details and banking information.
One of the main advantages of using PayPal for WooCommerce is its ease of use. PayPal offers a user-friendly checkout experience that simplifies the payment process & allows your customers to make payments using various methods, including credit and debit cards, bank transfers, and even PayPal’s own digital wallet.
Moreover, PayPal offers exceptional customer support, with a team available 24/7 to assist you with any issues. Also, you get advanced fraud protection and security measures to protect your business and your customers’ data.
Lastly, PayPal’s competitive pricing makes it an affordable option for businesses of all sizes. With no setup or monthly fees and only a small transaction fee, PayPal helps you keep your costs low and maximize your profits.
Host Your WooCommerce Store on a Flexible Managed Host
With Cloudways PAYG pricing, you don’t need to worry about traffic spikes and scale anytime with ease.
PayPal for WooCommerce: Features & Benefits
PayPal for WooCommerce offers a globally accepted, user-friendly, and secure payment gateway with various features to enhance your store. Its international support, multiple currencies, and diverse payment options make it ideal for business growth.
Also, with advanced fraud protection, SSL encryption, and two-factor authentication, PayPal ensures safe transactions. Plus, you can enjoy 24/7 customer support and competitive pricing with no setup or monthly fees.
Here’s a list of a few benefits that you get with PayPal for WooCommerce:
- Global reach: PayPal is accepted in over 200 countries and supports multiple currencies, making it ideal for international businesses.
- User-friendly checkout: Its simple checkout process supports various payment options, including credit and debit cards, bank transfers, and PayPal’s digital wallet.
- Secure payment gateway: PayPal comes with advanced fraud protection features, SSL encryption, and two-factor authentication, ensuring your transactions are safe and secure.
- Reliable customer support: PayPal offers a dedicated team available 24/7.
- Competitive pricing: PayPal charges no setup or monthly fees, helping you save money on payment processing.
Now that you know the benefits of using PayPal on a WooCommerce store as a payment gateway, let’s learn how you can integrate both PayPal and WooCommerce.
How to Create a PayPal Sandbox Account (Pre-Integration)
A PayPal Sandbox Account provides a safe and isolated environment for testing payment gateway operations before making actual transactions. This is especially important for WooCommerce stores that have uploaded inventory and installed payment gateways but have yet to be tested.
Let’s walk you through the process of setting up a PayPal Sandbox account and integrating it with your WooCommerce store.
Log in to the PayPal Developer Website
- Go to the PayPal developer website.
- Click the Login into Dashboard button.

- You can either set up a new PayPal account or log in to an existing one.
- Choose your country location, enter your email, and create a new password.
- Once your account is created, you will see the dashboard and the error logs.
- That’s it. You have successfully created your PayPal sandbox account. The next major step is to connect PayPal to the WooCommerce store.
How to Integrate PayPal with WooCommerce (Easy Steps)
Here’s how you can integrate PayPal with WooCommerce:
- Firstly, you need a WooCommerce store; if you already have one, skip the next few steps.
- Sign up or log in to the Cloudways Platform.
- Click “Add Server” on the top-right.
- Select “WooCommerce” as your application, and name your managed app & server.
- Select your IaaS provider, server size, and location.
- Click “Launch Now” to launch your server, and wait for your WooCommerce app to get ready.
- Once your app is ready, click Applications and select your app.
- Open your app by clicking the link under “Admin Panel” and copy/paste your credentials.
- Log in to access your WooCommerce store.
- Your WooCommerce store is ready now.
Now that your WooCommerce store is up and running. It’s time to install a PayPal payment plugin in your store.
- Go to your WordPress dashboard and click “Plugins” in the left sidebar.
- Click “Add New” and type “WooCommerce PayPal Payments” in the search box.
- Find the plugin and click “Install Now.”
- Once installed, click “Activate” to activate the plugin.
- Navigate to WooCommerce > Settings > Payments.
- Click on the toggle button to enable PayPal.
Configure PayPal Settings
When you click the PayPal toggle button, a new tab will appear on your screen, prompting you to activate PayPal.
- Check the “securely accept box” to ensure secure transactions.
- Select the options you want for your PayPal integration.
- Scroll down and click on “Test Payment With PayPal Sandbox” to test your setup.
- You will need a PayPal Sandbox email account and password to connect your PayPal.
Note: If you don’t have a Sandbox account, move to this part to create one.
- If you already have one, then go to PayPal Sandbox accounts and click “Sandbox test accounts.”
- Click “View/Edit account” to check your email and password.
- Copy your Sandbox Email ID & System Generated Password.
- Go back to the WooCommerce PayPal Payments settings and paste your details.
- Click “Agree and Connect” to connect your PayPal account.
- Once the setup process is complete, you will see a message that you have successfully configured PayPal for your WooCommerce store.
- Go back to your WooCommerce store and check the Payment section to see if your store is connected with the PayPal Sandbox Account.
- From this section, you can set your PayPal settings like PayPal Standart Payments settings, customize the appearance of PayPal Checkout, display Pay Later messaging, and more.
Boost Your Site’s Performance & Save Additional Hosting Costs
Cloudways offers high-performance hosting that ensures your website is always up and running smoothly without costing a fortune.
PayPal Configuration
Now it’s time to configure your PayPal settings. In the WooCommerce PayPal Payments settings, you’ll find various options that you can customize to fit your needs.
Take some time to explore the different options and make the necessary changes to ensure your PayPal checkout experience is seamless and efficient for your customers. Some of these options include:
- Standard Payment Settings
- Checkout
- Single Product Page
- Cart
- Mini Cart
Now let’s explore each of these options in detail:
Standard Payment Settings
In this section, you can customize various settings for your PayPal Standard payment gateway, including the title and description displayed to customers during the checkout process.
- Title: Specify the title that you want your customers to see on the checkout page.
- Description: Enter the description that you want to display during checkout.
- Intent: You can choose between two options – Capture and Authorize. The Capture option is for immediate payment, while the Authorize option is for payment authorization after order creation.
- Instant Payments: You can enable instant payment transfer by checking this checkbox.
- Brand Name: Add your brand name to the PayPal checkout process.
- Landing Page: You have two options to choose from – Login and Billing page.
- Hide Funding Source(s): By default, all funding options will be displayed. However, you can use the “Hide Funding Source(s)” option to hide funding sources for Credit Cards or Debit Cards, Venmo, and other payment methods.
- Vaulting: Enabling this option will let users save their payment information, including PayPal and credit card accounts.
Card billing data handling: This feature ensures that the billing information entered matches the billing data in the checkout process. - Separate Card Button from PayPal gateway: This option creates a second gateway for card payments, separate from the main PayPal gateway.
PayPal Smart Buttons
In this section, you can modify the appearance of your PayPal Smart Buttons to match your website’s design and branding.
- Smart Button Locations: Select the pages where you want to display the PayPal smart button.
- Customize Smart Button Per Location: It will create a separate setting section for the selected smart button pages like the Checkout page, Single Product Page, Cart page, and on Mini Cart.
Checkout Buttons
This section settings will let you change and customize the display/styling of your PayPal checkout on the checkout page.
- Button Layout: Choose between Vertical and Horizontal options to set the button layout.
- Button Label: Select from multiple options to display the label on your PayPal button, such as PayPal, PayPal Checkout, and more.
- Color: Set the background color of your button.
- Shape: Choose the shape of your button.
Single Product Page Buttons
This section is dedicated to customizing the styling and design of the single product page buttons.
The single product page offers the same fields and styling options as the Checkout section.
Cart Buttons
This section allows you to customize the checkout design and appearance of the cart page.
The cart product page provides the same fields and styling options as the Checkout section.
Mini Cart Button
In the Mini Cart section, you can customize the appearance of the PayPal checkout button.
This section shares the same design options as the main Checkout section, including the ability to adjust the button height to your liking.
By default, a fresh WooCommerce installation offers payment options such as:
- Direct Bank Transfer
- Check Payments
- Cash on Delivery
However, to enhance your store’s PayPal functionality, consider using one of the many high-quality PayPal for WooCommerce extensions available.
Cut Down Hosting Costs With Performance-Optimized Hosting
Cloudways ensures your sites are up and running at all times, giving the best performance results without breaking the bank.
5 Best WooCommerce PayPal Plugins/Extensions
We have multiple options in the market to enhance your WooCommerce store’s PayPal functionality. This section covers our top picks for the WooCommerce PayPal plugins/extensions:
WooCommerce PayPal Payments by WooCommerce
WooCommerce PayPal Payments is a premium plugin provided by WooCommerce that enables you to securely process credit and debit card payments directly on your WooCommerce store, with PayPal as the payment gateway.
This plugin is ideal for merchants who want to provide their customers with a seamless checkout experience without redirecting them to an external payment page. With WooCommerce PayPal Payments, you can allow your customers to pay with their preferred payment method while ensuring their payment data is secure and protected.
Features
- PCI compliance.
- Acceptance of all major credit and debit cards.
- Customizable checkout page.
- Fraud management tools.
- Recurring payments for easy subscription management.
- Refunds and cancellations from the dashboard.
- PayPal Seller Protection for security against unauthorized payments, chargebacks, and other fraudulent activity.
Ratings:
WooCommerce PayPal Payments is rated 3.5 out of 5 stars based on 98 reviews.
WooCommerce PayPal Powered by Braintree Payment Gateway
WooCommerce PayPal Powered by Braintree Payment Gateway is a free plugin that integrates Braintree as the payment gateway, allowing you to accept various payment methods, including PayPal, credit/debit cards, and Venmo.
The plugin offers customizable checkout, fraud protection, and chargeback management. It also supports multiple currencies and enables recurring payments and PayPal One Touch, making it an ideal option for merchants who want a secure and flexible payment solution for their WooCommerce store.
Features
- Accepts major credit/debit cards, PayPal, Venmo & more
- Fraud protection & chargeback management
- Customizable checkout
- Save customer payment info for future purchases
- Accepts payments in multiple currencies
- Supports recurring payments/subscriptions
- Enables PayPal One Touch for faster mobile checkout
Ratings:
- Braintree for WooCommerce is rated 2.6 out of 5 stars based on 47 reviews.
WebToffee PayPal Express Checkout Payment Gateway for WooCommerce
The WebToffee PayPal Express Checkout Payment Gateway for WooCommerce plugin is a free, user-friendly payment solution designed to simplify the checkout process for customers. With quick and easy integration, this plugin enables seamless payments through PayPal, supporting all major credit and debit cards.
It is a reliable and efficient payment solution that streamlines the checkout process for both merchants and customers. Moreover, its features make it an ideal solution for small- to medium-sized businesses looking for a free, easy-to-use payment gateway.
Features
- Express Checkout button for faster checkout
- Save customer payment information for future purchases
- Customizable checkout experience
- Fraud protection and dispute resolution support
- Multiple currency support
- Refunds and voids supported
- No additional transaction fees (other than PayPal fees)
Ratings:
- WebToffee PayPal Express is rated 4.3 out of 5 stars based on 74 reviews.
YITH PayPal Express Checkout for WooCommerce
The YITH PayPal Express Checkout for WooCommerce plugin is a powerful payment solution designed to simplify the checkout process for customers. This plugin provides a seamless payment experience by enabling quick and easy payments through PayPal while also supporting all major credit and debit cards.
This plugin simplifies checkout for merchants and customers, making it perfect for small to medium-sized businesses. It includes an Express Checkout button, saves payment information, and offers a customizable checkout. It also supports fraud protection, multiple currencies, refunds, and voids without extra transaction fees.
Features
- Customizable checkout experience
- Express Checkout button for faster checkout
- Save customer payment information for future purchases
- Fraud protection and dispute resolution support
- Multiple currency support
- Refunds and voids supported
- No additional transaction fees (other than PayPal fees)
Ratings:
- YITH PayPal Express Checkout is rated 4.2 out of 5 stars based on 5 reviews.
PayPal for WooCommerce by Angell EYE
PayPal for WooCommerce by Angell EYE is a professional and efficient plugin that seamlessly integrates PayPal with your WooCommerce store.
It offers a user-friendly interface, advanced fraud protection, dispute resolution, refunds, and support for multiple currencies. This reliable payment solution is perfect for small to medium-sized businesses, providing merchants and customers with a secure and streamlined checkout experience.
Features
- Seamless integration of PayPal with WooCommerce
- User-friendly interface for a hassle-free checkout experience
- Support for refunds and multiple currencies
- Advanced fraud protection and dispute resolution
- No additional transaction fees other than PayPal fees
Ratings:
- PayPal for WooCommerce by Angell EYE is rated 4.8 out of 5 stars based on 443 reviews.
Want to Test Your Changes on Free Staging URLs?
Try Cloudways managed WooCommerce hosting for a hassle-free experience.
Final Thoughts
Integrating PayPal as a payment gateway for your WooCommerce store offers numerous benefits, including secure transactions, faster checkout, and fraud protection. The process of setting up PayPal with WooCommerce is easy, and you can customize your settings to meet your needs.
This article outlines the steps to configure PayPal settings and create a Sandbox Account for testing purposes. I have also covered the leading WooCommerce PayPal plugins and extensions to enhance your store’s functionality. You can improve your customers’ shopping experience and increase your revenue by incorporating PayPal into your WooCommerce store.
Q. Does WooCommerce work with PayPal?
A. Yes, WooCommerce works seamlessly with PayPal. It supports multiple PayPal payment options, including PayPal Standard, PayPal Checkout, and PayPal Payments, which allow secure transactions directly from your WooCommerce store.
Q. What is the best payment method with WooCommerce?
A. The best payment method depends on your target audience. PayPal and Stripe are highly popular for their ease of use and global acceptance. For local transactions, region-specific gateways like Razorpay or Square may be more suitable.
Q. How much does PayPal charge for WooCommerce?
A. PayPal charges a transaction fee based on your location. For example, in the U.S., the fee is typically 2.9% + $0.30 per transaction. International transactions may incur additional fees. Check PayPal’s pricing for the latest details.
Q. Can I pay WordPress with PayPal?
A. Yes, WordPress accepts PayPal for purchases like domain registrations, hosting plans, or other premium services, provided the payment option is available in your region.
Here’s how you can add the PayPal plugin to WooCommerce:
- Download and install the PayPal for WooCommerce plugin from the WordPress Plugin Directory.
- After installation, configure the plugin settings.
- Connect your PayPal account to your WooCommerce store.
Q. How to get PayPal API for WooCommerce?
A. To get your API credentials, log in to the PayPal Developer Dashboard and navigate to Apps & Credentials. Toggle to Live or Sandbox for testing, then click Create App. Once created, you will see your Client ID and Secret Key, which you have to copy and paste into your WooCommerce payment settings. To keep these sensitive API keys secure, Cloudways protects your store with dedicated firewalls and free SSL certificates, ensuring safe communication between your site and PayPal.
Sarim Javaid
Sarim Javaid is a Sr. Content Marketing Manager at Cloudways, where his role involves shaping compelling narratives and strategic content. Skilled at crafting cohesive stories from a flurry of ideas, Sarim's writing is driven by curiosity and a deep fascination with Google's evolving algorithms. Beyond the professional sphere, he's a music and art admirer and an overly-excited person.

