


Key Takeaways
- A custom app built with Laravel gives you full control over your store’s functionality, letting you create unique features that go beyond what off-the-shelf apps offer.
- Laravel’s robust framework makes it easy to communicate directly with the Shopify API, allowing you to manage products, orders, and customer data programmatically.
- By using Laravel for your backend logic and Shopify for the core e-commerce platform, you get a scalable and secure solution with the best of both worlds.
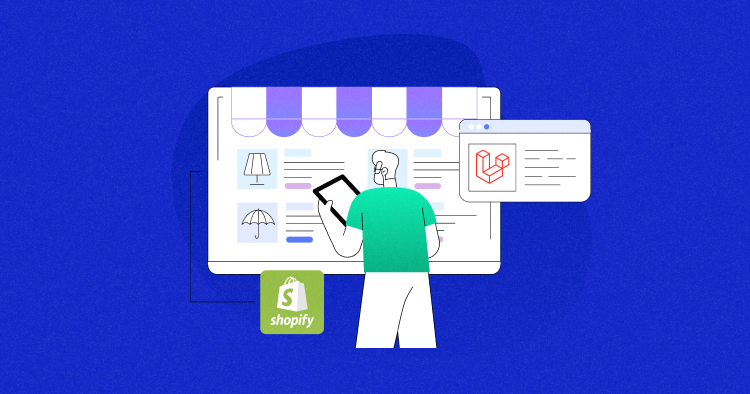
For many businesses, a standard Shopify store is just the beginning. While off-the-shelf apps are great for basic functionality, they often fall short when you have unique or complex business needs. This is where a custom solution built with Laravel is so effective.
By integrating Laravel with the Shopify API, you can build powerful, custom features—from a unique customer loyalty program to a tool that automatically syncs your inventory with a third-party warehouse.
In this guide, I’ll show you exactly how to build a secure connection between Laravel and Shopify, starting from scratch with a fresh project and a new development store. As we integrate Laravel with Shopify, Laravel security becomes a top priority.. I’ll walk you through fetching product data and displaying it on your own page.
We’ll cover two different ways to accomplish this: first, by setting up the project on your local machine, and second, by deploying it to a live server using Cloudways.
Let’s get started…
What is a Shopify App?
A Shopify app is a software application that extends what your Shopify store can do. Think of it as a way to plug in extra features or tools without having to reinvent the wheel.
For example, apps can:
- Help you manage products, inventory, or orders more efficiently in the Shopify admin.
- Add storefront features like product reviews, subscriptions, upsells, or advanced search.
- Automate tasks such as sending emails, syncing data with other platforms, or managing shipping.
There are two main types of Shopify apps:
- Public apps → These are available in the Shopify App Store and can be installed by any merchant. Examples include apps for marketing, SEO, customer support, or shipping.
- Custom apps → These are built specifically for one store (or a handful of stores). They’re not listed publicly and are often created when a business needs something unique that isn’t available in the App Store.
Apps can be built by third-party developers, agencies, or even by the store owner themselves using Shopify’s APIs and developer tools.
Types of Shopify Apps
Shopify apps generally fall into two categories:
1. Public Apps
Public apps are developed by third-party developers and listed in the Shopify App Store. These apps are available for any merchant to install and cover a wide range of needs — from marketing and SEO to payments, shipping, and customer service. Public apps are the easiest way for most store owners to add new features quickly.
2. Custom Apps (formerly called Private Apps)
Custom apps are designed specifically for a single Shopify store (or a small group of stores). Unlike public apps, you won’t find them in the App Store — instead, they’re built directly for your business needs. Custom apps are ideal when your store requires something very specific that isn’t available in existing public apps.
Shopify used to allow private apps, but that approach has been replaced by custom apps. Custom apps are more secure and easier to manage, and Shopify recommends using them moving forward.
Developers Trust Cloudways for Hosting Their Laravel Apps
Launch your Laravel Shopify app with ease on our developer-friendly cloud platform & experience blazing-fast speeds and performance.
Why Build a Shopify App Using Laravel?
Building a Shopify app with Laravel combines Shopify’s robust eCommerce platform with Laravel’s developer-friendly framework. This pairing makes it easier to extend Shopify beyond its default features while keeping development fast and scalable.
Here’s a quick breakdown:
| Laravel | Shopify | Why This Pairing Works |
|---|---|---|
| Clean, organized code structure | Ready-to-use eCommerce platform | You can focus on custom features instead of reinventing the basics of a store. |
| Built-in tools (routing, authentication, migrations) | User-friendly store management | Developers move faster while merchants get a smooth admin experience. |
| Strong API integration support (HTTP client, middleware) | API-first ecosystem (products, orders, customers) | Makes connecting and syncing data seamless. |
| Highly customizable for any workflow | Scales from small shops to enterprise | Perfect for building apps tailored to different store sizes. |
| Open-source, flexible framework | Trusted, secure SaaS platform | You can innovate on top of a reliable commerce backbone. |
Reasons to Use Laravel with Shopify
Laravel is a strong PHP framework that gives developers structure and flexibility when building custom solutions. Shopify, on the other hand, provides a stable eCommerce backbone with hosting, payments, and security built-in. Combining the two allows you to build tailored applications while still relying on Shopify for core store operations.
Here are a few practical reasons why this pairing makes sense:
- Scalability – Shopify handles traffic spikes and hosting, while Laravel lets you extend your store logic as your business grows.
- Security – Shopify manages PCI compliance and SSL certificates, while Laravel gives you the freedom to add secure, custom features.
- Support – Shopify offers 24/7 merchant support, and Laravel has a large developer community for troubleshooting and packages.
- Customization – Shopify themes and apps cover basics, but Laravel lets you go further with custom dashboards, integrations, or workflows.
- SEO & Marketing – Shopify has built-in SEO and analytics; Laravel lets you build additional tools or integrations for more advanced use cases.
- Payments – Shopify provides its own gateway and supports third-party options; Laravel lets you add layers like custom pricing logic or subscription handling.
How to Connect Laravel to Shopify
Now for the best part. It’s time to build a real connection between Laravel and your Shopify store. We’ll set up a custom app that securely communicates with the Shopify API, fetches a list of products, and displays them on your own page.
I’ll walk you through each step, so you can recreate what I’m creating and also get a deep understanding of the process involved.
What You’ll Need Before Starting
Before we dive in, let’s get our toolbox ready. Make sure you have:
- PHP 8.1 or higher installed.
- Composer, which we’ll use to pull in Laravel and dependencies.
- Laravel itself (we’ll set it up in a moment).
- A Shopify Partner account and a development store. This is where our app will connect.
- Command Prompt (on Windows) or any terminal (on Mac/Linux) for running commands.
If any of these aren’t set up yet, take a moment to get them ready.
Step 1: Create a Fresh Laravel Project
Let’s start clean. Open Command Prompt and run:
composer create-project laravel/laravel shopify-laravel

cd shopify-laravel

php artisan serve
Here’s what’s happening:
- The first command downloads Laravel into a new folder called shopify-laravel.
- The second command moves you into that folder.
- The third spins up a development server so you can test your app in the browser.
If you visit http://localhost:8000, you should see the default Laravel welcome page. That means Laravel is ready for us.
Step 2: Create a Custom App in Shopify
Before your Laravel app can pull products (or anything else) from Shopify, you need a Shopify development store. That’s where your test data lives and where your app will connect.
Where do you get this store?
- First, go to the Shopify Partners Dashboard. If you don’t have a partner account yet, you’ll need to sign up (it’s free). Fill up some basic on-screen information and register.
- After that, inside your partner dashboard, look for Stores in the left-hand menu.
- Click Create a development store.
- Fill in the basic details (store name, etc.) and click on Create development store.
- Now you’ll be asked to select which Shopify account you want to use.
This “development store” is basically a free sandbox Shopify gives you for testing apps. It looks and works just like a real Shopify store, but it’s only for building and testing.
Now that you have a development store,
- Go to Settings (bottom-left corner).
- Click Apps and sales channels.
- In the top-right, click Develop apps.
- Click on Allow custom app development.
- Then confirm that you want to allow custom app development.
- Next click on Create an app.
- Then give your app a name and click Create app.
Step 3: Add Some Products to Your Store
Before we jump into APIs, let’s put a few products into your development store. This way, when we connect Laravel to Shopify, you’ll actually have something to see.
- Go to your development store’s admin page. Just click the Shopify logo in the top left hand corner to go there.
- From the left-hand menu, click Products → Add product.
- Fill in some basic details like:
- Product Title (e.g., “Demo T-Shirt”)
- Description (anything short works)
- Price (e.g., $10)
- Click Save when you’re done.
Repeat this process for a few more items (2–3 is enough).
Now your development store has some products. Later, when our Laravel app connects to Shopify’s API, it will be able to fetch and display these.
Step 4: Configure the API Scopes
Now that the app is created, Shopify asks which type of API you want it to use.
- Admin API lets your app work with store data, like products, orders, and customers.
- Storefront API is used for building shopping experiences, like custom storefronts.
I’ll choose Configure Admin API scopes.
On the next screen, you’ll see a list of permissions. Scroll down and check read_products. This gives your app safe, read-only access to the product catalog, which is perfect for testing the connection.
Click Save when you’re done.
Step 5: Install the App and Get Credentials
With the configuration saved, move over to the API credentials tab.
- Click Install app.
- Shopify will generate your Admin API access token. Copy it right away because Shopify only shows it once.
You’ll also see your API key and API secret key here, but for now, the Admin API access token is what matters most.
Make sure you also note your store domain (something like your-store.myshopify.com).
Keep these handy — we’ll plug them into Laravel shortly.
Step 6: Add Your Store Credentials to Laravel
Open the .env file in your Laravel project.
This is where Laravel stores environment variables (like API keys) securely. Add these lines:
SHOPIFY_STORE=your-store.myshopify.com

SHOPIFY_ADMIN_TOKEN=shpat_xxxxx

SHOPIFY_API_VERSION=2025-07
A quick breakdown:
- SHOPIFY_STORE is your store’s domain.
- SHOPIFY_ADMIN_TOKEN is the secure token Shopify gave you.
- SHOPIFY_API_VERSION is which version of the Shopify API you want to use. Shopify updates their APIs quarterly, so always use a supported version. You can find the latest updates on Shopify APIs in their developer changelog.
Here’s how my updated .env file looks like:
Step 7: Install the HTTP Client
Laravel needs a way to talk to Shopify’s API. For this, we’ll use Guzzle, a popular PHP HTTP client.
Here’s what to do:
Open Command Prompt
If you still have Command Prompt open from earlier, great — just make sure you’re inside your Laravel project folder (shopify-laravel). Since we ran the php artisan serve command earlier to view our Laravel installation on http://localhost:8000, you’ll have to press CTRL+C to exit.
If you closed it, open Command Prompt again and navigate into your project folder:
cd path\to\shopify-laravel.
(Replace path\to\shopify-laravel with the actual folder path where your project lives.)
Install Guzzle
Once inside the shopify-laravel folder, run:
composer require guzzlehttp/guzzle
Composer will download and install Guzzle into your Laravel project. This will install the package so Laravel can talk to Shopify.
Confirm It’s Installed
If everything works, you’ll see guzzlehttp/guzzle added to your project’s composer.json file under require.
That’s it — Laravel is now ready to make HTTP requests to Shopify.
Step 8: Create a Controller for Shopify Logic
Next, let’s create a controller where we’ll handle the Shopify connection.
Run:
php artisan make:controller ShopifyAppController
This creates a new file at app/Http/Controllers/ShopifyAppController.php.
Open it and update it with the following code:
<?php

namespace App\Http\Controllers;

use GuzzleHttp\Client;

class ShopifyAppController extends Controller
{
    public function index()
    {
        $shop = env('SHOPIFY_STORE');
        $token = env('SHOPIFY_ADMIN_TOKEN');
        $apiVersion = env('SHOPIFY_API_VERSION');

        $client = new Client([
            'base_uri' => "https://{$shop}/admin/api/{$apiVersion}/",
        ]);

        $response = $client->get('products.json', [
            'headers' => [
                'X-Shopify-Access-Token' => $token,
                'Accept' => 'application/json',
            ],
            'query' => ['limit' => 5],
        ]);

        $products = json_decode($response->getBody()->getContents(), true)['products'] ?? [];

        return view('shopify.index', compact('products'));
    }
}
This method connects to Shopify’s API, fetches a few products, and passes them to a view.
Step 9: Define a Route
Tell Laravel which URL should trigger this controller. Open routes/web.php and add:
use App\Http\Controllers\ShopifyAppController;
Route::get('/', [ShopifyAppController::class, 'index']);
Now when you visit your app’s home page, it will call the index method we just created.
Step 10: Create the View
Now that we’ve set up the controller to fetch products from Shopify, let’s create a view so we can actually display them on the page.
In your Laravel project, create a new folder if it doesn’t already exist:
resources/views/shopify/
Inside that folder, create a file called index.blade.php.
Add the following code to the file:
<!DOCTYPE html>
<html>
<head>
  <title>Shopify App Integration</title>
</head>
<body>
  <h1>Products from Shopify</h1>

  <ul>
    @forelse($products as $product)
      <li>
        <h2>{{ $product['title'] }}</h2>
        <p><strong>Vendor:</strong> {{ $product['vendor'] }}</p>
        <p><strong>Type:</strong> {{ $product['product_type'] }}</p>
        <p><strong>Description:</strong> {!! $product['body_html'] !!}</p>

        @if(isset($product['images'][0]['src']))
          <img src="{{ $product['images'][0]['src'] }}" alt="{{ $product['title'] }}" width="200">
        @endif

        @if(isset($product['variants'][0]['price']))
          <p><strong>Price:</strong> ${{ $product['variants'][0]['price'] }}</p>
        @endif
      </li>
    @empty
      <li>No products found.</li>
    @endforelse
  </ul>
</body>
</html>
What this does:
- Loops through the products Shopify sent back.
- Displays the title, vendor, type, and description for each product.
- Shows the first product image if one exists.
- Displays the price from the first variant.
- If no products exist, it shows “No products found.”
Step 11: Test the Connection
Back in Command Prompt, run:
php artisan serve
Visit http://localhost:8000 in your browser. If everything’s wired up correctly, you should see a list of product titles pulled directly from your Shopify development store.
Integrate Shopify with Laravel on Cloudways
Earlier, we used a local server to connect Laravel and Shopify. If you want to see how to do the exact same thing but on an actual server, that’s what I’ll show you now on Cloudways.
We’ll start by setting up Laravel on Cloudways, and then move on to integrating it with Shopify so we can fetch and display products from your store.
Step 1: Sign Up for Cloudways
Head over to Cloudways and create your account. You get a 3-day free trial — no credit card needed. Once logged in, you’ll land on the Cloudways dashboard.
Step 2: Launch a New Server
Click + Add Server.
Here’s what you’ll choose:
- Application → Select Laravel (Cloudways pre-configures everything for you).
- Application & Server Name → Call it something like laravel-shopify.
- Cloud Provider → Pick DigitalOcean.
- Server Size → Start with 1GB — you can scale later.
- Region → Select the data center closest to your users.
Hit Launch Now. In a few minutes, your Laravel-ready server will be live.
Step 3: Access Your Laravel App
Once the server is ready:
- Go to the Applications tab in Cloudways.
- Select your Laravel app.
- Click the Application URL.
At this stage, you’ll see Cloudways’ default Getting Started page (not Laravel’s welcome screen). So now, you need to upload your Laravel project to the server you created.
Step 4: Prepare Your Laravel Project Locally
On your Windows machine, open Command Prompt and create a fresh Laravel project:
composer create-project laravel/laravel my-laravel-project
This will generate a my-laravel-project folder with all the Laravel files.
Before uploading, delete two things from the folder:
- The vendor/ directory (it’s huge; we’ll rebuild it on the server).
- The .env file (we’ll create a new one on the server with fresh credentials).
Step 5: Upload Project Files via FileZilla
Next, let’s move your project to Cloudways.
- Grab your SFTP credentials from the Cloudways dashboard → Servers → Master Credentials.
- Open FileZilla and connect using the IP, username, password, and port (22).
- On the right, navigate to:
/applications/[your_app_username]/public_html
- On the left, open your my-laravel-project folder.
- Select all files (except vendor/ and .env) and drag them into public_html on the right.
Now your Laravel files are on the server.
Enhance Laravel Shopify App Performance with Cloudways
Cloudways Laravel Hosting features advanced caching, SSD storage, and optimized server stacks for faster request handling and seamless user experiences.
Step 6: Configure Laravel on the Server
Back in Cloudways, launch the SSH Terminal. And log in using your Master Credentials.
Run these commands:
cd applications/[your_app_username]/public_html
composer install
cp .env.example .env
nano .env
Inside .env, update these lines with your Cloudways database details (you’ll find them in Application Credentials):
DB_CONNECTION=mysql

DB_HOST=127.0.0.1

DB_PORT=3306

DB_DATABASE=your_db_name

DB_USERNAME=your_db_username

DB_PASSWORD=your_db_password


APP_URL=https://your-cloudways-app-url

APP_DEBUG=false
Save and exit (Ctrl + X, then Y, then Enter).
Now finish setup:
php artisan key:generate

php artisan migrate
Visit your Application URL again — now you’ll see the default Laravel welcome page.
At this point, your Laravel app is live on Cloudways. Let’s connect it to Shopify.
Step 7: Connect Shopify to Laravel
Now let’s integrate Shopify so Laravel can pull product data.
Earlier, we already created a custom Shopify app, added products, and generated the Admin API token + store credentials. We’ll use those details here.
So now, with our SSH terminal already running on Cloudways, we’ll open the .env file using this command:
nano .env
- At the bottom, add your Shopify details:
SHOPIFY_STORE=yourstore.myshopify.com

SHOPIFY_ADMIN_TOKEN=shpat_xxxxx

SHOPIFY_API_VERSION=2025-01
You’ve already used these details earlier so you should have them handy. My updated file looks like this:
Save and exit (Ctrl + X, then Y, then Enter).
To let Laravel talk to Shopify’s API, we need to install Guzzle. So…run this command:
composer require guzzlehttp/guzzle
Step 8: Create a Controller
We need a controller to handle our Shopify logic — basically, this is where Laravel will fetch products from your Shopify store.
- First, log into your Cloudways SSH terminal (same place where we ran composer install earlier).
- Navigate to your Laravel project folder:
cd applications/your_app_username/public_html
- Run this command to generate the controller:
php artisan make:controller ShopifyAppController
Laravel will create a new file here:
app/Http/Controllers/ShopifyAppController.php
Step 9: Edit the Controller
Okay, the file is created, but the code in it doesn’t let us talk to Shopify.
We need to add the actual code that talks to Shopify.
To do this, we’ll use FileZilla, just like we did earlier when we uploaded our project:
- In FileZilla, navigate to:
applications/your_app_username/public_html/app/Http/Controllers/
- Download ShopifyAppController.php to your computer.
- Open it in your code editor and replace everything inside with this:
<?php


namespace App\Http\Controllers;


use GuzzleHttp\Client;


class ShopifyAppController extends Controller

{

public function index()

{

$shop = env('SHOPIFY_STORE');

$token = env('SHOPIFY_ADMIN_TOKEN');

$apiVersion = env('SHOPIFY_API_VERSION');


$client = new Client([

'base_uri' => "https://{$shop}/admin/api/{$apiVersion}/",

]);


$response = $client->get('products.json', [

'headers' => [

'X-Shopify-Access-Token' => $token,

'Accept' => 'application/json',

],

'query' => ['limit' => 5],

]);


$products = json_decode($response->getBody()->getContents(), true)['products'] ?? [];


return view('shopify.index', compact('products'));

}

}
- Save the file and upload it back to the same location on your server using FileZilla.
Step 10: Create a Route
Right now, our ShopifyAppController is just sitting there. Laravel doesn’t magically know when to run it — we need to register a route that points to this controller.
Here’s how we do it:
- Open FileZilla and navigate to:
applications/your_app_username/public_html/routes/
- Download the file called web.php (this is where Laravel stores web routes).
- Open it in your editor. You’ll see some default code like the route for the Laravel welcome page.
- Add this code:
use App\Http\Controllers\ShopifyAppController;

Route::get('/', [ShopifyAppController::class, 'index']);
This tells Laravel: “When someone visits the homepage /, run the index method inside ShopifyAppController.”
- Save the file and upload it back to the same folder on the server using FileZilla.
Step 11: Create the View
Now, we’ve told Laravel to fetch products and pass them to a view called shopify.index. But we don’t have that view yet — so let’s create it.
- In FileZilla, go to:
applications/your_app_username/public_html/resources/views/
- Inside the views folder, create a new directory called shopify.
- Inside shopify, create a file named index.blade.php.
- Paste this code into it:
<!DOCTYPE html>

<html>

<head>

<title>Products from Shopify</title>

</head>

<body>

<h1>Products from Shopify</h1>


<ul>

@forelse($products as $product)

<li>

<h2>{{ $product['title'] }}</h2>

<p><strong>Vendor:</strong> {{ $product['vendor'] }}</p>

<p><strong>Type:</strong> {{ $product['product_type'] }}</p>

<p><strong>Description:</strong> {!! $product['body_html'] !!}</p>


@if(isset($product['images'][0]['src']))

<img src="{{ $product['images'][0]['src'] }}" alt="{{ $product['title'] }}" width="200">

@endif


@if(isset($product['variants'][0]['price']))

<p><strong>Price:</strong> ${{ $product['variants'][0]['price'] }}</p>

@endif

</li>

@empty

<li>No products found.</li>

@endforelse

</ul>

</body>

</html>
- Save and upload this file back to the server.
Step 12: Test It Out
Now comes the fun part — testing!
- Open your browser.
- Visit your Cloudways application URL (the one you copied earlier from the dashboard).
- If everything is set up correctly, instead of the Laravel welcome page, you’ll now see your Shopify products displayed right on the screen — complete with title, vendor, description, price, and even images.
That’s it! We’ve fully connected Shopify to your Laravel app hosted on Cloudways.
Wrapping Up!
You’ve now successfully built a real connection between Laravel and Shopify, taking your project from a local development environment all the way to a live server on Cloudways.
Through this guide:
- You know the difference between public and custom apps and why they’re essential for extending your store’s functionality.
- You’ve seen how Laravel’s structured framework makes it easy to interact with the Shopify API and build a clean, secure application.
- You’ve learned how to set up, configure, and deploy your Laravel app on Cloudways, which is a crucial step for turning a local project into a publicly accessible app.
This is just the beginning of what you can accomplish by pairing the power of Laravel with the flexibility of the Shopify API. If you have any questions, let me know in the comments below.
Frequently Asked Questions
1. Can I integrate multiple Shopify stores with a single Laravel app on Cloudways?
Yes, you can. By using the Shopify API, a single Laravel app can connect to more than one store. The key is to securely store and manage each store’s API credentials (like tokens and store URLs) in your .env file or database so your app knows which store it’s talking to.
2. What happens if Shopify updates or changes the API version? Will my Laravel app stop working?
Not necessarily — but it can if your app uses features that are removed or changed in the new version. Shopify releases regular API updates and gives advance notice before deprecating old versions. To avoid issues, always pin your app to a specific API version (for example, 2025-01) and keep an eye on Shopify’s developer changelogs so you can adjust your code before older versions are retired.
3. Can I build a Laravel Shopify app without any front-end?
Absolutely. Your Laravel app can function purely as a backend service — handling API requests, syncing data, processing orders, or running automations — without serving a user interface. If you want to add a dashboard or product view later, you can build that separately as a front-end layer.
Abdul Rehman
Abdul is a tech-savvy, coffee-fueled, and creatively driven marketer who loves keeping up with the latest software updates and tech gadgets. He's also a skilled technical writer who can explain complex concepts simply for a broad audience. Abdul enjoys sharing his knowledge of the Cloud industry through user manuals, documentation, and blog posts.


