Want a high-performing website? One overlooked aspect is usually the way site pages load.
Imagine this: you have a beautiful website or a store, but it loads slowly. What will happen?
Well, stats show that people will bounce away and likely never return to your store.
– The buying decisions of about 70% of online shoppers are influenced by fast loading speeds.
– A report from Google shows that there’s a 32% increase in the chance of a user bouncing off when the load time jumps from 1 to 3 seconds.
A fast website will definitely pay off well for your business. One way to increase the page speed is to defer offscreen images. In this article, we shall learn all about this website optimization technique – what it is, its benefits, how it’s done, etc.
Let’s get started…
What Is Offscreen Image Deferring?
Offscreen image deferring, also called lazy loading, is a web performance optimization technique that delays loading images not immediately visible in a visitor’s viewport.
Whether your visitors browse via laptop or mobile devices, only a portion of the page is visible at any given time, the viewport is the area currently in sight.

Instead of loading all images at once, only the images in view are downloaded initially. As the user scrolls down the page, images in the next sections load on demand.
This approach reduces server load, saves bandwidth, and speeds up page load times. It also improves Core Web Vitals, like Largest Contentful Paint (LCP), making your website faster and more user-friendly.
Why Defer Offscreen images?
Offscreen image deferring directly impacts Core Web Vital‘s First Input Delay (FID) metric. FID calculates the time it takes for the browser to respond to a user’s initial interaction with the page.
The ideal time for FID is anywhere between 0 to 100 ms. And anything beyond 300 ms is considered poor.
By optimizing your web pages with the help of offscreen image differing, you can get the following benefits:
- Reduced Load Times: This one is a definite. When the images don’t load beyond the viewport, your pages load way faster than they would if they loaded all at once.
- Bandwidth Conservation: When a limited part of the page loads at a time, the bandwidth resource used by your visitors comes down significantly. Rather, it’s not unnecessarily wasted. Maximum bandwidth is only consumed when a visitor views the full page.
- Better SERP Rankings: Faster websites rank high. When your site shows higher, you get more traffic and eventually more conversions. What could be a better motivator to implement offscreen image deferring?
- Better Visitor Experience: As mentioned in the stat above – the decisions of about 70% of shoppers are influenced by the speed of the webpage load time. Do you want to lose your customers and visitors to slow pages? No, right?
Offscreen Image Defering + Fastest Cloud Hosting = Lightning Fast Web Pages!
Cloudways comes with the latest technologies like Apache, Nginx, Redis, etc., which can load your website in UNDER A SECOND!
Now that you know the whats and whys of offscreen image deferring, let’s see how it’s done.
Methods for Deferring Offscreen Images
So basically, there are several methods that you can use to get the task done. I’ll discuss the easiest and the most common ones so that you have zero problems implementing offscreen image deferring to your website.
Oh, by the way, if you’ve got a WordPress site built on version 5.4 or higher, you already have the offscreen image deferring, also sometimes called lazy loading capabilities by default.
Here’s an example that I got from a WP test page that I created for this article.
To see if your WP version supports it, simply go to the WP Dashboard → Updates.
Then, look for the version it shows.
It’s a great lazy loading tool, but it can be a little restrictive at times.
That said, let’s move on to the methods that you can use for offscreen image deferring for your web pages.
Method 1: Offscreen Deferring via HTML Code
You don’t need to be a pro coder to defer images via HTML coding. You can simply do it with a single line of code that you’ll use for the images of your choice.
Here are the steps you can follow to manually defer the images.
1. Open up your HTML file. It can be in your IDE or your text editor.
2. Identify the offscreen images that you want to defer. Then, use the following line of code to defer the images or lazy load them.
<img src="example.png" loading="lazy" alt="example">
Replace “example.png” with the actual path to the image you want to display.
3. Save the file, then execute the code, and your images will be deferred.
Source: Web.dev
In the video above, you can see that as the page is scrolled and the viewport content changes, the new images start showing up. This is how the process goes by.
Caution, though – experts from web.dev suggest that you should avoid deferring images that are highly likely to be in-viewport and LCP images in particular.
LCP stands for Largest Contentful Paint and it basically times how long it takes for the largest content piece to show up on the screen.
Method 2: Differing With Plugins and Tools for Various Platforms
Now, if you don’t want to go through the code hassle or manually choose the pictures and want an easy way out, then there are tools to do that.
Depending on the platform, some plugins or extensions can assist you in getting the job done easily. Let me share some of the tools for some of the most common platforms, such as WordPress, Magento, Shopify, etc.
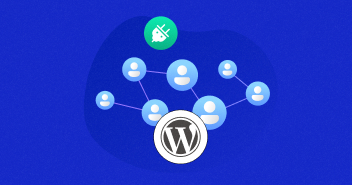
Offscreen Deferring in WordPress
Deferring offscreen images with WordPress is super easy. There are tons of plugin options available that you can explore. Here are some common ones that are used for that purpose:
These are all top options, and anyone will do the trick for you. Most of the WP plugins for this purpose are pretty user-friendly, so you won’t have a problem with performing the job.
In fact, let me just show you one method of how to do it in WordPress. The process is usually more or less similar for other plugins as well. I’ll use Smush to show you how it’s done.
The first step is to install the plugin.
Dashboard → Plugins → Add New → Search for Smush → Install → Activate.
Once activated, you can use the plugin to lazy load images. A “Smush” tab on the left will appear. Hover that and you’ll see all the options that the plugin offers. Click on Lazy Load to access the settings for offscreen image deferring.
When you are in that tab, you’ll easily know how to use the plugin.
You can see that it tells you about the status of lazy loading for your website already. Plus, once you scroll down you’ll see lots of customization options that you can explore for offscreen image deferring.
And that’s literally how simple it is to lazy load images for WordPress websites. Once you are done choosing your desired settings, just click the “Save Changes” button and you’re done.
That’s done. Let’s look at how it’s done for other platforms.
WordPress Sites Load Super Fast With Cloudways!
With our optimized hosting stack for WordPress that includes tech like Apache, Ngnix, Redis, etc., you can have your WP sites load in less than a second. Amazing right?
Offscreen Defering in Shopify
Shopify is another popular option where people build their online stores. And naturally, those sites are often image-rich. Here are some image-deferring tools to explore for your Shopify stores:
Offscreen Defering in Magento
Magento is a popular platform that’s usually a choice of mid-tiered to high-end businesses. Several extension options will come handy when wanting to defer offscreen images for your Magento stores.
Let’s have a look at them:
- Magento 2 Image Lazy Load Extension
- Lazy Load by Amasty
- Magento 2 Lazy Load Images & Products by Welt
Method 3: Differing Using JS Listeners
This approach involves deferring offscreen images through JavaScript. JS Listeners, also known as JavaScript event listeners, ensure that the code waits for a triggering event before taking action. In other words, it’s action-based offscreen image deferral.
addEventListener() and removeEventListener() are the commands used to implement Event Listeners in your JavaScript code. These functions enable you to utilize various types of events to trigger offscreen image deferral using JavaScript.
I’ve also provided additional code examples below and explained how to use them.
Scroll: document.addEventListener(“scroll”, lazyload)
This happens when a certain area of the page is scrolled.
Orientation Change: window.addEventListener(“orientationChange”, lazyload);
This happens when your users change the screen orientation from landscape to portrait or vice versa.
And that’s about it. In the end, there are many methods to get the job done. It totally depends on what route is the easiest for you. That said, offscreen image deferring alone can’t seal the optimization deal for you.
You’ll also need to implement the image optimization best practices so that your website pages load faster. And your lazy loading efforts combined with a fast web host can reap the best results for you.
Now let’s look at some image optimization techniques that you can implement to make the best of your offscreen image deferring efforts!
Image Optimization Tips to Assist Your Offscreen Image Differing Efforts
Now, differing images offscreen on its own will only do so much to your page load speeds. It’s best that you assist those efforts with better image optimization. Here are a few ways to optimize your images:
1. Reduce your Image File Size and Choose the Right Format
Ensure that your pages aren’t bombarded with heavy images. Compress the images so that your pages don’t need more bandwidth to load. Because even with image deferring, heavy data will push your load times up.
You don’t want that, right?
Here’s a test that I did to show how heavy images can impact the load times significantly.
This is a report for a very fuzzy website that I made as a test. No images are optimized. You can see that the results for the site aren’t good. I ran the test on PageSpeed Insights.
See all the errors that it’s giving me for the images.
Then, I reduced the image sizes and made some optimization adjustments, and the error numbers were reduced significantly.
This resulted in better website performance metrics as well as shown below:
So, don’t underestimate the importance of image optimization and using the correct format. It can significantly enhance your store’s performance.
2. Keep the Images High Quality
Now, you don’t want to reduce the quality of images when bringing down their file size. So, keep the images of high quality to ensure an excellent visitor experience. The two quickest ways to do this are:
- Convert your images into JPEG format.
- Convert your images into WEBP format.
Now, it’s best to implement these steps when uploading the images. But if you already have a site laden with images of the wrong formats, you can download plugins and extensions to convert the format.
Luckily, if you’re a Cloudways customer and opt to buy the Cloudways Cloudflare Enterprise Add-on, you get access to Cloudflare Polish, which you can use to reduce image sizes without compromising on quality.
3. Use Responsive Images
Your image sizes should vary depending on the screen size of the visitor. This will greatly benefit your site in terms of mobile visits or for other smaller devices such as tablets.
Rather than consuming equal data for mobile and laptop, the consumption will reduce, impacting the LCP element of the Core Web Vitals.
So, it is definitely something not to overlook when optimizing your site’s images. Now, I understand that businesses don’t usually have much time and resources to do all this manually.
That’s why I find it relevant to mention the Cloudflare Mirage that you can get with Cloudways for pennies. This tool will make your images responsive so that you save time and resources and dedicate them to other important things that matter more.
4. Enable Browser Caching for your Images
This feature will download the resources for the visitors when they visit your site for the first time. So, on their subsequent visits, the data will already be there. Hence, the page will load faster.
This is a great tool for websites that expect recurring visitors.
Now that you are sorted with your image optimization, I’d like to move to the end of the article with an offscreen image deferring tip for you:
Don’t Lazy Load Images in the First Visible Viewport
All the pages on your website have a hero section. This is the first section that is visible to your viewers. If that shows up delayed, you are basically telling people to go away.
Don’t do that. In fact, there’s something called eager loading. Implement that so that the image loads as usual and isn’t unnecessarily delayed.
Conclusion
Offscreen image deferring is a great way to speed up your website.
Hopefully, by looking at the methods above, you can implement them for your site and deliver a blazing-fast browsing experience to your visitors.
See which one is relevant to you the most. And if you are just starting out with a site, make sure to build it on a platform that gives you the most freedom and access to customizations.
Last but not least – don’t forget to power the site with fast hosting because unoptimized hosting will keep your site slow, and all your image deferring efforts will go to waste anyway!
Q1. What does defer offscreen images mean?
To defer offscreen images means to only make the images in the present viewport of the user appear and to delay loading those images that aren’t requested for viewing yet.
Q2. How do you fix defer offscreen images?
You can fix offscreen image deferring by manual methods or via tools and plugins, depending on the platform you are using for your website.
Q3. How do I defer offscreen images in WordPress?
You can either do it manually via HTML alterations, or you can use plugins such as Smuch, WP-rocket, etc.
Q4. How do I defer offscreen images in Shopify?
You can defer offscreen images in shopify by using tools such as Lazify, Loadify, TinyIMG, etc.
Abdul Rehman
Abdul is a tech-savvy, coffee-fueled, and creatively driven marketer who loves keeping up with the latest software updates and tech gadgets. He's also a skilled technical writer who can explain complex concepts simply for a broad audience. Abdul enjoys sharing his knowledge of the Cloud industry through user manuals, documentation, and blog posts.