Codeigniter is popular choice for projects that require database integration and interfacing. The main reason is the simple within-the-framework options for setting up and working with database connections. This means that Codeigniter is a great option for MVC CRUD applications. Before going into the details of this Codeigniter CRUD application, I will describe the basics of Create, Read, Update and Delete.
You Might Also Like: How to Install Codeigniter
Create, Read, Update, and Delete
All database based applications operate on a simple process that involves four simple operations – Create, Read (Retrieve in some cases), Update and Delete. All these operations are applied to the database and are essential for the operation of the application.
Since an application has users with varying privileges, it is important to note that not all users could carry out the four operations within the application. Similarly, the application process could also carry out these functions without any specific user input.
- Create operation is used to create or add data to the database.
- Read/Retrieve operation is used to read the data that is already saved in the database.
- Update operation is used to save or update the data in the database.
- Delete operation is used to remove data from the database.
Now that you have a basic understanding of CRUD, I will demonstrate how to implement these ideas in a Codeigniter CRUD application.
You Might Also Like: CRUD operation with PDO Database Connection
Create the Database and the Table
I will start by creating the database and a table that will act as the basis of this tutorial. For the purpose of this Codeigniter CRUD example, I have named the database as ‘crud’ and the table as ‘faqs’. Use the following SQL statements for creating:
CREATE TABLE IF NOT EXISTS `faqs` (
`id` int(11) NOT NULL AUTO_INCREMENT,
`title` varchar(255) NOT NULL COMMENT 'title',
`slug` varchar(255) NOT NULL,
`employee_name` varchar(255) NOT NULL COMMENT 'employee name',
`employee_salary` double NOT NULL COMMENT 'employee salary',
`employee_age` int(11) NOT NULL COMMENT 'employee age',
PRIMARY KEY (`id`),
KEY `slug` (`slug`)
) ENGINE=InnoDB DEFAULT CHARSET=latin1 COMMENT='datatable demo table';
Insert Values in the Database
Once the database and the table is up and running, the next step is adding value to the table faqs. Note that the fields in the table include After creating the database and table.

Configure the Database Settings
The next step after setting up the database and the table is the configuration of database specific settings including the host, database name, user credentials. This is is generally done by adding these information to a Codeigniter database config file, located generally in the file application/config/database.php.
For the purpose of this tutorial, I have set the following values:
Database hostname: ‘localhost’
Database name: ‘crud
Database username: ‘root’
Database password: ‘root’
The complete database configuration are:
$db['default'] = array(
'dsn' => '',
'hostname' => 'localhost',
'username' => 'root',
'password' => 'root',
'database' => 'crud',
'dbdriver' => 'mysqli',
'dbprefix' => '',
'pconnect' => FALSE,
'db_debug' => (ENVIRONMENT !== 'production'),
'cache_on' => FALSE,
'cachedir' => '',
'char_set' => 'utf8',
'dbcollat' => 'utf8_general_ci',
'swap_pre' => '',
'encrypt' => FALSE,
'compress' => FALSE,
'stricton' => FALSE,
'failover' => array(),
'save_queries' => TRUE
);
Next up, Controller
The next major step is the creation of the Controller that processes the user’s request, talks to the Model (the business logic component) and finally, loads the proper View.
You Might Also Like: Pass Data From Controller to View in CodeIgniter
The Controller is located in the file, ‘application/controllers/Faqs.php’. For the purpose of this tutorial, I have creates a controller with three major functions. The index() function lists all the FAQ items, the create() function adds new FAQ item, the edit() function is called to edit the already published FAQ items, and finally the delete() function removes the FAQ items from the database. Here is the complete code for the controller:
class Faqs extends CI_Controller {
public function __construct()
{
parent::__construct();
$this->load->library('session');
$this->load->library('form_validation');
$this->load->model('faqs_model');
$this->load->helper('url_helper');
}
public function index()
{
$data['faqs'] = $this->faqs_model->get_faqs();
$data['title'] = 'Faqs archive';
$this->load->view('templates/header', $data);
$this->load->view('faqs/index', $data);
$this->load->view('templates/footer');
}
public function view($slug = NULL)
{
$data['faqs_item'] = $this->faqs_model->get_faqs($slug);
$data['title'] = $data['faqs_item']['title'];
$this->load->view('templates/header', $data);
$this->load->view('faqs/view', $data);
$this->load->view('templates/footer');
}
public function create()
{
$this->load->helper('form');
$this->load->library('form_validation');
$data['title'] = 'Create a FAQ item';
$this->form_validation->set_rules('title', 'Designation', 'required');
$this->form_validation->set_rules('employee_name', 'Name', 'required');
$this->form_validation->set_rules('employee_salary', 'Salary', 'required');
$this->form_validation->set_rules('employee_age', 'Age', 'required');
}
public function save(){
    $this->form_validation->set_rules('title', 'Designation', 'required');
    $this->form_validation->set_rules('employee_name', 'Name', 'required');
    $this->form_validation->set_rules('employee_salary', 'Salary', 'required');
    $this->form_validation->set_rules('employee_age', 'Age', 'required');
    if ($this->form_validation->run() === FALSE)
    {
        $this->load->view('templates/header');
        $this->load->view('faqs/create');
        $this->load->view('templates/footer');
    }
    else
    {
        $this->faqs_model->set_faqs();
        $this->load->view('templates/header');
        $this->load->view('faqs/success');
        $this->load->view('templates/footer');
    }
}
public function edit()
{
$id = $this->uri->segment(3);
$this->load->helper('form');
$this->load->library('form_validation');
$data['title'] = 'Edit a faqs item';
$data['faqs_item'] = $this->faqs_model->get_faqs_by_id($id);

$this->form_validation->set_rules('title', 'Designation', 'required');
$this->form_validation->set_rules('employee_name', 'Name', 'required');
$this->form_validation->set_rules('employee_salary', 'Salary', 'required');
$this->form_validation->set_rules('employee_age', 'Age', 'required');

    if ($this->form_validation->run() === FALSE)
{
$this->load->view('templates/header', $data);
$this->load->view('faqs/edit', $data);
$this->load->view('templates/footer');
}
else
{
$this->faqs_model->set_faqs($id);
redirect( base_url() . 'index.php/faqs');
}
}
public function delete()
{
$id = $this->uri->segment(3);
$faqs_item = $this->faqs_model->get_faqs_by_id($id);
$this->faqs_model->delete_faqs($id);
redirect( base_url() . 'index.php/faqs');
}
}
You Might Also Like: Codeigniter Form Validation With Example
Build the Model
The Model contains the “business” logic of the MVC CRUD application. For the purpose of this tutorial, the Model of this application communicates with the database. As such, the Model contains the code that interacts with the database and performs the data select, insert, update and delete operations.
Get Your VueJS Handbook Now
Simply enter your email address and get the download link in your Inbox.
Thank You
Your Ebook is on it’s Way to Your Inbox.
The Model developed for this tutorial has the several functions including: get_faqs() function that fetches the FAQ items (by $slug name), get_faqs_by_id() function fetches FAQ by ID number, set_faqs() function edits and adds new item into the database, and delete_faqs() function that deletes a particular item from the database.
Note that this model class has been created in the directory ‘application/models/Faqs_model.php’.
<?php
class Faqs_model extends CI_Model {

    public function __construct()
    {
        $this->load->database();
    }

    public function get_faqs($slug = FALSE)
    {
        if ($slug === FALSE)
        {
            $query = $this->db->get('faqs');
            return $query->result_array();
        }

        $query = $this->db->get_where('faqs', array('slug' => $slug));
        return $query->row_array();
    }

    public function get_faqs_by_id($id = 0)
    {
        if ($id === 0)
        {
            $query = $this->db->get('faqs');
            return $query->result_array();
        }

        $query = $this->db->get_where('faqs', array('id' => $id));
        return $query->row_array();
    }

    public function set_faqs($id = 0)
    {
        $this->load->helper('url');

        $slug = url_title($this->input->post('title'), 'dash', TRUE);

        $data = array(
            'title' => $this->input->post('title'),
            'slug' => $slug,
            'employee_name' => $this->input->post('employee_name'),
            'employee_salary' => $this->input->post('employee_salary'),
            'employee_age' => $this->input->post('employee_age')
        );

        if ($id == 0) {
            return $this->db->insert('faqs', $data);
        } else {
            $this->db->where('id', $id);
            return $this->db->update('faqs', $data);
        }
    }

    public function delete_faqs($id)
    {
        $this->db->where('id', $id);
        return $this->db->delete('faqs');
    }
}
Template Header
The header of the template is common for all the pages. Note that this template is stored in application/views/templates/header.php. The full HTML code is as follows:
<!DOCTYPE html>
<html>
<head>
    <title> Create a Simple MVC Codeigniter CRUD Application</title>
    <link rel="stylesheet" href="https://maxcdn.bootstrapcdn.com/bootstrap/3.3.7/css/bootstrap.min.css" />
</head>
<body>
<div class="container">
Footer Template
Similar to the header, the footer is common to all pages. The file is located in application/views/templates/footer.php. The full HTML code is as follows:
</div>
 </body>
</html>
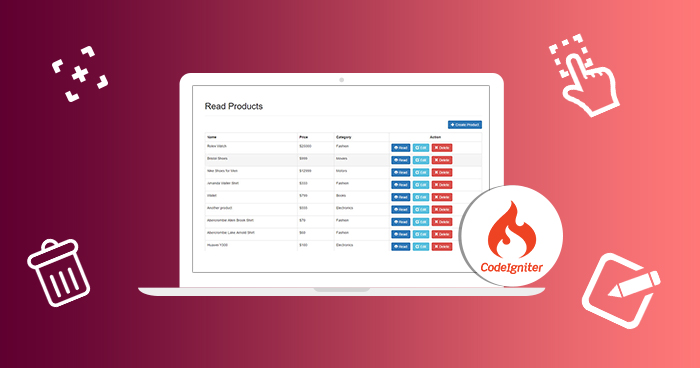
Create the Index View
This view file is used to display the list of all the FAQ items. The file is called by the index() function of the controller. The file is located at ‘application/views/ faqs /index.php’. The full code of the index file is as follows:
<div class="container">
    <div class="row">
        <div class="col-lg-12 margin-tb">

            <div class="pull-right">
                <a class="btn btn-success" href="http://demo.itsolutionstuff.com/itemCRUD/create">Add FAQs</a>
            </div>
        </div>
    </div>
    <table class="table table-bordered">
        <tbody><tr>
            <th>Title</th>
            <th>Employee Name</th>
            <th>Salary</th>
            <th>Age</th>
            <th width="280px">Action</th>
        </tr>
<?php foreach ($faqs as $faqs_item): ?>
        <tr>
            <td><?php echo $faqs_item['title']; ?></td>
            <td><?php echo $faqs_item['employee_name']; ?></td>
            <td><?php echo $faqs_item['employee_salary']; ?></td>
            <td><?php echo $faqs_item['employee_age']; ?></td>
            <td>
                <a class="btn btn-info" href="<?php echo site_url('faqs/'.$faqs_item['slug']); ?>">Show</a>
                <a class="btn btn-primary" href="<?php echo site_url('faqs/edit/'.$faqs_item['id']); ?>">Edit</a>
                <a class="btn btn-primary" href="<?php echo site_url('faqs/delete/'.$faqs_item['id']); ?>">Delete</a>

            </td>
        </tr>
<?php endforeach; ?>
        </tbody></table>
</div>
Detail View
This view file is called in by the controller’s view() function to display a specific FAQ item. The file is located in ‘application/views/news/view.php’. The full code of the view file is:
<?php
echo '<h2>'.$faqs_item['title'].'</h2>';
echo $faqs_item['employee_name'];
echo $faqs_item['employee_salary'];
echo $faqs_item['employee_age'];
ADD View
This view is called by the create() function in the controller class, and it prints a form to add the FAQ item to the database. It is located in the file, application/views/ faqs /create.php. here is the complete code:
<h2><?php echo $title; ?></h2>
<?php echo validation_errors(); ?>
<?php echo form_open('faqs/create'); ?>
 <table>
    <tr>
        <td><label for="title">Title</label></td>
        <td><input type="input" name="title" /></td>
    </tr>
    <tr>
        <td><label for="Employee Name">Name</label></td>
        <td><input type="input" name="employee_name" /></td>
    </tr>

    <tr>
        <td><label for="Employee Salary">Salary</label></td>
        <td><input type="input" name="employee_salary" /></td>
    </tr>

    <tr>
        <td><label for="Employee Age">Age</label></td>
        <td><input type="input" name="employee_age" /></td>
    </tr>

    <td><input type="submit" name="submit" value="Create faqs item" /></td>
    </tr>
</table>
</form>
EDIT View
The edit() function of the controller called this view file and prints a form to edit the FAQ items. This file is found in application/views/ faqs /edit.php. The full code of the edit view file is:
<h2><?php echo $title; ?></h2>

<?php echo validation_errors(); ?>

<?php echo form_open('faqs/edit/'.$faqs_item['id']); ?>
<table>
    <tr>
        <td><label for="title">Title</label></td>
        <td><input type="input" name="title" value="<?php echo $faqs_item['title'] ?>" /></td>
    </tr>
    <tr>
        <td><label for="Employee Name">Name</label></td>
        <td><input type="input" name="employee_name" value="<?php echo $faqs_item['employee_name'] ?>" /></td>
    </tr>

    <tr>
        <td><label for="Employee Salary">Salary</label></td>
        <td><input type="input" name="employee_salary" value="<?php echo $faqs_item['employee_salary'] ?>" /></td>
    </tr>

    <tr>
        <td><label for="Employee Age">Age</label></td>
        <td><input type="input" name="employee_age" value="<?php echo $faqs_item['employee_age'] ?>" /></td>
    </tr>


    <tr>
        <td></td>
        <td><input type="submit" name="submit" value="Edit faqs item" /></td>
    </tr>
</table>
</form>
Successfully Added View
This view is called by the create() function of the controller when a FAQ item has been successfully added to the database. The file is located in the directory application/views/faqs/success.php. This very simple view is as follows:
<p>FAQs added successfully!</p>
Config the Routes
Now that all the view are done, it is time to configure the routes in the route.php file. The good thing is that these routes could be defined by using either (or both) regular expressions or through wildcards. This file is located in the file, application/config/routes.php. The code of the route is:
$route['faqs'] = 'faqs';
$route['404_override'] = 'custom404';
$route['faqs/create'] = 'faqs/create';
$route['faqs/create'] = 'faqs/save';
$route['faqs/edit/(:any)'] = 'faqs/edit/$1';
$route['faqs/view/(:any)'] = 'faqs/view/$1';
$route['faqs/(:any)'] = 'faqs/view/$1';
Create a new controller and write the following code in it.
<?php
class custom404 extends CI_Controller
{
    public function __construct()
    {
        parent::__construct();
    }

    public function index()
    {
        $this->output->set_status_header('404');
        $data['content'] = 'custom-error_404'; // This is your View name
        $this->load->view('index',$data);//This is loading your template
    }
}
?>
Now Create a view file with name ‘custom-error_404.php‘ with your custom message.
Stop Wasting Time on Servers
Cloudways handle server management for you so you can focus on creating great apps and keeping your clients happy.
Conclusion
At this point, you have a simple yet complete MVC CRUD Application powered by Codeigniter. While a bit crude on the design end, the application can add, display and edit FAQ items without any issues. You can use this Codeigniter CRUD application as the basis of your own CMS project. To see the application in action, access the URL of the live application.
Owais Khan
Owais works as a Marketing Manager at Cloudways (managed hosting platform) where he focuses on growth, demand generation, and strategic partnerships. With more than a decade of experience in digital marketing and B2B, Owais prefers to build systems that help teams achieve their full potential.