[Update] OpenCart is now available on 1-Click install from within the Cloudways Platform. Simply Signup and launch your OpenCart based ecommerce store within minutes. Although, if you wish to install using the SSH method, you can follow the step mentioned below.
OpenCart is considered to be one of the easiest CMS for building ecommerce websites. It is still widely used with a very strong community of contributors and users.

It has many useful built-in features, such as multiple payment gateways, multi-store, multi-language support, modules, SEO friendly configuration, and much more. In short, OpenCart is able to answer most of the needs of a startup ecommerce store.
If you are looking to install any version of OpenCart 2.0 on Cloudways through SSH terminal, then follow the step below.
Okay, let’s cut to the chase and dive right in.
How to Install OpenCart 2.0 on a server
You need to ensure that your hosting provider allows you to use SSH on your server. On Cloudways, SSH access is provided inside the Cloud Console, our built-in cloud administration panel. If you have SSH access, then the process will be same. Following are the steps to follow:
- Launch PHP Stack
- Login to your SSH Terminal
- Install the version of your choice through wget command
- Unzip the contents
- Move the Upload folder to root folder
- Begin OpenCart Installation
- Remove the “Install” directory
- Your fully functional blazing fast OpenCart store is ready for use
Step 1: Launch PHP Stack
First off, you need to launch PHP stack on your server. You can find the option under the Server Management tab and click “Add App”. Select PHP Stack, highlighted in the picture.

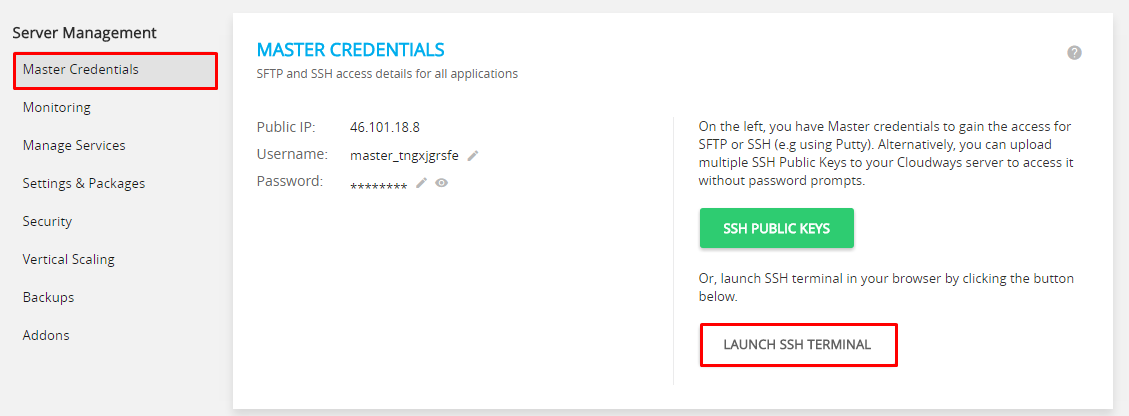
Step 2: Login to your SSH Terminal
Navigate to Application Management tab and launch your SSH terminal. Note that each application has its own access credentials to the SSH, so make sure you have selected the desired PHP stack.
Step 3: Install the version of your choice through wget command
Most probably you may be thinking that one way to install OpenCart is to download the latest version from the official website and upload the files through FTP client. The method sure is easy, but it takes a lot of time to finish with all the uploads.
The quickest way to get the OpenCart installation files is through wget command. This command connects your server with the GitHub repository of OpenCart through which the required installation package gets delivered. Alternatively, you can get the installation files by visiting OpenCart’s GitHub page.
For this tutorial, we are using version 2.0.2.0. Therefore, the command would be:
wget https://github.com/opencart/opencart/archive/2.0.2.0.zip
This will transfer the OpenCart contents in a zipped file to your server.
Step 4: Unzip the contents
Next, we need to unzip the contents. Just use the following command:
unzip opencart_v2.0.2.0.zip
This will unzip the contents into the folder, /opencart-2.0.2.0.
Step 5: Move the Upload folder to root folder
Probably you don’t want your OpenCart to exist in a sub-folder (i.e. opencart-2.0.2.0) in this case. It is better we move the contents in the “Upload” folder to the root directory.
To move the data from opencart-2.0.2.0/upload to root directory, we use the following command.
mv -v opencart-2.0.2.0/upload/* ./
-v: Verbose, displays the information about the command process
./: denotes the current directory we are present. (In this case, it is the public_html folder.)
Step 6: Begin OpenCart Installation
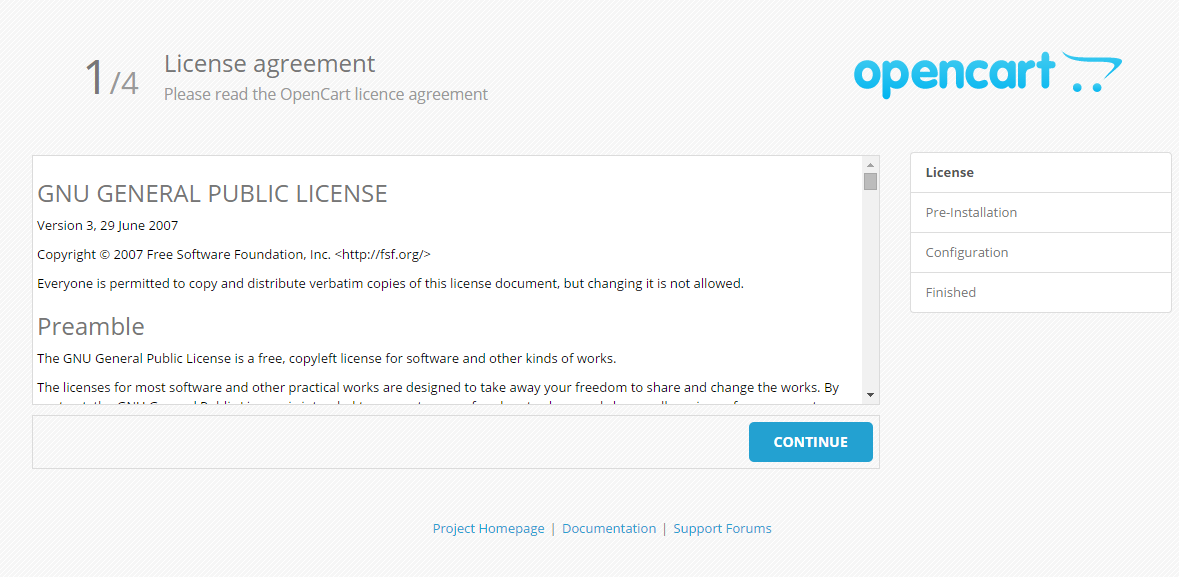
To begin with the OpenCart installation, just visit the URL of your website. In this tutorial, it is a random staging URL generated by Cloudways system.
When you first visit your website with OpenCart files in the root, then installation will initialize. The first page will be the license agreement.
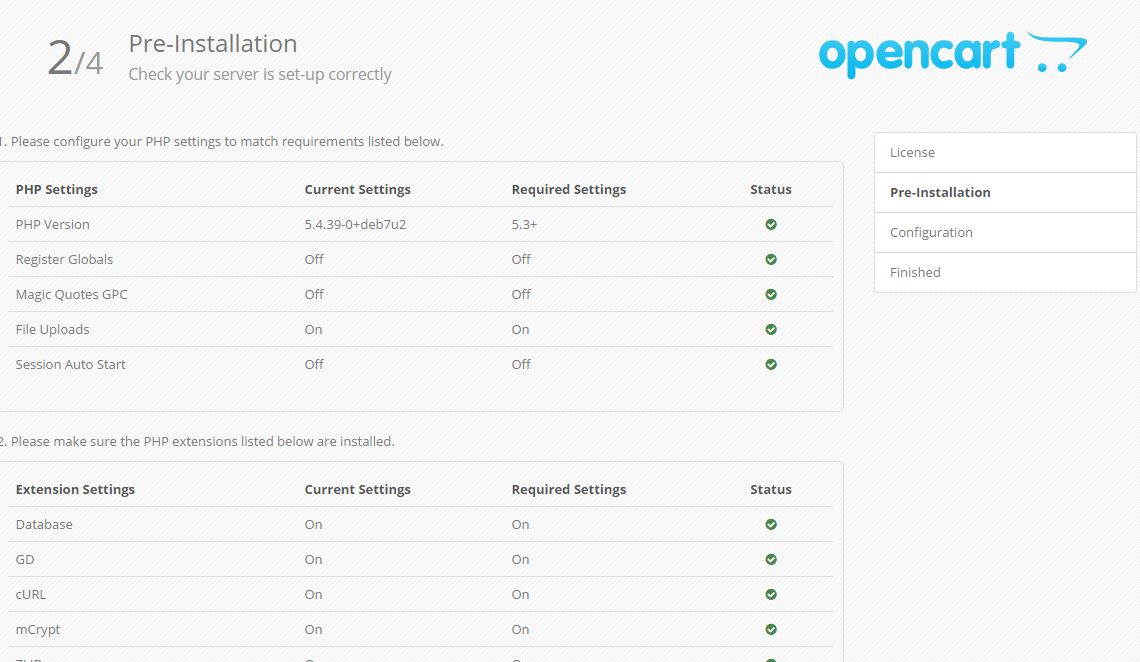
Next, OpenCart will run a server check. Cloudways default setup is fully compatible with the latest version of OpenCart.
On Page 3, OpenCart will ask you to insert the database details into the application. You can find the details of your database in Application Management under Access Details.
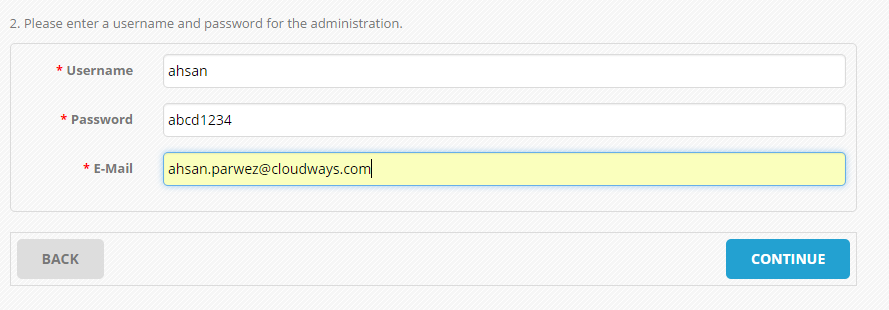
After inserting the database details, you’ll need to enter the admin credentials.
That’s it! On Page 4, you will see a note saying that you should remove the “Install” folder for security reasons.

Step 7: Remove the “Install” directory
As a final step, we will remove the “Install” folder as we don’t want any hackers to reinitialize the OpenCart install process.
To remove it, we will run the following command on SSH terminal.
rm -rf install/

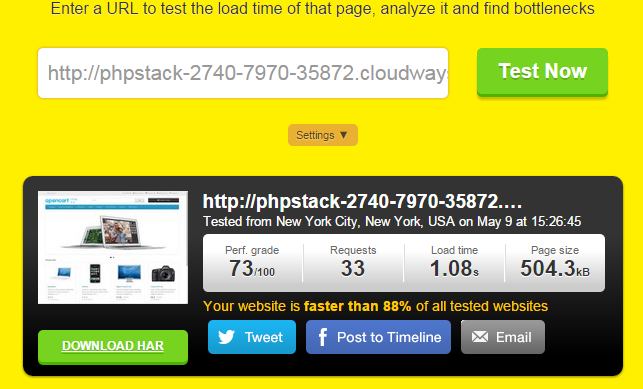
Your fully functional blazing fast OpenCart store is ready for use
Now, you have a fully functional OpenCart on performance-optimized cloud servers on Cloudways Cloud Platform. You’ll have a blazing fast e-store that loads under a second.
Next step for you is to add data, customize the theme, point the domain name, and get the store going on Cloudways platform. So, don’t just wait. Launch a PHP-based OpenCart hosting server now or install OpenCart in a single click from within the Platform to try out its excellent features!
Danish Naseer
Danish Naseer is a WordPress Community Manager at Cloudways. He is passionate about designing, developing, and engaging with people to help them. He also actively participates in the community to share his knowledge. Besides that, he loves to watch documentaries, traveling and spending time with family. You can contact him at [email protected]