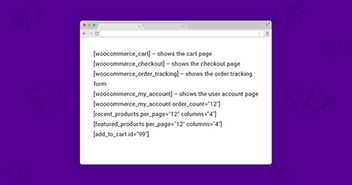
Many store owners think that moving the WooCommerce coupon field to the bottom of the page (around the payment details section) is a great idea. This field is default located near the top of the checkout page. If the customer is not logged in, this field would be located right under the legal notice.
The best thing is to move the WooCommerce coupon field on the checkout page to a new location without disturbing other template elements. In this tutorial, I will show you how to move the WooCommerce coupon field in the checkout page using custom code.
Unhook Coupon From Current Location
First, you must unhook the coupon form from its current location (top of the checkout page). This task could be done through a single line of code. Please see the example below.

remove_action( 'woocommerce_before_checkout_form', 'woocommerce_checkout_coupon_form');
This snippet will remove the coupon field from the checkout form.
Add Coupon Form to Target Location
Next, I will need to add it to the template at the desired location. In this case, I will add the field below the checkout form. Remember that the WooCommerce coupon field cannot be nested inside the checkout form because it might affect the Place Order button. Add the field near the end of the form through this snippet:
add_action( 'woocommerce_after_checkout_form', 'woocommerce_checkout_coupon_form' );
Move Coupon Field to the Checkout Page
To move the WooCommerce coupon to the checkout page, I will use the jQuery UI Dialog library to help me with the dialog functionality. In functions.php, add the following code (in case your website doesn’t already include the jQuery UI Dialog library).
function cw_scripts() {
    wp_enqueue_script('jquery-ui-dialog');
}
add_action('wp_enqueue_scripts', 'cw_scripts');
Next, create a jQuery Model Dialog instance containing all the coupon code content. Position the model dialog, so it anchors to an HTML element inside the checkout form. Use the existing WooCommerce filters (or actions) to position the HTML element at your desired location within the checkout form.
From launching to customizing your WooCommerce stores, Cloudways is at your service.
Whether you’re a beginner or an expert, Cloudways Platform is based on UI, where you can create and customize your online store in a few seconds.
In the functions.php, add the following code:
function cw_show_coupon_js() {
    wc_enqueue_js('$("a.showcoupon").parent().hide();');
    wc_enqueue_js('dialog = $("form.checkout_coupon").dialog({
                       autoOpen: false,
                       width: 500,
                       minHeight: 0,
                       modal: false,
                       appendTo: "#coupon-anchor",
                       position: { my: "left", at: "left", of: "#coupon-anchor"},
                       draggable: false,
                       resizable: false,
                       dialogClass: "coupon-special",
                       closeText: "Close",
                       buttons: {}});');
    wc_enqueue_js('$("#show-coupon-form").click( function() {
                       if (dialog.dialog("isOpen")) {
                           $(".checkout_coupon").hide();
                           dialog.dialog( "close" );
                       } else {
                           $(".checkout_coupon").show();
                           dialog.dialog( "open" );
                       }
                       return false;});');
}
add_action('woocommerce_before_checkout_form', 'cw_show_coupon_js');
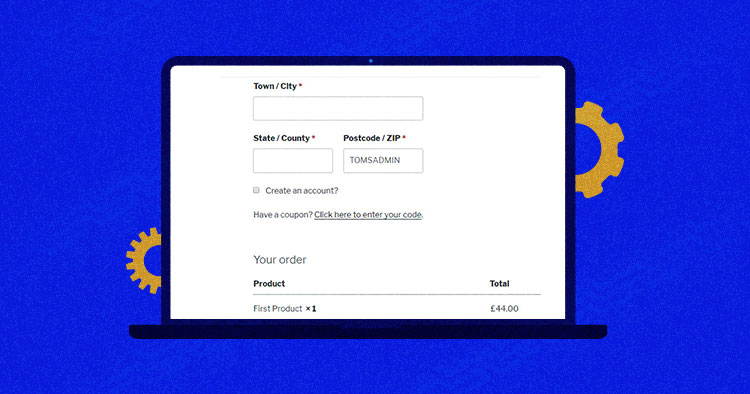
Next, to show the coupon field at checkout, add the “Click here to enter your code link”. This code will link the customer details and order details sections. To check out other locations for this link, you could look into other WooCommerce actions and filters on the checkout page (woocommerce_checkout_fields or woocommerce_before_checkout_billing_form). If you cannot find the right filter or method, you could override the default WooCommerce checkout page template and locate the link at your desired location.
function cw_show_coupon() {
    global $woocommerce;

    if ($woocommerce->cart->needs_payment()) {
        echo '<p style="padding-bottom: 5px;"> Have a coupon? <a href="#" id="show-coupon-form">Click here to enter your coupon code</a>.</p><div id="coupon-anchor"></div>';
    }
}
add_action('woocommerce_checkout_after_customer_details', 'cw_show_coupon');
Click the link and enter the coupon code. You will get the following result.
Summary
In this article, I discussed the important issue of moving the WooCommerce coupon field on the checkout page to your desired location. You could often find a filter or action to situate the link. However, you could also override the default template for locating the link. If you need further help in this regard, please leave a comment.
Owais Alam
is the WordPress Community Manager at Cloudways - A Managed WooCommerce Hosting Platform and a seasoned PHP developer. He loves to develop all sorts of websites on WordPress and is in love with WooCommerce in particular. You can email him at [email protected]