It’s not easy to attract the audience when you have limited information on your ecommerce store. Product descriptions, reviews, and content pieces are essential in helping your customers decide what to buy because simply selling products is not enough to attract loyalty from customers. Also, Google is getting more involved, and social media has become a great source of referrals. Hence, it is important that your ecommerce businesses should have a content publishing team if you really want to attract new buyers and retain existing ones.
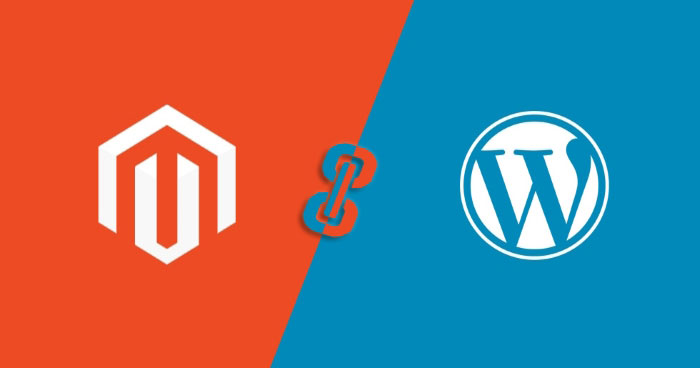
Magento platform is an open source ecommerce platform champion, and WordPress, on the other hand, is known for its awesomeness in CMS and blogging. As a store owner, we know that you have to build a fully functional Magento based ecommerce store for your business. On the flip side, you also have to create an informative WordPress blog that directly interacts with your visitors about your business, offers, and products.
However, it is totally possible to create a combination of both Magento and WordPress and have the best of both worlds.
Integrating a WordPress blog in a Magento store is perhaps the best thing to do for your business. You can integrate a WordPress blog in Magento using a module like FishPig Magento WordPress Integration. It’s a free Magento module that works with both Magento Community and the Enterprise edition, which increases the ease of navigation between the two platforms and prevents the users from leaving the Magento store.
Hence, we will now explore some easy steps to integrate a WordPress blog into your Magento store. But before starting the process, please ensure that you have FTP access to your hosting server and that you are comfortable with file management. Also, I would advise you to follow the steps carefully.
First of all, you must install WordPress. If your hosting provider has 1-click WordPress install feature, I wouldn’t recommend using it because if you install WordPress yourself, it will give you finer control over things and will allow you to understand and follow this tutorial.
Speed Up Your Magento Store By 3x Times
Experience superior Magento performance with our advance caching and dedicated resources
Download and Install WordPress
Visit the WordPress official website and download the latest version. You will get a zip file containing all the files and folders of the WordPress application. Now upload the zip file to your server in the root of your Magento store and extract it. You will get a folder called WordPress that contains all the files and folders of the application. Just rename this folder to wp, and that’s all.
Now, open your favorite web browser and type your Magento store’s URL and add /wp/ at the end. For example, if your Magento store’s URL is http://www.example.com/, you should type http://www.example.com/wp/ in your browser. If you see the WordPress installation page, it means everything was uploaded correctly.
Now follow the steps on the screen of your web browser to install WordPress. When it asks for the database information, you can either create a new database and enter the relevant details or enter your existing Magento database details. If you are unaware of your Magento database details, open the $MagentoRoot/app/etc/local.xml file and you will find the details there.
There is no harm in using the existing Magento database because WordPress uses wp_ as a table prefix by default. It helps to separate Magento tables from WordPress tables. It is also acceptable if you change it to something else like wp_blog_ or anything else according to your wish.
After this, complete the installation process, and you should now have a fully functioning WordPress blog on your Magento server. This installation is not integrated with Magento yet, though, but we are going to do that now. Let’s get started by installing the FishPig Magento WordPress Integration module.
Install the Magento WordPress Integration Module
This module is absolutely free and can be installed like a regular Magento module using the Magento Connect Manager. Before you begin with the installation, make sure that the Magento Compiler and Magento Cache is fully disabled else you will get some errors. You can enable the cache and run the Magento compiler later.
Configure the Module
Let’s configure the module so that it integrates the WordPress blog to your Magento store. Log in to your Magento Admin and from the top nav of Magento Admin, tap WordPress > Settings. Now, there are two sections that we need to configure:
Database
If you installed WordPress in the existing Magento database, you can select “Yes” from the drop-down “Do Magento and WordPress share a database?” option and just enter the WordPress table prefix.

If you installed WordPress on a different database, just select “No” from the drop-down and enter the information in the right field and hit the “Save Config” button.
Integration
There are three primary fields that we need to go through to get WordPress properly integrated. In the “Integrate Theme” option, select “Yes” if you want your WordPress blog’s theme to be integrated with your Magento theme. If you select “No”, the WordPress theme will not be integrated with the Magento theme, and the module will just connect to your WordPress database. To simplify things, set this option to “Yes.”
Next is the Home URL field. Whatever you enter here, it will be added to your Magento base’s URL and become the URL of your WordPress blog. To set up the WordPress blog to be integrated at http://www.example.com/blog, we have to write “blog” in the Home URL field. If you want to set your WordPress blog at a different location like http://www.example.com/news or http://www.example.com/announcements, and just substitute “blog” with your preferred word.
At last, is the Path field. This contains the path to your WordPress installation. If you have installed WordPress in a subdirectory of Magento, you can just enter the name of that folder into the Path field. As described above, we have installed WordPress in a subdirectory called “wp“, so just enter “wp” in this Path field and click the “Save Config” button to save the changes.
Note: While configuring the Magento WordPress Integration module, you will see some yellow and red warning messages on top of the page. Don’t worry about them, the step-by-step configuration will take care of these errors.
Configure WordPress for Magento Integration
We will need to make some changes in the WordPress configuration. Like Magento, WordPress saves its settings in the database including URLs. These URLs can be found in the “wp_options” table. To edit it, login to your WordPress Admin, and go to Settings > General from the left navigation bar.
Here, you can see two fields that contain URLs. The first field is labelled as WordPress Address (URL) which is the URL where WordPress is installed and should remain as it is. For example, if the Magento base URL is http://www.example.com/, so this URL will be http://www.example.com/wp.
The second field Site Address (URL) contains the URL on which the frontend of WordPress blog be will available. Normally, this URL matches the WordPress Address (URL). However, with an integrated WordPress installation, this URL will be your Magento base URL + whatever you have entered in the Home URL field above while configuring Magento WordPress Integration module. Using an earlier example, if Magento base URL is http://www.example.com/ and your Home URL value in the module’s configuration was “blog” so, this URL will be http://www.example.com/blog.
Once you are done, tap the “Save Changes” button at the end of the page.
Congratulations! Your WordPress blog is now integrated with Magento. To see if it’s working, visit the URL you set up in the Magento module, i.e. http://www.example.com/blog.
Conclusion!
Integrating WordPress blog to your Magento store allows you to have the best of both ecommerce and the CMS world. I hope this tutorial was easy to follow. We went through all the steps that are required to integrate WordPress in Magento with the help of the FishPig Magento WordPress Integration module. You are now ready to utilize the powerful features that WordPress has to offer. If you have any questions about it, or you are facing any issue, please comment below or contact me via email.
Abdur Rahman
Abdur Rahman is the Magento whizz at Cloudways. He is growth ambitious, and aims to learn & share information about Ecommerce & Magento Development through practice and experimentation. He loves to travel and explore new ideas whenever he finds time. Get in touch with him at [email protected]